Below are five exclusive, detail-driven insights that discerning homeowners and design-forward renovators can use to protect the integrity of their tiled environments—without compromising their carefully cultivated aesthetic.
1. Read the Tile’s Origin Story Before You Touch the Damage
Before any repair is attempted—no matter how minor—pause to understand the history of the tile in front of you. Age, manufacturing method, and installation style profoundly influence what “successful repair” looks like.
Classic terracotta, hand-made Moroccan zellige, rectified porcelain, and high-gloss ceramic all age and respond to moisture, heat, and cleaning agents in dramatically different ways. A chipped corner on a hand-glazed tile, for example, may be better addressed with a subtle, color-matched fill that honors its artisanal irregularities rather than a harsh, over-sanded correction that tries to impose perfection.
Talk to your original installer, if possible, or review old invoices and product specs. Identify:
- Manufacturer and product line
- Tile type (porcelain, ceramic, stone, cement, terracotta, etc.)
- Finish (matte, honed, polished, lappato, textured)
- Grout type (cementitious, epoxy, urethane) and color
That information becomes your “repair dossier”—guiding the selection of adhesives, fillers, sealers, and even cleaning protocols. In a sophisticated home, the goal is not merely to fix what broke, but to sustain the continuity of the original design intent.
2. Color Is Not Enough: Mastering Sheen, Texture, and Light
Most homeowners focus solely on color-matching, but color is only one dimension of a successful repair. A tile patch that is technically the right shade but the wrong sheen will catch the light and betray itself instantly—especially under directional lighting or near large windows.
To achieve a premium, almost invisible repair:
- Evaluate under real lighting
View samples in the space during the times of day your room is most used. Overhead LEDs, sconces, and natural light all reveal surface differences differently.
- Match sheen, not just hue
A matte repair on a semi-polished tile reads as a flat, “dead” spot. In contrast, an overly glossy filler on a honed surface will sparkle where it should quietly diffuse light.
- Consider micro-texture
Some porcelain tiles have subtle, almost imperceptible textures that scatter light. Using a perfectly smooth filler creates a visible “lens” effect. A tiny amount of blending or micro-abrasion can help match the surrounding texture.
- Check from multiple sightlines
Look across the floor or wall at a low angle. This grazing view often reveals sheen mismatches and uneven fills far more clearly than a straight-on look.
The standard of luxury is not that a repair looks “good”; it’s that it doesn’t declare itself at all—especially when the light is least forgiving.
3. Replace or Restore? Choosing the Right Strategy for the Space
Not every damaged tile deserves to be replaced. In some contexts, a conservative restoration is the more elegant—and more intelligent—choice.
Opting to replace a tile may be appropriate when:
- The damage is structural (cracks propagating through the substrate)
- The tile is part of a perfectly aligned grid where a singular imperfection breaks a visual rhythm
- You still have spare tiles from the original batch or can source the exact SKU and dye lot
However, in many high-end installations, especially with artisanal or discontinued tiles, replacement is either impractical or risky. Removing one tile can stress its neighbors, disturb waterproofing layers, or introduce hairline fractures that appear months later.
A refined approach favors restoration over replacement when:
- The tile is part of a rare or hand-crafted series
- The damage is localized (edge chips, surface abrasions, minor spalling)
- The area is highly complex—at niches, transitions, or around built-ins—where removal can compromise detailing
In these cases, professional-grade fillers, color-stable pigments, and carefully layered touch-ups can preserve more original fabric of the installation while maintaining design integrity. The most luxurious repair is often the least invasive one that still respects performance and safety.
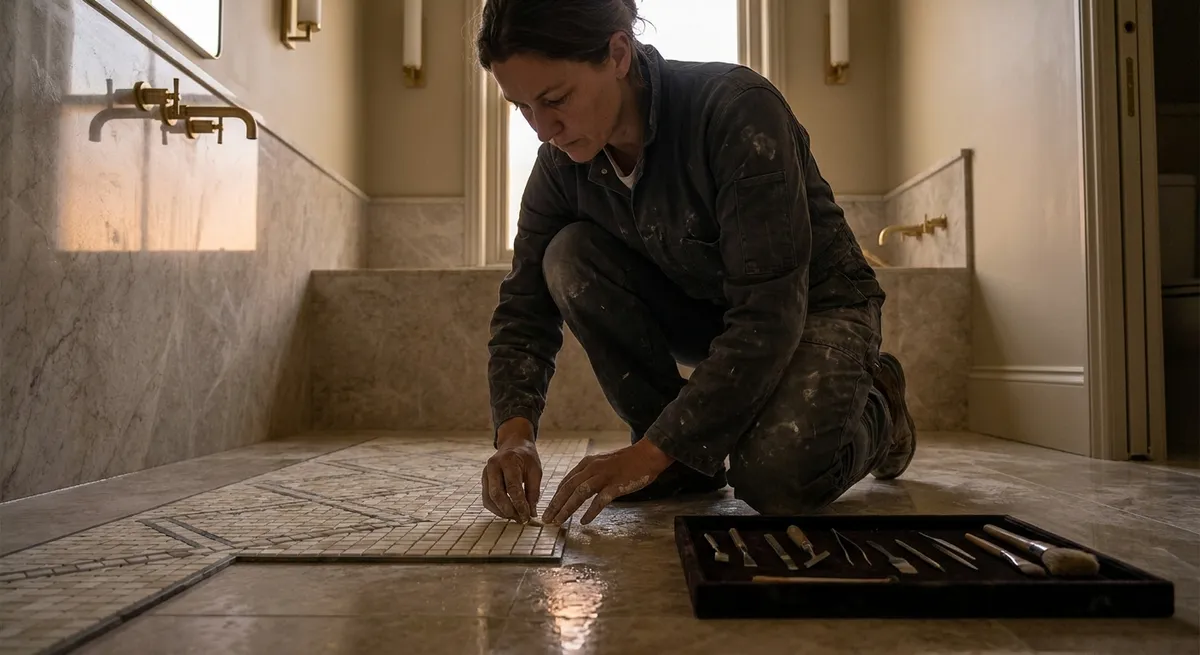
4. Grout as a Design Element in Repair, Not an Afterthought
Grout is frequently treated as a simple construction material, but in premium spaces it functions as a design frame—controlling how the eye reads pattern, dimension, and alignment. A careless grout repair can undo the discipline of an entire room.
When addressing cracked, stained, or missing grout, treat it with the same consideration you would give to a piece of millwork:
- Recreate joint profile
The shape and depth of the grout joint (concave, flush, slightly recessed) materially affects the shadow line. A new joint that is too flush will erase definition; too recessed and it creates unsightly grooves that collect dirt.
- Maintain consistent joint width
Even a 1–2 mm variation in joint width can stand out in a tightly laid, rectified pattern. Use joint spacers or reference lines when regrouting select areas.
- Color-fast matching
Grout darkens slightly as it cures. Always test a small area and allow full cure before judging the match. In luxe spaces, colorant systems can also be used to harmonize old and new grout for a unified tone.
- Respect functional zones
In wet areas (showers, steam rooms, exterior terraces), ensure the replacement grout type is appropriate to the exposure: epoxy or other advanced formulations may be necessary for longevity and stain resistance.
In a refined home, grout is not “background”; it is the quiet geometry that makes the tile composition feel intentional. A successful repair restores that quiet geometry, not just the gap.
5. Design a Maintenance Ritual That Prevents Future Repairs
The most exclusive repair insight is deceptively simple: elevate your maintenance routine to professional-grade standards so that you prevent many repairs from ever being needed. Superior surfaces demand equally considered care.
For premium tile installations:
- Align cleaning agents to material
Acidic cleaners that may be perfectly acceptable for some porcelains can etch natural stone or damage certain cement tiles. Always refer to manufacturer recommendations rather than generic “tile-safe” labels.
- Protect high-impact zones
Transition points—doorways, kitchen prep zones, entry vestibules—are particularly vulnerable to chipping, scratching, and staining. Strategically placed mats, rugs with felt backings, and discreet furniture pads dramatically extend tile life.
- Schedule periodic professional inspections
Just as a fine watch benefits from occasional servicing, tile assemblies in showers, terraces, and heated floors benefit from expert eyes every few years. Early detection of grout failure, loose tiles, or subtle substrate movement can save an installation from major interventions later.
- Refresh sealers with intention
For natural stone and certain cement tiles, sealing is not a one-time act but an ongoing covenant with the surface. Over-sealing can cause haze; under-sealing invites staining. Follow product-specific schedules, and always test absorbency before reapplying.
A cultivated approach to maintenance reframes repair: instead of dramatic rescues, you have quiet, periodic refinements that preserve a sense of newly completed craftsmanship for years longer than most homes ever achieve.
Conclusion
In the realm of sophisticated interiors, tile repair is not a crude patchwork exercise—it is a discipline of restraint, precision, and respect for the original design. By learning the story of your tile, attending to light and sheen rather than color alone, choosing wisely between replacement and restoration, honoring grout as a design feature, and embracing a thoughtful maintenance ritual, you transform “repair” into an act of guardianship.
The reward is a home where surfaces age gracefully, disruptions are minimal, and even the quietest tile in the most modest corner still feels intentionally, impeccably considered.
Sources
- [Tile Council of North America (TCNA) – Installation & Maintenance Guidelines](https://www.tcnatile.com/faqs/79-installation-and-maintenance.html) - Industry guidelines on tile installation, grout, and care that inform best-practice repair decisions
- [U.S. General Services Administration – Historic Tile and Terra Cotta Preservation Brief](https://www.gsa.gov/technical-procedures/historic-surfaces/ceramic-and-quarry-tile/ceramic-and-quarry-tile-and-terra-cotta) - Technical insights on conserving and repairing tile in high-value and historic settings
- [The Natural Stone Institute – Stone Care, Maintenance, and Restoration](https://www.naturalstoneinstitute.org/consumers/care/) - Authoritative recommendations for caring for and restoring natural stone elements in tile assemblies
- [Mapei – Guide to Tile & Stone Installation Systems](https://www.mapei.com/us/en-us/home-page/solutions-and-products/lines/tile-stone-installation-systems) - Manufacturer guidance on adhesives, grouts, and repair-compatible materials
- [Laticrete – Tile & Stone Technical Resources](https://laticrete.com/en/support-and-downloads/technical-resources) - Technical documentation on advanced grouts, sealers, and repair approaches for high-performance tile installations