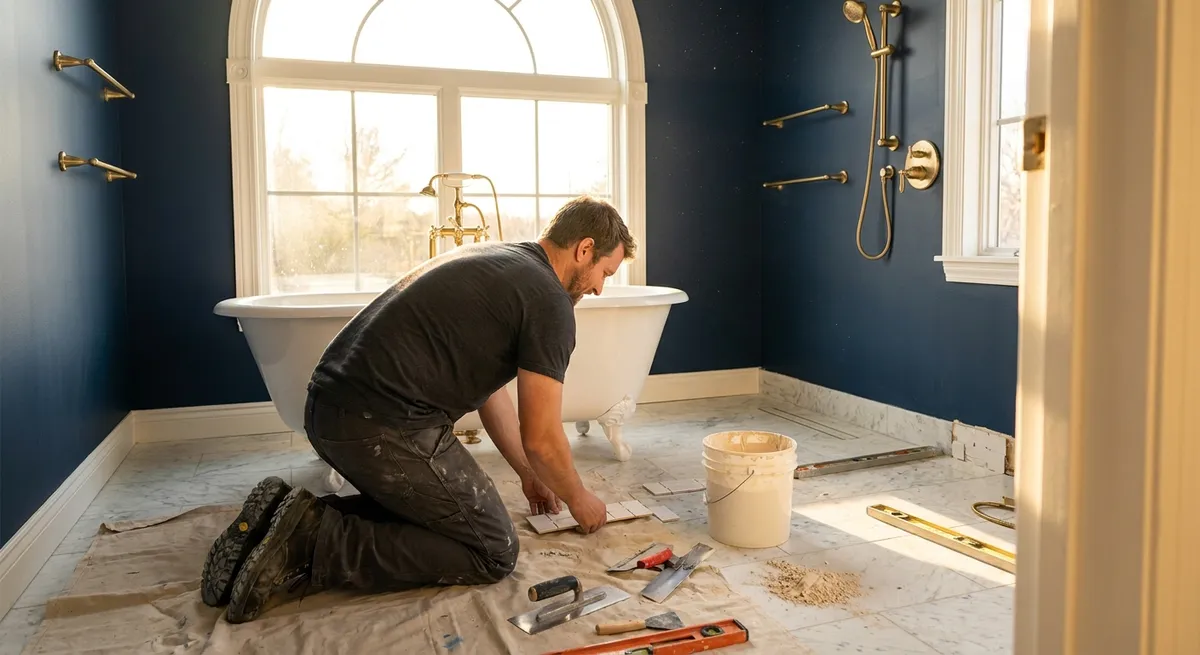
Below, we explore a sophisticated approach to tile repair, with five exclusive insights that discerning homeowners and design‑conscious renovators will appreciate.
Reading the Damage Like a Designer, Not a Contractor
Before any repair begins, the first task is not mixing compounds or sourcing replacements—it is observation. A tile failure rarely exists in isolation; it is part of a broader narrative about structure, moisture, and movement.
Instead of focusing only on the chipped corner or isolated crack, step back and study the composition of the entire surface:
- Note how light travels across the room: does the damage sit in a beam of natural light that will highlight every imperfection, or in a low‑visibility perimeter zone?
- Assess transitions: is the tile adjacent to wood, carpet, or stone that may expand and contract at a different rate?
- Check for repeating failures: multiple hairline cracks radiating from a doorway or threshold often indicate movement, not simply impact damage.
- Observe grout behavior: crumbling or hollow‑sounding grout lines can hint at substrate issues long before tiles fully debond.
This design‑driven assessment helps you decide whether a discreet localized repair is sufficient—or if the damage signals a deeper condition that must be addressed to preserve the long‑term integrity of your investment.
Exclusive Insight #1: Treat every repair as a diagnostic moment. Correcting the symptom without understanding the pattern is the quickest route to future, more visible failures.
Curated Replacement: Sourcing Tiles as You Would Fine Fabrics
When a tile must be replaced, success depends as much on sourcing as on installation. With premium materials, it is rare that a replacement piece looks identical straight out of the box, especially if the original tile is several years old.
Approach tile replacement with the same intentionality you would apply to selecting a custom textile:
- Batch and caliber matching: Request information on dye lots and calibers from the original supplier or manufacturer. Even within the same product line, subtle shifts in tone and size can create a jarring patchwork if not coordinated.
- Patina sensitivity: Older tiles may have softened slightly in color, especially natural stone. When possible, select from multiple pieces to find the closest visual match, and consider gentle finish adjustments (like ultra‑fine polishing or honing) for a more integrated appearance.
- Strategic tile placement: If a perfect match is impossible, position the replacement in a visually less dominant zone—then relocate an original tile from a discreet area into the more noticeable area. This “tile rotation” strategy can dramatically improve overall cohesion.
- Manufacturer archives: For premium collections, some brands maintain archives or extended‑run stock. An email or phone call to the manufacturer may uncover options that local showrooms can’t immediately offer.
Exclusive Insight #2: Don’t simply “find a similar tile.” Curate your replacement as an extension of the original design story, using batch matching, deliberate placement, and nuanced finish adjustments.
The Art of Invisible Fills: Turning Chips into Texture
Superficial chips and small voids around edges, corners, or cutouts do not always justify full tile replacement—especially with rare or discontinued materials. In many cases, a meticulously executed fill can restore visual calm.
The goal is not to create a glossy patch, but a subtle correction that visually dissolves into the surrounding surface:
- Choose the right medium: For porcelain and ceramic, high‑quality epoxy or UV‑curable resins tailored for hard surfaces provide durability and fine control. For natural stone, stone‑grade epoxies or polyester resins tinted to match veining and background colors are standard in professional restoration.
- Color layering, not single‑tone matching: For marbles, limestones, and travertines, a single color never accurately mimics the stone’s complexity. Professionals often blend several micro‑tints, layering them to reproduce both base tone and veining.
- Micro‑texture finishing: Once cured, the filled area should be carefully refined—using progressively finer abrasives—to echo the surrounding finish, whether honed, polished, or brushed. A perfectly smooth fill on a subtly textured tile will draw the eye immediately.
- Perimeter blending: Slightly feathering the edges of the repair into the surrounding surface often creates a softer visual transition, particularly under strong raking light.
Exclusive Insight #3: The most successful chip repair is not “invisible” because it’s flawless—it’s invisible because it harmonizes with the existing texture, sheen, and complexity of the tile.
Precision Grout Surgery: Refining the Frame, Not Just the Field
Grout is often treated as background, but in a luxury environment it functions like the frame around a painting. Poorly executed grout repairs—overfilled joints, mismatched color, or rough, crumbly patches—can visually devalue even the finest tiles.
High‑caliber grout corrections demand surgical precision:
- Selective removal: Instead of grinding aggressively along entire lines, carefully remove only the failed or stained segments to preserve edge integrity. Specialized grout saws and oscillating tools with narrow blades allow clean access without chipping tile edges.
- Color and texture fidelity: Matching the original grout involves more than pigment. Consider whether the original joint is slightly concave or flush; sanded or unsanded; matte or mildly burnished from years of cleaning. The new grout should emulate both color and physical profile.
- Micro‑joint refinement: After initial cure, a light, controlled pass with a damp sponge or a finishing tool can soften any hard edges, replicating the “lived‑in” profile of existing grout.
- Transition awareness: Where new grout meets old, a gradual blend—instead of a hard line—is more forgiving visually. Slightly overlapping into adjacent joints helps avoid stark demarcation.
Exclusive Insight #4: Expert grout repair is less about filling gaps and more about respecting proportion, profile, and patina so that the entire field reads as one continuous, intentionally framed surface.
Planning for Future Grace: Designing Repairs That Age Beautifully
The most sophisticated repair is one that not only looks impeccable today but also ages in step with the rest of the installation. This demands a forward‑thinking mindset that balances materials, movement, and maintenance.
Consider these long‑range strategies when planning any significant repair:
- Movement accommodation: If the original failure stemmed from structural movement—door thresholds, long corridors, or substrate transitions—integrate appropriate movement joints or flexible sealants in discreet locations. This protects both new and existing tiles without compromising aesthetics.
- Moisture literacy: In bathrooms, kitchens, and entryways, verify that waterproofing, vapor barriers, and drainage planes are functioning correctly before closing up any repair. An impeccable surface repair over compromised waterproofing is a temporary illusion.
- Finish compatibility: When introducing new sealers or protective coatings, confirm compatibility with existing materials. Some products can alter color or sheen unexpectedly, or interfere with future maintenance options.
- Documenting the repair: Maintain a simple but detailed record—products used, batch numbers, and photos of the process. This quiet archive can prove invaluable for future restorative work, resale documentation, or insurance claims.
Exclusive Insight #5: Think of every repair as part of a long‑term conservation plan for your surfaces, not a one‑off fix. Design your interventions to evolve gracefully alongside the rest of your home.
Conclusion
Refined tile repair is less about emergency patchwork and more about deliberate restoration—of structure, of aesthetics, and of the subtle equilibrium that well‑designed interiors maintain. When you approach damages as opportunities to recalibrate, rather than simply conceal, each intervention becomes an expression of care and discernment.
By reading the broader context of the damage, curating replacements with intention, perfecting invisible fills, treating grout as a design element, and planning for how repairs will age, you safeguard not just the look of your tile, but its quiet contribution to the overall sophistication of your home.
Sources
- [U.S. Department of Housing and Urban Development – Residential Rehabilitation Inspection Guide](https://www.hud.gov/program_offices/healthy_homes/rrr) – Offers guidance on diagnosing underlying building issues that often relate to surface failures like cracked or loose tile.
- [Tile Council of North America (TCNA) – Handbook for Ceramic, Glass, and Stone Tile Installation](https://www.tcnatile.com/products-and-services/publications/handbook.html) – Industry reference for correct installation practices, movement joints, and substrate requirements that inform durable repairs.
- [Schluter Systems – Movement Joints and Special Applications](https://www.schluter.com/schluter-us/en_US/Movement-Joints/c/MJ) – Technical information on designing and integrating movement joints to prevent future tile stresses and cracking.
- [Mapei – Tile & Stone Installation Systems](https://www.mapei.com/us/en-us/products-and-solutions/lines/tile-stone-installation-systems) – Detailed product data for mortars, grouts, and epoxy repair materials commonly used in high‑end tile restoration.
- [Harvard University – Facilities Maintenance Resources](https://www.energyandfacilities.harvard.edu/facilities-services/maintenance) – Insight into institutional standards for durable, long‑term maintenance and repair strategies in high‑performance buildings.