This guide explores refined repair strategies designed for those who notice everything. Within it are five exclusive insights that move beyond basic patchwork and into the realm of preservation-grade tile care.
Understanding the Architecture of a Flawless Repair
A sophisticated tile repair begins long before adhesive touches the back of a tile. It starts with understanding the layered architecture beneath the surface: substrate, underlayment, setting material, grout, and sealant. Each layer has its own purpose and pathology when things go wrong.
True refinement lies in diagnosing the origin of failure. A seemingly simple crack might trace back to substrate movement, an incompatible mortar, thermal expansion at door thresholds, or water intrusion that has gone unnoticed. Merely replacing the visible tile treats the symptom, not the cause.
A premium repair approach always includes three non-negotiables: moisture assessment in wet zones, movement analysis at transitions and corners, and a review of existing installation materials for compatibility with modern repair products. By resolving the structural reason behind the damage, the repaired area becomes not just restored—but improved—relative to its original state.
Exclusive Insight 1: Repair Begins with Light, Not Tools
Most repair attempts start with a chisel. The elevated approach starts with lighting.
Before committing to any intervention, an expert will “read” the surface under raking light—angled illumination that glides across the tile from the side rather than above. This simple change reveals subtle lippage, hairline cracks, micro-chips on edges, and variations in sheen that overhead lighting can conceal.
For homeowners, this practice is transformative. By examining floors and walls at dawn or dusk light levels, or with a handheld light at a shallow angle, you’ll see how a repair will actually present in lived conditions: along corridors, beside windows, across long kitchen runs.
This visual mapping dictates the level of precision required. A chip in a shadowed powder room corner may allow for an in-place epoxy fill. A similar blemish in a sun-washed foyer may call for a full tile replacement and a more demanding color-match strategy. Beginning with light sets the standard for what will pass as truly invisible in your specific home.
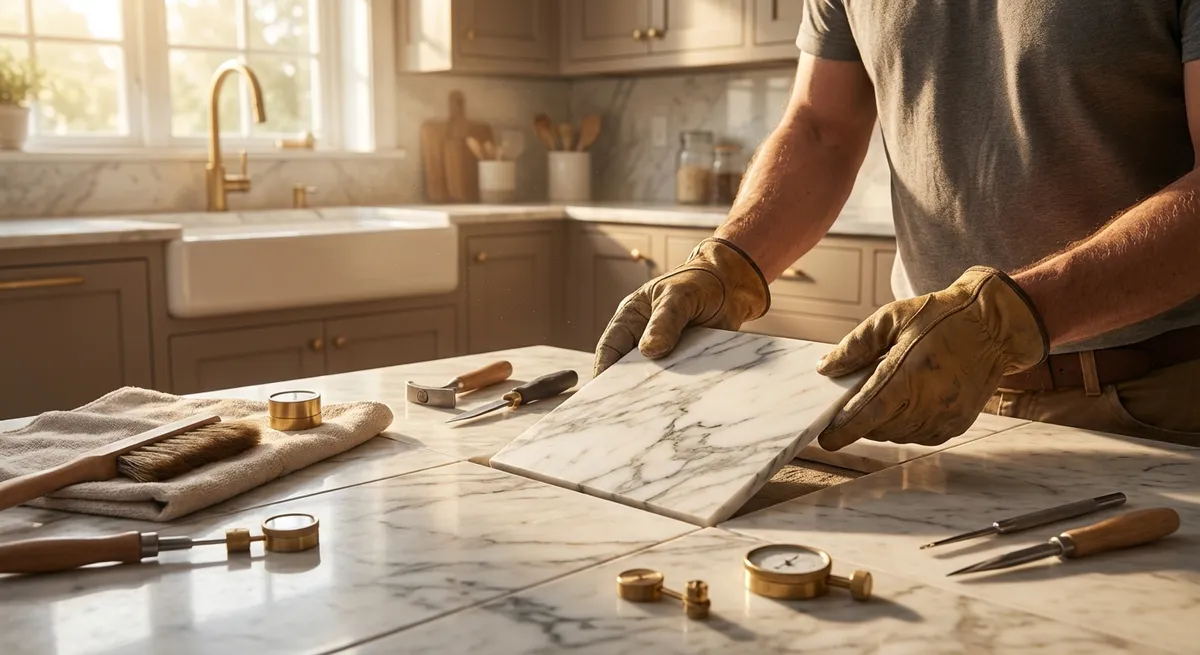
Exclusive Insight 2: Micro-Interventions Preserve Original Luxury
Not every flaw warrants the drama of full tile removal. In high-value spaces, over-repair can be as problematic as under-repair—unnecessary disturbance to surrounding grout joints, risk of damaging adjacent tiles, or disrupting a carefully aged patina.
Micro-interventions favor surgical precision:
- Chip and edge repair using color-matched epoxy or resin systems can restore the profile of a corner without lifting the tile. When carefully sanded and polished, the result can be nearly undetectable in most lighting conditions.
- Hairline crack stabilization on non-structural, cosmetic cracks can sometimes be addressed by filling and sealing, particularly on decorative wall tiles where structural load is minimal.
- Targeted regrouting—removing only the compromised segments with oscillating tools and ultra-thin blades—avoids the “obvious patch” look caused by indiscriminately regrouting entire expanses.
The key is restraint. Before any tool touches the surface, ask: What is the smallest possible intervention that will produce a visually perfect result? In the most refined homes, minimal disturbance is itself a luxury.
Exclusive Insight 3: Color Matching Is a Discipline, Not a Guess
The difference between a competent repair and a premium restoration often comes down to one factor: color discipline.
Tile, grout, and stone do not exist as single colors; they read as fields of tone, texture, and reflectivity that shift throughout the day. When a repair product matches only in flat color but fails in undertone or sheen, the human eye detects the inconsistency immediately—especially on large continuous surfaces.
Sophisticated color matching involves:
- Sampling under multiple light sources—daylight, warm interior lighting, and cool task lighting—to ensure the chosen grout or repair compound holds up across scenarios.
- Accounting for aging—older grout may have subtly darkened with cleaning products or light exposure. Selecting a slightly adjusted tone, rather than the original manufacturer’s swatch, often produces a better integration.
- Finishing the surface to the correct sheen—gloss, satin, or matte—through careful polishing or micro-abrasion, so that the repaired area reflects light exactly like its surroundings.
Many high-end professionals create a small mockup on an inconspicuous area or spare tile before committing to the final repair. Homeowners who insist on this step—and are willing to reject a near miss—often achieve museum-quality continuity that feels as if nothing was ever amiss.
Exclusive Insight 4: Acoustic Diagnostics for Hidden Failures
Sophisticated tile care is as much about what you hear as what you see.
Hollow-sounding tiles can be a harbinger of future problems: debonded mortar, voids beneath large-format tiles, or localized movement from structural shifts. Instead of waiting for these areas to crack or loosen visibly, a preventive, acoustically informed repair approach can protect your floor before visible failure.
A simple tap test—using a hard plastic tool or the wooden handle of a hammer—creates a language of sound: solid areas respond with a dense, muted tone; compromised tiles ring hollow or echo. Mark these with removable tape and map the pattern. Clusters of hollow tiles in wet areas or along structural seams deserve immediate attention.
Modern injectable repair systems can, in certain cases, re-bond loose tiles from above without removal by filling voids with specialized resins. While not suitable for every situation, these techniques are invaluable when working with discontinued tiles, intricate patterns, or installations set over delicate substrates such as radiant heating.
Listening, quite literally, becomes a preservation tool—catching instability before it becomes visible damage.
Exclusive Insight 5: Respecting Original Patterns and Joint Logic
The most successfully repaired surfaces are those where the underlying logic of the original layout is preserved with reverence. Tile work is, at its best, a form of geometry in motion: joint alignment, pattern rhythm, and symmetry at focal points create an underlying calm that the eye registers instinctively.
When a tile is replaced, the temptation is to focus solely on the individual piece. A more refined approach looks outward first:
- Confirm alignment with distant reference points such as thresholds, room centers, or main sight lines. A single new tile that is slightly rotated may feel “off” across an entire room.
- Respect the original joint width and depth, even if it differs from current trends. Matching the established language of the floor is more important than conforming to contemporary preferences.
- Mirror existing pattern decisions—for example, how cuts were handled at corners, registers, or built-ins. An inconsistent cut introduced during repair can disrupt an otherwise impeccable layout.
When working with patterned or veined materials, such as marble-effect porcelain or natural stone, an additional layer of subtlety is required: orienting veining or pattern flow to echo the surrounding field, rather than treating each tile as a standalone artwork. This quiet, pattern-conscious alignment is a hallmark of truly elevated tile repair.
Conclusion
Tile surfaces in refined homes are not mere finishes; they are architectural statements that frame daily rituals and underscore the overall quiet of the space. When damage inevitably appears, the goal is not simply to erase it, but to respond in a way that honors the original craftsmanship and anticipates decades of future use.
By beginning with light instead of tools, favoring micro-interventions where appropriate, treating color matching as a disciplined practice, listening for acoustic warnings, and honoring the logic of the original layout, homeowners can insist on repair work that rises to the standard of their interiors.
In the best outcomes, no one comments on the repair—because no one can find it. The surface appears as it always has: composed, continuous, and quietly impeccable.
Sources
- [The Tile Council of North America (TCNA) – Handbook for Ceramic, Glass, and Stone Tile Installation](https://www.tcnatile.com/products-and-services/publications/handbook.html) - Authoritative industry guidelines for proper tile installation and repair principles
- [Schluter Systems – Movement Joints and Substrate Considerations](https://www.schluter.com/schluter-us/en_US/Movement-Joint-Profiles/c/MJ) - Technical information on how movement and substrates affect tile performance and failure
- [Mapei – Technical Articles on Tile Installation and Problem Solving](https://www.mapei.com/us/en-us/technical-library/tech-talk) - In-depth discussions on diagnosing tile issues, hollow tiles, and compatible repair materials
- [U.S. General Services Administration – Historic Tile and Terra Cotta Preservation Brief](https://www.gsa.gov/technical-procedures/historic-preservation/historic-building-components/terra-cotta-and-tile) - Guidance on sensitive, preservation-grade approaches to tile repair and restoration
- [TCNA – Grout and Mortar Selection Guides](https://www.tcnatile.com/faqs/37-faqs/95-grouts.html) - Detailed information about mortar, grout selection, and their impact on long-term tile performance