Below, we explore a sophisticated approach to tile repair, anchored by five exclusive insights that discerning homeowners and design-conscious renovators often overlook—but deeply appreciate once they know them.
Reading the Surface: Diagnosing Before You Touch a Tile
Exceptional tile repair begins long before any grout is mixed or a single piece is lifted. An elegant outcome depends on understanding why the failure occurred, not just where it appears.
Subtle cues—hairline cracks radiating from a single corner, hollow sounds underfoot, or faint discoloration near a grout joint—reveal the underlying story. A refined repair strategy considers substrate movement, moisture migration, previous installation methods, and even ambient conditions such as radiant heating or direct sun exposure. Rather than rushing to replace a cracked tile, a premium approach maps the failure pattern, checks for substrate deflection, and confirms whether expansion joints and perimeter movement gaps were properly considered.
By insisting on a diagnosis-first mindset, homeowners avoid the common cycle of “repair, re-crack, repeat.” The result is not merely a cosmetic touch-up, but a recalibrated system designed to age quietly and gracefully.
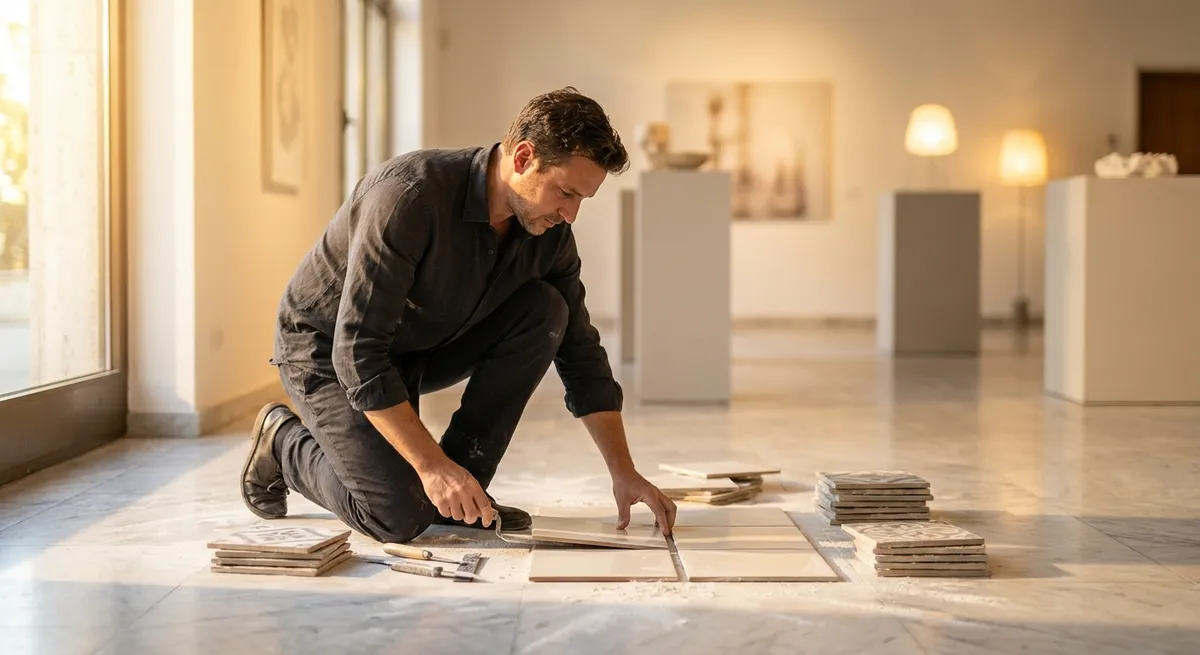
Curated Materials: Matching Beyond Color and Size
Perfectly matched replacement tiles are rarely achieved by eye alone. In sophisticated interiors, tiny misalignments in sheen, edge profile, or texture can be as disruptive as a completely wrong tile.
A premium repair solution treats replacement selection as curation, not shopping. That means sourcing from the original batch when possible, or—when that’s no longer available—matching several critical attributes:
- Sheen and reflectivity: A semi-polished porcelain next to a honed finish will betray the repair under daylight and ambient lighting alike.
- Edge profile: Rectified, micro-beveled, and cushioned edges read very differently once grouted; mismatched edges ruin the visual rhythm of a floor or wall.
- Tone variation rating: Many porcelain and stone-look tiles are intentionally varied; selecting a tile with the wrong tonal intensity can make the repair area appear “framed.”
- Thickness and density: If the new tile sits fractionally proud or shallow, grout joints and light reflections will highlight the transition.
For natural stone installations, an elevated approach may involve hand-selecting a tile or slab section whose veining direction and density echo the surrounding field, sometimes even templating the cut so that veining flows uninterrupted. The goal is not just a color match, but a continuity of character.
Insight 1: Micro-Section Repairs Instead of Full-Tile Replacements
One of the most underused techniques in high-end tile repair is the micro-section repair—addressing localized damage without replacing the entire tile. This approach is most effective for chips near edges, minor surface spalls, or isolated impact marks on otherwise perfect tiles.
Instead of removing a fully bonded tile (risking adjacent damage), a skilled technician can:
- Feather out a damaged area with ultra-fine abrasives or precision tools.
- Build up losses using color-matched epoxy or resin fillers engineered for tile and stone.
- Refinish and polish the repaired section to integrate with the tile’s original finish.
For natural stone, this may mirror restoration methods used on luxury hotel lobbies and historic properties, where preserving original material is paramount. In these contexts, minimal intervention is often more elegant than full replacement, especially where surrounding tiles have developed a gentle patina that is impossible to reproduce with new material.
The result: the eye sees a continuous surface, not evidence of surgery.
Insight 2: Custom Grout Toning for Seamless Integration
Many tile repairs fail not because of the tile itself, but because of the grout. A slightly off grout color can create visible “frames” around new tiles, undermining the subtlety of the repair.
Sophisticated grout integration goes beyond choosing “the closest color on the chart.” Instead, a premium approach might include:
- Layered toning: Using one base grout shade and a carefully tinted grout colorant to adjust the final appearance once cured.
- Aging the joint: Softly reducing the starkness of new grout—especially in older installations—through gentle cleaning, sealing, and occasionally subtle color washing so it aligns with the lived-in character of surrounding joints.
- Controlling joint geometry: Matching joint width and profile (slightly concave vs flush) for visual continuity, especially in raked or designer grout lines.
In heritage or high-design interiors, grout is part of the composition, not an afterthought. Treating it as such ensures that your repaired area never “reads” as new grout surrounded by old, but rather as a consistent plane of intentional detail.
Insight 3: Stabilizing the Substrate Without Full Demolition
When tiles crack or debond because of substrate movement, many homeowners are told a full tear-out is inevitable. Yet in select scenarios, refined repair techniques can stabilize the underlying structure without dismantling an entire room.
For instance, in a localized failure zone where deflection or hollow spots are found, a specialized repair might:
- Inject high-performance adhesives beneath debonded tiles through micro-perforations in the grout joints.
- Introduce decoupling or crack-isolation membranes in strategic patches if adjacent tiles must be replaced, creating a controlled transition instead of a brittle seam.
- Rebuild small substrate flaws with high-strength patching compounds, carefully feathered and re-leveled before re-tiling.
This approach requires precise assessment to ensure it’s appropriate—structural defects or persistent moisture require more extensive action. But when viable, it preserves intact tile fields and trims disruption, especially in spaces where cabinetry, integrated millwork, or stone thresholds would be costly to disturb.
Insight 4: Refining Lippage and Transitions Post-Installation
Not all tile “repairs” involve broken or missing pieces. Sometimes, what disturbs the eye is unevenness—tiny height differences between tiles (lippage), clumsy transitions to adjacent surfaces, or edges that snag bare feet and catch light unattractively.
In luxury environments, these details are non-negotiable. Advanced corrective techniques can be performed after installation to bring underwhelming work up to refined standard:
- Stone and large-format porcelain lippage correction: Using planetary grinders and precision polishing systems, technicians can flatten and then refinish tiled surfaces so they read as a calm, continuous plane.
- Profiled transitions: Replacing generic metal trims with slimmer, architecturally consistent profiles or flush stone/wood thresholds that respect the language of the home.
- Edge refinement: Softening or re-detailing exposed edges so they feel intentional under hand and foot, not merely “where the tile ended.”
These interventions transform an acceptable installation into one that feels composed, serene, and thoroughly considered.
Insight 5: Preventive Detailing as a Future-Proof Repair Strategy
True repair is as much about the future as it is about the present. Once a defect has been addressed, a premium approach often introduces quiet enhancements to prevent recurrence.
Examples of preventive detailing include:
- Discreet expansion allowances: Introducing or improving movement joints at edges and transitions—often hidden under baseboards, thresholds, or cabinetry toe-kicks—so thermal and structural movement is absorbed elegantly, not telegraphed as cracks.
- Moisture management upgrades: Adding or improving sealants at critical junctions (shower corners, niches, benches, window returns), revising caulked joints where rigid grout was previously used, and upgrading to waterproofing systems where previous barriers were inadequate.
- Performance-focused sealers: Choosing breathable, high-quality penetrating sealers for stone and cementitious grout to resist staining and moisture ingress without plastic-like build-up.
- Refined cleaning protocols: Recommending gentle, tile-appropriate maintenance products and rituals that align with the specific material—porcelain, marble, limestone, or encaustic—so the repair ages at the same pace as the original surface.
These “quiet upgrades” are rarely noticed individually, but collectively they keep a space in a state of effortless composure.
Working with Specialists: What Discerning Homeowners Should Ask
Not every tile contractor is versed in the level of subtlety described here. When seeking a professional to handle high-end repairs, questions matter more than price alone.
Consider asking:
- How do you diagnose the cause of the issue before starting?
- What is your process for matching tile, sheen, and grout in existing installations?
- Are you experienced with micro-repairs, substrate stabilization, or post-installation refinements (like lippage correction)?
- What moisture or substrate tests will you perform?
- How will you ensure the repaired area ages at the same rate as the original installation?
A contractor who speaks fluently about decoupling membranes, movement joints, moisture testing, and surface refinement is much more likely to deliver a result worthy of a carefully curated home.
Conclusion
In a refined interior, the most successful tile repair is the one you never notice. It preserves the original design intent, anticipates future stresses, and respects the materials as though they were being installed for the first time—only with the added wisdom of lived experience.
By prioritizing precise diagnosis, curated material matching, advanced micro-repair techniques, substrate stabilization, surface refinement, and preventive detailing, homeowners can transform tile repair from a necessary inconvenience into an exercise in quiet craftsmanship. The surface remains serene, the lines stay pure, and the story your home tells continues uninterrupted.
Sources
- [Tile Council of North America (TCNA) Handbook](https://www.tcnatile.com/publications-and-links/handbook-faq.html) - Industry-recognized guidelines for tile installation, movement joints, and substrate requirements
- [Schluter Systems – Movement Joints and Crack Isolation](https://www.schluter.com/schluter-us/en_US/Membranes/Uncoupling%28DITRA%29/c/M) - Technical information on decoupling membranes and methods to manage substrate movement
- [U.S. General Services Administration – Marble, Terrazzo, and Tile Maintenance](https://www.gsa.gov/technical-procedures/marble-terrazzo-and-tile) - Detailed procedures for repair and restoration of stone and tile in high-value buildings
- [Laticrete – Technical Resources](https://laticrete.com/en/support-and-downloads/technical-resources) - Professional guidance on tile setting materials, crack isolation, and advanced repair products
- [University of Florida IFAS Extension – Selecting Cleaning Products](https://edis.ifas.ufl.edu/publication/HE814) - Best practices for choosing appropriate cleaning agents to protect finished surfaces over time