This guide explores repair solutions through a more exacting lens, offering five exclusive insights that move beyond quick fixes into thoughtful, design-led interventions.
Reading the Surface: Diagnosing Damage with Architectural Intent
Before touching a single tile, treat the space as an architect would: by reading it.
Hairline cracks, chipped edges, hollow-sounding tiles, or discolored grout each tell a different story. A long, continuous crack that runs across several tiles may signal substrate movement or structural settlement, not simply a failed tile. Isolated cracks in one or two tiles might stem from point impact—dropped cookware, a heavy bottle, or a misjudged furniture move.
Moisture-related issues demand particular attention. Staining, efflorescence (the white, powdery residue), or persistent grout darkening can indicate water migration rather than surface dirt. In wet rooms, pay close attention to transitions: shower niches, benches, thresholds, and corners are frequent points of vulnerability where membrane detailing may have failed.
Elite repair does not begin with a trowel—it begins with an informed decision: is this merely cosmetic, or is the assembly beneath the tile compromised? A premium result often depends less on the elegance of the visible repair and more on whether the underlying cause has been correctly identified and resolved.
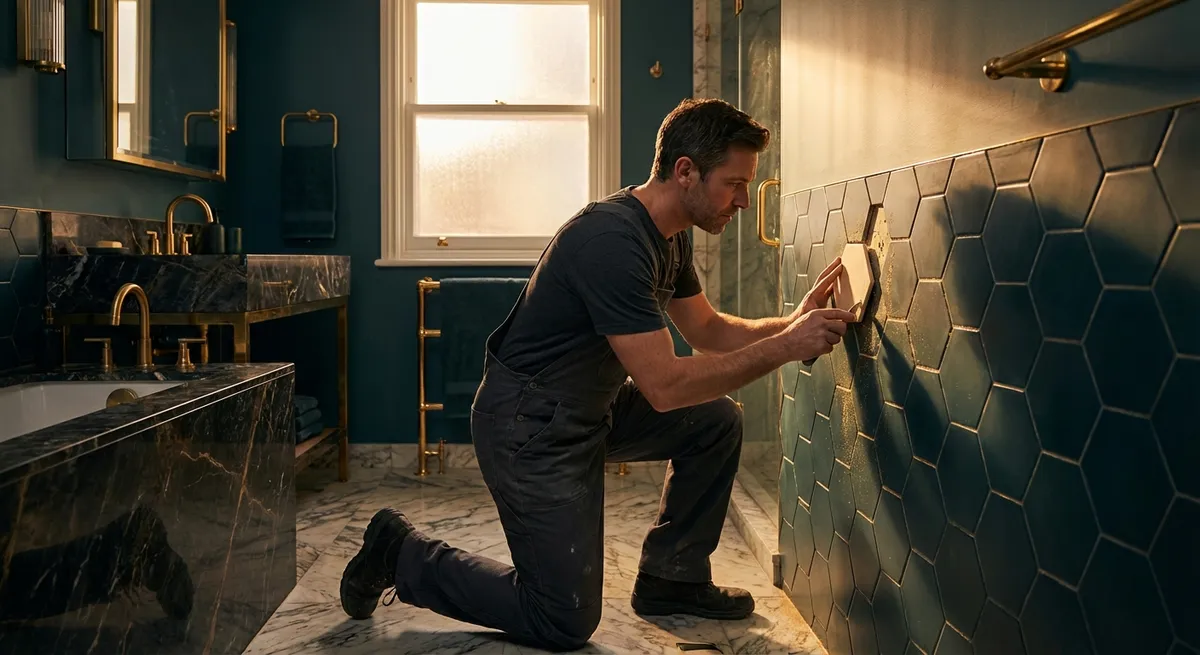
Invisible Substitutions: Achieving a Near-Perfect Tile Match
The most successful tile repair is often the one no guest ever notices.
If your project involves replacing damaged tiles, you’re essentially curating an “invisible substitution.” This starts with an honest audit of what you have: note the tile’s manufacturer (if known), series name, color code, finish (matte, honed, polished), and caliber (the specific dimensional batch). Even among factory tiles, shade variation (often listed as V1–V4) can make a new piece look conspicuously fresh next to a decade-old installation.
When original stock is unavailable, prioritize the hierarchy of match: color harmony first, then surface finish, then size calibration. In situations where an exact match is impossible—especially with natural stone—strategic placement can make all the difference. Replace damaged tiles in visually less prominent zones (behind a freestanding tub, under a vanity, at a room’s perimeter) and migrate the best-matched tiles into primary sight lines.
Advanced practitioners will also refine edges and sheen. A very slight hand-honing of a new polished tile, or a microfiber and polishing-compound pass on an older adjacent tile, can reduce the “new vs. old” contrast. The goal is not a perfect laboratory match, but visual calm—a continuity of surface that feels original to the room.
Grout as a Design Instrument: Subtle Color Corrections in Repair
Grout is often treated as an afterthought, yet in repair work it can be an exquisite tool for harmonizing old and new.
When a patch is required—perhaps a small area of replaced tiles in a kitchen or entryway—grout becomes your primary means of visual integration. Rather than simply replicating the original grout color by name, assess what it looks like today. UV exposure, cleaning products, and time can all shift grout to warmer or cooler tones. A newly mixed batch from the same manufacturer may be technically identical but appear subtly different once cured.
One sophisticated strategy is to embrace grout recoloring in a controlled, intentional way. High-quality grout colorants or sealers, correctly applied, can standardize tone across an older installation and new repairs, transforming a slightly disjointed patch into a cohesive field. This approach is especially effective for mid-tone and darker grouts, where minor hue variations are noticeable but still manageable.
In highly curated interiors, many homeowners now view grout repair as an opportunity to refine the grout palette entirely—slightly deepening a too-light shade in a busy kitchen, or softening contrast in a calm, spa-like bath. The repair then becomes a design enhancement, not merely a correction.
Correcting Past Errors: Elevation, Lippage, and Alignment Refinement
Not all tile repairs respond to damage; some correct earlier compromises.
Lippage (one tile edge sitting higher than its neighbor), inconsistent joint spacing, and subtle misalignment around focal elements—like freestanding tubs, fireplaces, or feature walls—can undermine an otherwise excellent room. Many homeowners assume that these issues are permanent, yet targeted repair can meaningfully elevate the visual order of a space.
The key is surgical precision. Instead of demolishing an entire floor or wall, a skilled professional can selectively remove and reset tiles in the most visually prominent corridors of sight: thresholds, room centers, major transitions, and framing lines around key fixtures. A few meticulously re-leveled tiles at the edge of a large-format porcelain installation can dramatically reduce overall perceived irregularity.
Modern leveling systems, improved thinset mortars, and more refined layout strategies allow these corrections to be executed with far more subtlety than in years past. The result is a surface that not only functions correctly, but finally aligns with the architectural intent of the room—a quiet rectification of earlier missteps.
Future-Proof Repairs: Building Durability into Every Intervention
An elegant repair should not merely look resolved on completion day; it should age as gracefully as the original concept.
Think of every intervention as a chance to upgrade the system. If you open a shower wall to replace failed tiles, consider whether the waterproofing method meets current best practice: continuous, properly lapped membranes, carefully detailed corners, and fully integrated movement joints. A localized crack along a perimeter may be your invitation to introduce or refine soft joints that allow the assembly to move without telegraphing stress to the tile surface.
Materials matter. Premium mortars and grouts engineered for flexibility, staining resistance, and color stability can significantly extend the life of both the existing field and the repaired area. In high-use kitchens, for instance, upgrading to a high-performance grout in the repaired section—and then rationally extending it to adjacent areas over time—can progressively enhance the entire installation without wholesale demolition.
Thoughtful documentation completes the picture. Retain records of products, colors, and batch numbers used in the repair; store a small cache of spare tiles in a stable, labeled location. In a refined home, these quiet details form a legacy of care—ensuring that future repairs, if ever required, can be executed with the same level of precision.
Exclusive Insights Homeowners Quietly Rely On
Below are five distilled insights that sophisticated homeowners often leverage when approaching tile repair—rarely discussed, but consistently effective:
- Plan repairs around light, not just layout.
Evaluate potential repair areas under both daylight and artificial lighting. Tiles that appear acceptable in diffuse light can reveal mismatches or lippage under raking light from windows or wall sconces. Prioritizing corrections along primary light paths yields a disproportionately elevated result.
- Treat thresholds as your secret design ally.
Doorways, transitions between materials, and step edges are optimal locations to discreetly “reset” alignment, grout color, or tile format. If a perfect match is impossible, intentionally regrouping tiles at a threshold can make the shift feel deliberate rather than accidental.
- Use sample boards as your insurance policy.
When executing repairs, ask your installer to create a small, removable sample board: a spare tile set and grouted with the exact products used. This becomes a future reference for color, texture, and sheen—a private benchmark if you later extend or adjust the installation.
- Upgrade underlayment quietly during partial repairs.
When lifting even a small section of floor, consider improving the substrate where feasible—introducing modern underlayment, decoupling membranes, or sound isolation layers in that zone. Done thoughtfully, this creates a more forgiving assembly and can prevent new stresses from telegraphing into the repaired tiles.
- Calibrate perfection to viewing distance.
High-end repair work acknowledges the reality of how space is experienced. A repair that is virtually undetectable from a natural viewing distance (1.5–2 meters) is often more valuable than a technically flawless but over-engineered intervention. The aim is to restore harmony to the room, not to chase microscopic perfection at the expense of practicality and structure.
Conclusion
Refined tile repair is far more than a response to damage; it is an opportunity to reassert intention, elevate performance, and preserve the quiet luxury of a well-resolved interior. By diagnosing issues with architectural clarity, curating near-invisible substitutions, mastering grout as a design instrument, correcting historical imperfections, and embedding durability into every intervention, homeowners can transform repair from a reluctant necessity into a considered act of stewardship.
In the most sophisticated homes, the story of the tile is not merely how it was installed—but how thoughtfully it has been maintained, corrected, and preserved over time.
Sources
- [U.S. Tile Council of North America (TCNA) – Handbook & Resources](https://www.tcnatile.com/faqs/79-handbook-faqs.html) - Authoritative guidance on tile installation methods, movement joints, and best practices that inform durable repairs
- [American National Standards Institute (ANSI) A108/A118/A136.1 via Tiled Resources](https://www.tcnatile.com/industry-standards/ansi-standards.html) - Technical standards for installation materials and methods, crucial for high-performance repair work
- [Schluter Systems – Waterproofing & Uncoupling Membranes](https://www.schluter.com/schluter-us/en_US/Membranes/c/M) - Detailed product information and technical resources on modern substrates that influence long-term repair success
- [Laticrete Technical Data Sheets](https://laticrete.com/en/support-and-downloads/technical-datasheets) - Specifications for advanced mortars, grouts, and waterproofing products used in premium tile repair solutions
- [University of Florida IFAS Extension – Efflorescence: Causes, Prevention, and Remediation](https://edis.ifas.ufl.edu/publication/CH181) - Research-based explanation of efflorescence and moisture-related surface issues often encountered in tile repair