This guide explores elevated repair solutions for discerning homeowners, with a focus on subtlety, longevity, and design integrity. Beyond basic patching, you’ll discover five exclusive insights that professionals use to ensure every correction feels deliberate rather than improvised.
Seeing Past the Crack: Evaluating the System, Not Just the Surface
Sophisticated tile repair begins with the understanding that the visible defect is rarely the whole story. A single cracked tile might signal simple impact damage—or it might be a symptom of deeper structural movement, moisture intrusion, or an installation shortcut buried beneath the surface.
Before replacing or repairing, a refined approach asks a few key questions: Is there vertical movement between adjacent tiles? Do multiple tiles show similar issues along the same line? Has the grout separated from the wall or baseboard, hinting at expansion strain? These observations help distinguish an isolated cosmetic issue from a systemic failure.
Removing one tile can serve as a diagnostic window into the substrate, revealing improper thinset coverage, hollow spots, or inadequate waterproofing. A premium repair does not blindly repeat the original mistake; it corrects it—selecting a more appropriate adhesive, adding crack isolation where needed, or slightly adjusting movement joints so the restored surface ages gracefully instead of failing again in silence.
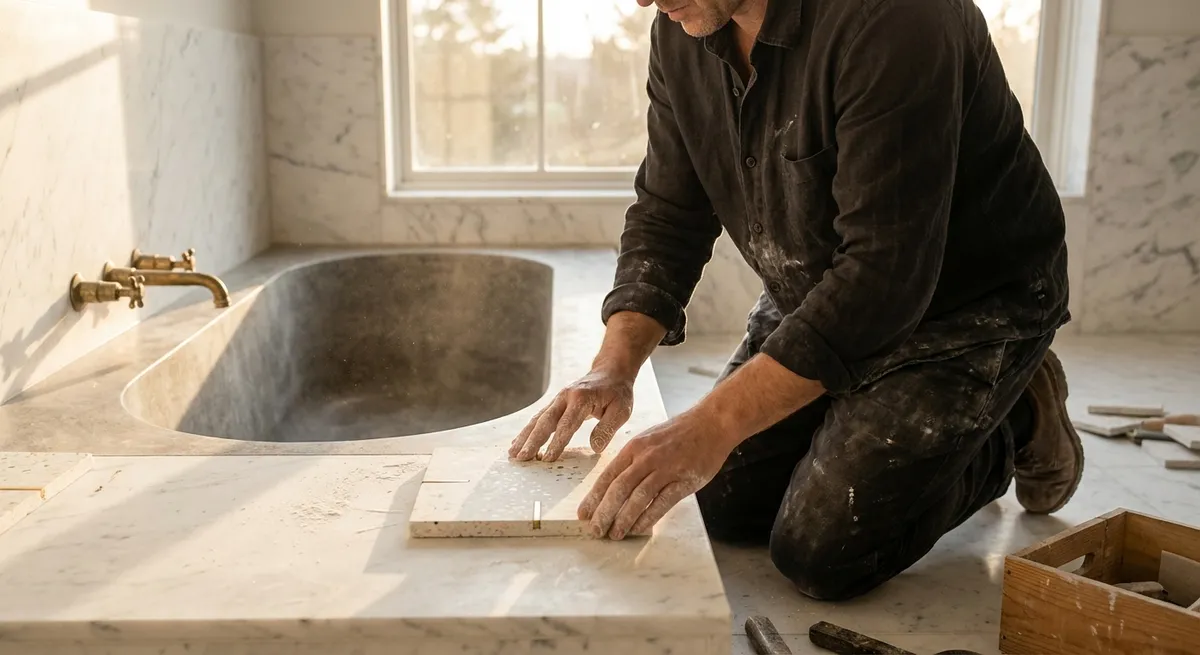
The Art of the Nearly-Invisible Replacement
When a tile must be replaced, the real craft lies in ensuring the new piece is visually indistinguishable from its neighbors. This requires more than simply matching the product SKU.
The replacement tile should be oriented to echo the original pattern: veining direction in marble, grain in wood-look porcelain, or directional texture on structured surfaces. Even a 90-degree rotation in a vein-cut stone can break the flow and distract the eye. For tiles with natural variation, a more subtly patterned spare may be preferable in a highly visible location, with bolder pieces reserved for less critical zones.
Edge profiling is equally important. If the original installation softened corners with a micro-bevel, a sharp factory edge dropped into the field will appear new and abrupt. Lightly easing the edges of the replacement tile to mimic surrounding wear ensures the repair blends not only in color and pattern, but also in perceived age. Grout joint width, alignment, and finishing technique (too concave, too flush, or too rough) further determine whether the repair reads as an interruption or a quiet continuation.
Exclusive Insight #1: When ordering extra tiles for a project, set aside a “repair set” of well-matched pieces specifically selected for veining, tone, and pattern continuity. Treat them like fine fabric remnants reserved for future tailoring, not general leftovers.
Curated Color: Grout Matching as a Design Discipline
Grout is often the giveaway in an otherwise competent repair. Even a fractional mismatch in color or sheen can telegraph the repaired area, especially on large-format or monochromatic installations. A design-led repair treats grout selection as a nuanced exercise in color theory, not an afterthought.
Instead of relying solely on printed color charts, a premium solution may involve creating custom grout blends to echo an aged or patinated appearance. Cementitious grout, for example, typically lightens as it cures and may be slightly different from the original batch that has matured over years. In some cases, tinting grout color sealers allows for almost exact visual alignment, especially when the existing field has subtly absorbed stains or cleaning agents over time.
Texture and reflectivity matter as well. A sanded grout used adjacent to unsanded grout, or a high-sheen epoxy grout surrounded by matte joints, will break the visual field even if the color match is perfect. The goal is not simply “the same color,” but “the same visual character under your space’s actual lighting conditions.”
Exclusive Insight #2: For prominent repairs, have your installer prepare small grout samples and cure them fully, then view them in your space’s evening and daytime lighting before committing. Evaluating under dim, warm lighting often reveals mismatches invisible under bright work lights.
Precision Repairs: When Replacement Isn’t the Most Elegant Option
Not every damaged tile warrants removal. In some instances, a controlled, highly targeted repair is more respectful of the surrounding assembly—particularly with delicate natural stone, historic installations, or where access is limited.
Hairline cracks in natural stone can sometimes be stabilized and disguised using professional-grade epoxy or polyester resins, tinted to match the stone’s body and veining. Surface chips on glazed porcelain can be carefully filled and color-corrected with durable ceramic repair systems, preventing a full removal that might disturb adjacent tiles or waterproofing layers.
These techniques demand deliberate restraint. The objective is not to erase all evidence at any cost, but to ensure that the eye does not read the defect before it reads the overall composition. Subtle feathering of sheen, micro-polishing, and careful alignment of faux veining ensure that the repair supports the tile’s original language rather than competing with it.
Exclusive Insight #3: On natural stone, a micro-repair that respects existing patina is often more elegant than a “perfect” new tile that appears too pristine. A precisely restored imperfection can harmonize better with a stone surface that has gently aged in place.
Protecting the Narrative: Moisture, Movement, and Future-Proofing
A truly premium repair anticipates the next decade as much as it resolves the present moment. Two forces in particular—moisture and movement—quietly dictate whether your renewed surface will endure.
In wet areas such as showers or spa zones, even a small breach in the tile envelope is a potential path for water into the substrate. When a repair involves removing tiles in these zones, it is critical to verify that the waterproofing layer is intact, continuous, and properly detailed. In some cases, the most responsible “repair” may involve reconstructing a broader section of the assembly to reestablish a trustworthy waterproof barrier.
Movement is equally essential to consider. Replacing a cracked tile without analyzing existing expansion joints, perimeter gaps, and substrate performance merely postpones failure. Strategic use of movement joints—often disguised within grout lines or at transitions—allows hard surfaces to respond gracefully to building shifts, thermal expansion, and even subtle seasonal changes.
Exclusive Insight #4: When repairing tile in sun-exposed spaces, consider whether solar gain or radiant heat may be stressing the assembly. Introducing or improving movement accommodation at doors, windows, and long runs can prevent a localized crack from becoming a recurring theme.
Collaborating with Craftsmen: Defining Quality Beyond “Looks Fixed”
The most successful tile repairs come from a collaboration between a discerning homeowner and a detail-obsessed professional. Beyond licensing and general experience, the right artisan will be comfortable discussing substrate preparation, movement accommodation, setting materials, and finishing techniques in the context of your design goals—not just in technical isolation.
Request to see close-up photographs of prior repairs, not only large-format glamour shots. Examine how meticulously cuts align, how consistent grout joints appear, and how well transitions are handled at thresholds, drains, and built-ins. A truly skilled installer or repair specialist will talk as much about what they refuse to compromise on as what they can do.
Clarity in your brief is equally important. Rather than simply asking for a “fix,” define your priorities: visual invisibility, protection of original waterproofing, preservation of historic fabric, or long-term stability in a high-traffic area. This allows your craftsman to recommend the approach that aligns with your values—not merely the fastest or cheapest remedy.
Exclusive Insight #5: When discussing the repair, ask your professional how they will protect adjacent tiles, finishes, and furnishings during demolition and installation. The way they manage dust, vibration, and impact often reveals as much about their standards as the final joint or polished edge.
Conclusion
Refined tile repair is less an emergency response and more a continuation of your design intent. It asks you to look beyond the chipped corner or fine crack and consider the entire system—structure, pattern, light, and time. By insisting on thoughtful diagnostics, near-invisible replacements, curated grout matching, intelligent micro-repairs, and forward-looking detailing, you transform repair from a necessary inconvenience into a precise, almost invisible act of preservation.
In a well-resolved home, every surface tells a story. When approached with care, your tile repairs won’t interrupt that story; they will quietly ensure it can be read, admired, and lived with for years to come.
Sources
- [Tile Council of North America (TCNA) Handbook](https://www.tcnatile.com/publications-and-downloads/free-downloads.html) - Industry guidelines on tile installation and best practices for performance and longevity
- [Custom Building Products – Technical Information](https://www.custombuildingproducts.com/how-to) - Professional resources on setting materials, grout selection, and repair considerations
- [Mapei Technical Library](https://www.mapei.com/us/en-us/technical-library) - Detailed documentation on adhesives, grouts, and specialty products used in advanced tile repair and installation
- [Floor Covering Installation Contractors Association (FCICA)](https://www.fcica.com/resources) - Educational materials focused on proper substrate preparation and long-term flooring performance
- [National Park Service Preservation Briefs: Repair and Maintenance of Historic Tile](https://www.nps.gov/orgs/1739/preservation-briefs.htm) - Guidance on sensitive repair techniques for historic tiled surfaces and assemblies