Below, we explore five exclusive, often-overlooked insights that discerning homeowners can use to elevate any tile project—from a single bath to a full-home scheme.
Designing with Sightlines, Not Just Square Footage
Professionals often speak in the language of square footage and coverage, but the most elegant tile installations are designed from the vantage points that truly matter: where you stand, sit, and move.
Begin by walking the space and noting the primary sightlines: the view from the entry, the angle from the bath threshold, the first glimpse of the shower wall when the door swings open. Instead of laying tile strictly from the “center of the room,” consider centering key patterns or grout joints on these visual axes. A floor that is surgically centered to the room but misaligned with a doorway will always feel faintly off, even if a casual observer can’t pinpoint why.
Subtle adjustments—moving the layout a fraction so a grout joint lands precisely in the center of a doorway, or ensuring a feature tile is framed symmetrically in the vanity mirror—create an underlying order that reads as calm and composed. In premium spaces, you are not tiling a box; you are composing views.
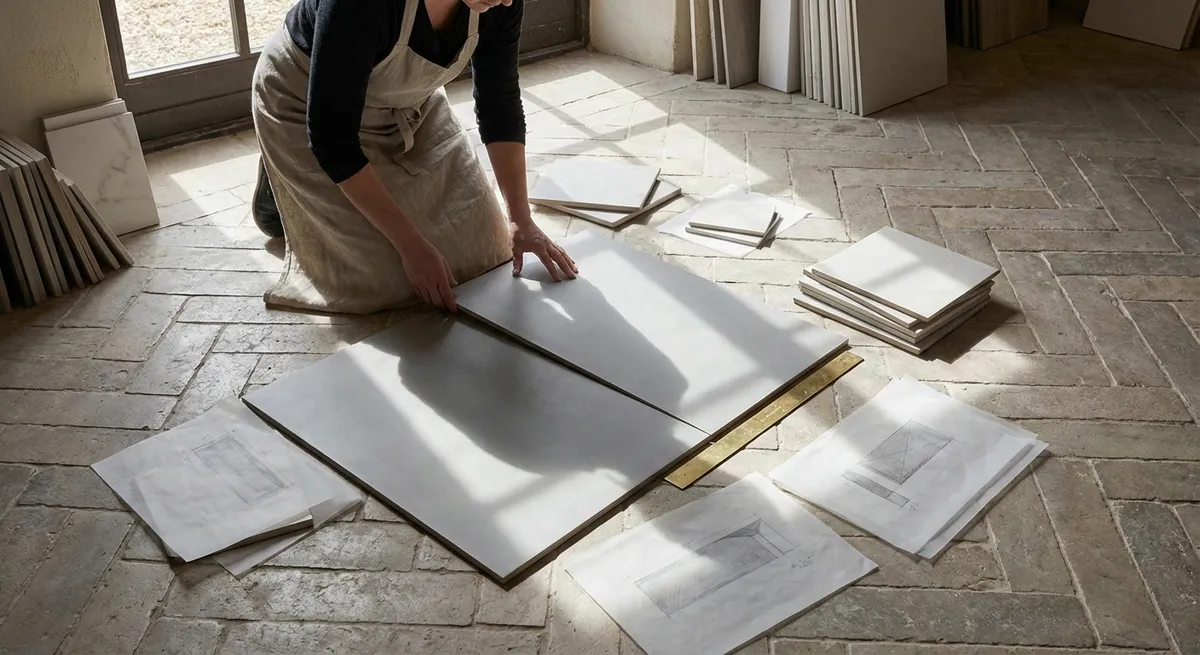
Curating Joint Width as a Design Element
Grout joints are often treated as a technical afterthought, dictated solely by tile size and tolerance. Yet the width and proportion of those joints can drastically shift the mood of a room.
Narrow, finely controlled joints (often 1/16" or 1/8", depending on the tile) create a more monolithic, tailored feel, especially with rectified porcelain or large-format slabs. Wider joints, carefully chosen, can lend a space a European traditional character when paired with hand-made or zellige-style tiles. The key is intentionality: your joint width should harmonize with the scale of the tile, the room, and even the window mullions and door casings that frame the space.
Equally critical is grout color. A tone-on-tone approach, where grout closely matches the tile, produces a soft, continuous field that feels luxurious and calm. A gently contrasting grout, just a shade or two darker or lighter, can emphasize rhythm without appearing busy. Reserve high-contrast grout pairings for areas where you want to celebrate pattern, such as a herringbone kitchen splash; in serene primary baths and living areas, subtlety usually reads as more elevated.
Letting Light Dictate Tile Orientation
Many tile layouts are drawn in plan view only, as if light were evenly distributed and static. In a premium installation, natural and artificial light are treated as collaborators in the design, not as afterthoughts.
Observe how sunlight moves across the room throughout the day. Linear tiles—planks, elongated rectangles, or ribbed textures—can accentuate this movement if oriented parallel to the primary light source. Running planks in the direction of the light tends to minimize shadow lines on imperfections and create a visually elongating effect. Conversely, orienting tiles perpendicular to the main light can emphasize surface texture in a deliberate, sculptural way on walls.
On floors, consider how downlights and sconces will graze the surface. Glossy wall tiles under grazing light can create seductive reflections, but they can also highlight the smallest lippage. If you prefer a polished finish, ensure the substrate and installation standards are exacting. For spaces prioritizing visual calm, a matte or satin finish under controlled lighting avoids harsh glare and allows the geometry of the layout to take precedence over sheen.
Controlling Transitions as Moments of Quiet Luxury
Sophisticated tile work often reveals itself not in the center of the room, but in the transitions—where tile meets wood, carpet, stone, or simply another tile pattern. These junctions are where lesser installations feel abrupt, and refined ones feel intentional and seamless.
Plan transitions at architectural “pause points”: door thresholds, cased openings, or natural breaks in cabinetry. Whenever possible, align tile joints so that they terminate cleanly at these breaks rather than being arbitrarily cut mid-span. Consider using stone or metal profiles as deliberate connectors rather than last-minute problem-solvers. A slim brushed brass or stainless profile between tile and hardwood, perfectly centered under a door, reads as jewelry rather than necessity.
Within tiled rooms, transitions between patterns or formats deserve the same care. A shift from a large-format field tile to a mosaic shower floor, for instance, should be designed so that full or near-full pieces meet; avoid slivers that suggest compromise. When well executed, these transitions feel like a change in tempo within the same composition, not a switch to a different song.
Coordinating Patterns Across Planes and Rooms
The most elevated tile projects think beyond isolated rooms and consider the entire home as a continuous composition. This doesn’t mean every surface must match; rather, patterns, proportions, and materials should converse across spaces.
In open-plan environments, consider how a tiled kitchen floor relates to an adjoining tiled bath or entry. Repeating an element—such as a consistent grout color, a shared tile size, or a recurring pattern direction—creates a sense of quiet continuity, even when the tile materials differ. Slight variations in tone or texture then become layer, not noise.
On a smaller scale, coordinating patterns across planes can be exceptionally powerful. A floor pattern that aligns with a shower wall layout, or a stacked wall tile that meets a large-format floor with perfectly continuous joints, communicates meticulous forethought. These alignments require early collaboration between homeowner, designer, and installer, especially when plumbing, drains, and niches must land in precise relation to the tile module. The result is a space where your eye moves effortlessly, supported by invisible geometry.
Conclusion
Truly refined tile installations are rarely about spectacle; they are about control, proportion, and a quiet respect for the architecture and the way you live within it. When you design from sightlines, treat grout as a deliberate design tool, allow light to guide orientation, choreograph transitions, and coordinate patterns beyond individual rooms, tile stops being a mere finish and becomes part of the home’s underlying language.
For homeowners who value detail and longevity, these subtleties are not indulgences—they are the difference between a surface that simply looks new and one that feels timeless.
Sources
- [Tile Council of North America (TCNA) Handbook](https://www.tcnatile.com/handbook.html) - Industry-recognized installation standards and guidelines for ceramic, glass, and stone tile
- [American National Standards Institute (ANSI) A108/A118/A136.1](https://webstore.ansi.org/standards/tca/tcaansia108a118a1362022) - Technical standards governing tile installation methods and material performance
- [Schluter Systems – Movement Joints and Transitions](https://www.schluter.com/schluter-us/en_US/faq/movement-joints) - Detailed guidance on managing transitions and movement joints between tile and adjacent materials
- [Florida Tile – Understanding Grout Joint Size](https://floridatile.com/blog/grout-joint-size) - Explanation of how grout joint selection affects aesthetics and performance
- [NC State University – Daylighting and Interior Design](https://projects.ncsu.edu/going-green/lighting.html) - Overview of how natural light interacts with interior surfaces and finishes