This guide approaches tile repair as a precise discipline rather than a rushed patch. Below, you’ll find five exclusive, detail-driven insights that protect the integrity of your tile while preserving the elevated character of your space.
Understanding the “Why” Before the “How”
The most elegant repair begins with diagnosis, not tools. A loose tile may be the symptom, but the cause could be structural movement, improper substrate preparation, or moisture intrusion. Addressing only the visible defect while ignoring the underlying issue nearly guarantees a repeat performance.
A refined repair process starts with observation: tap tiles to detect hollow spots, inspect baseboards and adjacent walls for hairline cracks, and pay close attention to transitions where different materials meet. In wet zones, note any subtle discoloration in grout lines or caulk joints, which can signal water migration long before anything appears obviously damaged. By treating the repair as forensic work first, you ensure that any intervention is not just cosmetic, but durable and architecturally coherent with the rest of the installation.
Insight 1: Precision Color Mapping for Invisible Blends
Standard color matching often stops at “close enough”—which is precisely what makes many repairs noticeable. For high-end tile, particularly stone and artisan or large-format porcelain, imperceptible blending demands a more nuanced approach: precision color mapping.
This begins by examining the tile and grout under the actual lighting conditions of the room—daylight, artificial, and mixed. Photograph tiles and grout at different times of day to understand how light shifts the perceived tone. When selecting replacement tiles or touch-up materials (epoxy fillers, pigments, or repair compounds), work from this visual record instead of relying on memory or store lighting.
For grout repair, consider custom pigment blending rather than an off-the-shelf color. A measured combination of two or three grout pigments can be mixed into a small test batch to approximate the aged tone of existing joints. Similarly, stone repairs benefit from multiple tint layers, applied in transparent veils rather than a single opaque color. The objective is not to match a theoretical color sample, but to mirror the way your existing installation actually lives in its light.
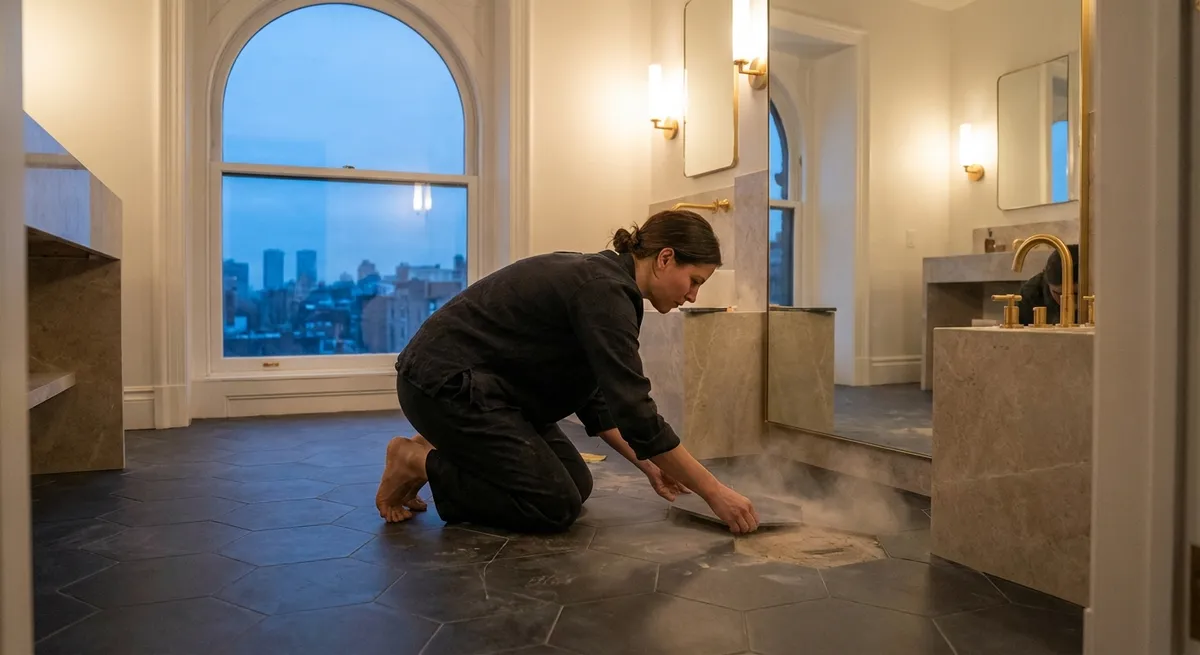
Insight 2: Stabilizing the Substrate Without Full Demolition
Many homeowners assume that a hollow or loose tile demands disruptive demolition. While full removal is sometimes necessary, a more sophisticated strategy is to stabilize where possible, reserving extraction for only the most compromised sections. This is particularly relevant in spaces where the tile layout, pattern, or inlay is complex and worth preserving intact.
For minor debonding on rigid substrates, targeted injection systems—where a low-viscosity, compatible adhesive is introduced beneath the tile through micro drill points—can re-anchor the surface with minimal disturbance. The key is to use products recommended for your specific tile and substrate combination, and to test in an inconspicuous area to confirm there is no staining or swelling.
Equally important is verifying substrate integrity around the problem zone. A slightly loose tile at the edge of a rigid, stable field may be a candidate for micro-repair. A cluster of hollow tiles or widespread tenting, however, typically points to systemic movement, improper expansion joints, or substrate failure—issues that justify selective, but decisive, removal. The refined decision is not to avoid demolition, but to minimize it without compromising performance.
Insight 3: Seamless Grout Renewal as a Design Decision
Grout repair is often treated purely as maintenance, yet in a premium tile installation it is a powerful design tool. When a section of grout must be removed—perhaps due to cracking, staining, or moisture damage—there is an opportunity to reconsider grout width, depth, and sheen to harmonize with the overall aesthetic.
A meticulous grout renewal begins with partial, not total, removal: typically two-thirds of the depth is sufficient for mechanical bond, while preserving the tile edges. Specialized grout removal tools with guides or depth stops help prevent chipping and overcutting, especially on softer or polished materials. Once the old material is cleared, joints should be vacuumed and lightly dampened (as appropriate for the new grout type) to improve adhesion.
At this stage, you can calibrate the visual effect: a slightly recessed grout joint can emphasize the profile of handmade tile; a flush joint can visually flatten the plane for a more monolithic, gallery-like surface. Choosing between sanded, unsanded, or high-performance resin-based grout influences both texture and reflectivity. A modest repair executed with these subtle choices in mind can make an entire surface feel more intentional, cohesive, and elevated.
Insight 4: Respecting Movement—The Quiet Guardian of Long-Term Repairs
Many tile failures masquerade as isolated defects when they are, in fact, symptoms of ignored movement. Expansion, contraction, structural deflection, and temperature swings all exert force on rigid finishes. Elegant repair solutions therefore do more than fill gaps—they re-establish proper movement accommodation.
During any repair near perimeters, doorways, or large uninterrupted spans, examine existing movement joints. Are there flexible caulked joints where tile meets walls, tubs, showers, or different materials? Have these joints hardened, cracked, or disappeared under paint or grout? Reinstating or refining these slip zones often prevents recurrences of cracking and tenting.
In expansive areas such as open-plan living spaces or heated floors, confirming that movement joints are correctly spaced and integrated is essential when executing repairs. Where they’re lacking, a sophisticated solution may introduce discreet, color-matched joints along natural breaks in the layout (for example, under thresholds, casework lines, or designed transitions). This is less about visibly dividing the floor and more about allowing the system to breathe, ensuring your repair is working with the architecture instead of resisting it.
Insight 5: Layered Protection—Sealers, Edges, and Anticipated Wear
Once a repair is complete, the true mark of a premium approach is how thoughtfully the area is protected against future stress. Rather than a single “finish and forget” step, advanced protection is layered and location-specific.
In kitchens or busy entries, freshly repaired grout can benefit from high-quality penetrating sealers chosen for the material type and traffic level. The goal is not to create a plastic shine, but to reduce absorption while preserving the authentic character of the surface. On natural stone, a breathable sealer compatible with the stone’s porosity and finish is essential to avoid unwanted darkening or blotching.
Edges deserve special consideration. A repaired tile at a stair nose, threshold, or shower niche edge may be structurally sound yet still vulnerable to impact. Here, small refinements—such as upgrading to a more robust trim profile, gently easing a sharp stone edge, or adding a discreet protective strip at a doorway—can dramatically extend the life of the repair. Beyond sealers and trims, anticipate how the area is actually used: a protective mat at a high-traffic entry or felt pads beneath furniture legs near freshly repaired tiles are quiet yet powerful allies in maintaining a flawless appearance.
Conclusion
Refined tile repair is not about disguising flaws; it is about restoring integrity with the same care and intention that guided the original installation. By diagnosing causes rather than symptoms, calibrating color to real-world conditions, stabilizing substrates with restraint, respecting movement, and layering intelligent protection, you elevate repair from a necessary inconvenience to a continuation of craftsmanship.
For the homeowner who expects their surfaces to age gracefully rather than simply endure, these quiet rescues are what keep tile installations not just intact, but genuinely distinguished.
Sources
- [Porcelain Tile Installation and Maintenance – TCNA](https://www.tcnatile.com/training/installation-guides.html) - Technical guides from the Tile Council of North America on proper installation and troubleshooting
- [Grout and Sealers Technical Data – MAPEI](https://www.mapei.com/us/en-us/products-and-solutions/products/detail/ultracolor-plus-fa) - Manufacturer specifications and best practices for advanced grout products
- [Natural Stone Care and Maintenance – Natural Stone Institute](https://www.naturalstoneinstitute.org/consumers/care/) - Authoritative guidance on sealing, protecting, and repairing stone surfaces
- [Home Moisture Problems – U.S. EPA](https://www.epa.gov/mold/mold-course-chapter-2) - Background on moisture issues that can underlie tile and grout failures
- [Flooring Expansion and Movement Joints – Schluter Systems](https://www.schluter.com/schluter-us/en_US/Profiles/Movement-Joint-Profiles/c/P-MJ) - Technical information on movement joint profiles and their role in preventing damage