In refined homes, tile repair is less about patching and more about continuity: preserving tone, texture, and proportion so the surface reads as one deliberate composition. Below, we explore elevated repair strategies and five exclusive insights that discerning homeowners can use to guide better decisions—whether working with a seasoned installer or evaluating their own options.
Reconciling Old and New: The Art of Material Matching
Sophisticated tile repair begins before any adhesive is mixed. The quiet success or failure of a repair rests on how convincingly old and new materials coexist.
For natural stone, the challenge is especially acute. Marble, limestone, and travertine are geological one-offs; even tiles from the same lot can vary in veining and tone. When replacing a damaged stone tile, an expert will pull from a “visual inventory” of spare pieces, rotating and dry-fitting options under the actual room lighting—both natural and artificial—before committing to one. The goal is not perfection but harmony: a piece whose movement and color density echo the surrounding field.
For porcelain and ceramic, lot numbers matter. Tiles from a different batch can be imperceptibly larger, glossier, or cooler in tone, which only becomes obvious once grouted. A premium repair approach involves verifying shade and calibration numbers from the original packaging, or—if that information is lost—ordering a minimal test quantity and comparing several pieces in situ. When a perfect match is impossible, a skilled professional may intentionally “reframe” the repair by introducing a deliberate detail, such as:
- A new accent strip at a doorway that incorporates the replacement tile.
- A framed inlay around a replaced group of tiles, turning necessity into feature.
- A threshold transition that gracefully separates old tile from new.
In elevated interiors, the most successful repairs either disappear completely or look intentionally designed—never like an afterthought.
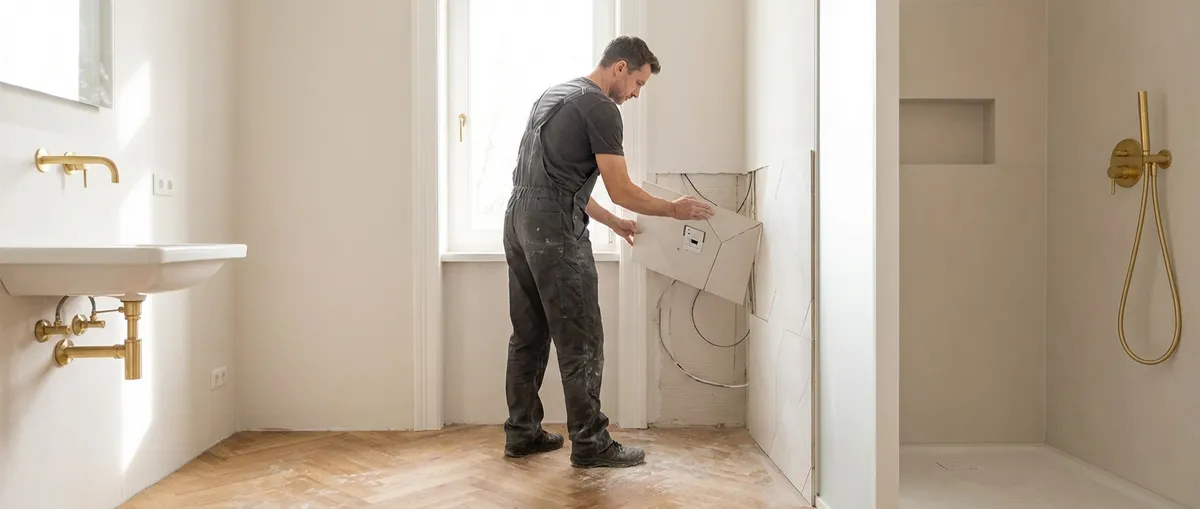
Substrate Intelligence: Repairing What You Can’t See
Refined tile work is only as sound as what lies beneath it. Many visible failures—cracked grout, tented tiles, or localized hollow spots—begin in the substrate.
Premium repair strategy treats the surface as evidence, not the whole story. For example, a single cracked tile in the center of a room might be replaced with surgical precision. But if hairline cracks run along a continuous line, that suggests movement in the substrate or improper joint placement. In such cases, replacing just the tile is akin to repainting a wall with active water damage.
A sophisticated assessment will consider:
- Substrate composition: Is it concrete, plywood, an old mud bed, or a cement backer board? Each behaves differently under load and moisture.
- Movement accommodation: Are perimeter and intermediate expansion joints present and correctly sized? Large-format tiles without movement joints are especially vulnerable.
- Moisture pathways: Any signs of vapor drive from below a slab, or trapped moisture in a shower assembly, can doom even meticulous surface repairs.
In better homes, the most valuable repair is often diagnostic: opening a small, strategic area to inspect the assembly below. A homeowner who authorizes a targeted investigation—even if it means lifting a few intact tiles—often avoids far more disruptive failures later. The goal is not merely to mask symptoms but to recalibrate the system beneath the tile so that the repaired surface ages predictably and gracefully.
Grout as Design Element: Reviving Joints Without Replacing Tile
Grout repair is frequently treated as housekeeping rather than craftsmanship, yet in a luxurious space, grout is a design element as important as the tile itself. The wrong approach can shift the entire character of a room.
Instead of defaulting to full regrouting at the first sign of discoloration or hairline cracking, a nuanced professional will evaluate:
- Joint depth and integrity: If grout has minor surface wear but remains structurally sound, a careful clean-and-color-seal may restore uniformity without complete removal.
- Original grout chemistry: Cementitious, epoxy, and hybrid grouts age and fail differently. Using the wrong product for spot repairs can introduce visible seams or premature cracking.
- Color drift over time: Grout shades often soften or warm slightly as they age. Perfectly matching the color number from the original installation may result in patchwork joints that look “newer” and therefore more obvious.
In elevated repair work, grout restoration is approached with the same subtlety used in art conservation. Instead of stripping everything, experts selectively remove weakened areas, then blend the new material through careful tooling and, when appropriate, color sealing over broader runs to equalize tone.
This is also where micro-adjustments can quietly “correct” past design missteps. A too-stark grout in a calm, monochrome space can be visually softened; conversely, under-defined joints in a patterned floor can be subtly articulated to clarify the layout. The repair becomes an opportunity to bring the original design closer to its ideal expression.
Moisture, Heat, and Movement: Precision Repairs in Demanding Zones
Areas under thermal and moisture stress—showers, steam rooms, radiant-heated floors, and exterior terraces—demand a different caliber of repair thinking. These are environments where design ambition and physics negotiate daily.
In showers, a cracked tile or discolored grout line may signal issues deeper within the waterproofing layer. Simply swapping tiles or regrouting can trap moisture or allow water to bypass the intended drainage plane. A meticulous approach includes:
- Verifying whether the assembly is traditional (mortar bed with pan liner) or modern (surface-applied waterproofing membrane).
- Probing for saturation in the mortar or backerboard, especially at benches, niches, and curbs.
- Assessing slope toward drains and any “birdbaths” where water collects.
On radiant-heated floors, repeated thermal cycling can compound any installation weaknesses. Hairline grout cracks or isolated tile movement often reflect insufficient movement joints or incompatible setting materials for heated assemblies. Premium repair work may involve:
- Mapping the heating cable or mat locations before demolition to prevent catastrophic damage.
- Using adhesives and grouts rated for higher temperature fluctuations.
- Introducing or enlarging movement joints at room perimeters, transitions, or long runs.
Exterior tile—on terraces, balconies, and pool surrounds—adds freeze-thaw effects, UV exposure, and dynamic loading to the mix. Here, a repair that doesn’t respect drainage layers, slope, and expansion detailing will fail quickly, often more dramatically than the original. The hallmark of a high-caliber repair in these zones is not just aesthetic continuity but climatic literacy: materials and detailing selected with explicit awareness of the environment they will inhabit.
Five Exclusive Insights for Homeowners Committed to Exceptional Tile Repair
For homeowners who treat their surfaces as long-term investments rather than consumables, the following insights can dramatically elevate the outcome of any repair project:
Insist on a Mock-Up for Visible Repairs
When replacing tiles in highly visible locations—entry halls, shower walls at eye level, kitchen backsplashes—ask your tile professional for a dry-fit mock-up. Seeing the nominated replacement tile (or group of tiles) in place, under your actual light, allows you to evaluate veining, tone, and joint alignment before any irreversible work begins. This practice, common in high-end stone projects, prevents subtle mismatches that can bother you every time you enter the room.
Protect and Catalog Spare Material Like an Heirloom
Leftover tiles, trims, and grout documentation are invaluable decades later. Store spare tiles flat, in a temperate, dry environment, and label each box with the room, installation date, manufacturer, collection name, and shade/caliber numbers. Include a printed copy of the grout color and type. This “material archive” transforms future repairs from guesswork into precision work, particularly when the original line has been discontinued.
Evaluate Repairs Under All Lighting Conditions
A repair that looks perfect at noon may betray itself at dusk or under accent lighting. Always review repaired areas in morning, afternoon, and evening light, and with all relevant fixtures turned on—recessed cans, wall washers, under-cabinet lighting, and decorative sconces. Light rake can emphasize lippage, joint irregularities, or texture differences that are invisible head-on. Sophisticated repair standards account for how surfaces behave under every lighting scenario the room actually experiences.
Treat Movement Joints as Design, Not Compromise
Many tile failures stem from the absence or under-sizing of movement accommodation. In premium spaces, movement joints can be integrated as quiet design elements: slender metal profiles that align with architectural lines, color-matched silicone at perimeters that visually disappears, or deliberate “grid breaks” that correspond to doorways or furniture groupings. When discussing repairs, be open to the introduction or refinement of these details—they often represent the difference between a temporary fix and a lasting solution.
Use Repairs as an Opportunity to Upgrade Assemblies, Not Just Surfaces
When a repair requires opening a meaningful portion of the installation, consider upgrading the “invisible” components: uncoupling membranes over problematic slabs, more advanced waterproofing in wet zones, high-performance setting materials, or grout types better suited to your usage patterns. The marginal additional cost during a necessary repair can dramatically extend the life of the entire assembly, turning an unwelcome problem into a strategic improvement of your home’s infrastructure.
Conclusion
Exceptional tile repair is not defined by how quickly a flaw disappears, but by how completely the surface’s integrity—visual and structural—is restored. In a refined home, tile is part of the architectural language; the goal of any intervention is to maintain that language’s fluency, so every line, joint, and transition continues to feel intentional.
By insisting on rigorous substrate analysis, intelligent material matching, and a thoughtful approach to grout, movement, and environmental stress, homeowners can transform repair from a reactive chore into a deliberate act of stewardship. The result is a home where every tile—old or newly installed—participates in a continuous, coherent story of quality.
Sources
- [Ceramic Tile Installation Guide – TCNA Handbook](https://www.tcnatile.com/handbook.html) – Industry-recognized standards and best practices for tile installations and assemblies
- [ANSI A108/A118/A136.1 Specifications for the Installation of Ceramic Tile](https://webstore.ansi.org/standards/tca/ansia108a118a1362017) – Technical specifications governing setting materials and installation methods used in professional repair and installation
- [Schluter Systems Technical Articles](https://www.schluter.com/schluter-us/en_US/technical-resources) – Detailed resources on uncoupling, waterproofing, and movement joint design for tile assemblies
- [Laticrete Training & Education Resources](https://laticrete.com/en/support-and-training/training-and-education) – Guidance on grout types, setting materials, and performance considerations in demanding environments
- [Custom Building Products – Tile & Stone Installation FAQs](https://www.custombuildingproducts.com/how-to/product-FAQs) – Practical explanations of common tile failures, repair strategies, and material selection considerations