Repair as Preservation, Not Patchwork
Many tile repairs fail not because the technique is poor, but because the philosophy is wrong. A patch mentality focuses on the damaged tile alone; a preservation mindset considers the field, the light, the room’s architecture, and the way the surface is used.
Begin by looking beyond the defect. Step back several feet and observe how light moves across the surface throughout the day. A fine hairline in a high-sheen porcelain might be nearly invisible at noon yet sharply outlined in evening side light. The timing and angle of your inspection will dictate whether a micro-fill, a full replacement, or a broader intervention is warranted.
Preservation-minded repair also respects the original specification. Matching tile is only the beginning; you must also respect the initial grout joint width, grout composition (cementitious, epoxy, or hybrid), sheen level, and edge profile. When these details are aligned, a repair becomes effectively invisible, not because it cannot be found, but because it does not interrupt the visual rhythm of the surface.
Insight 1: Treat Light as Your Primary Design Partner
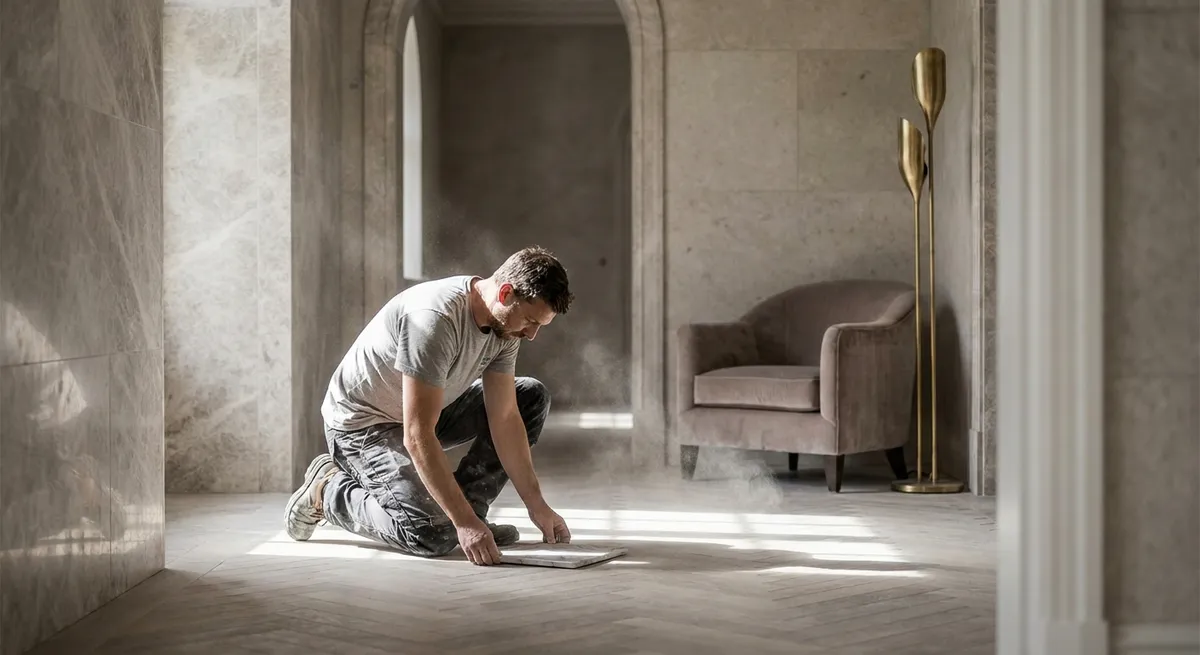
Successful tile repair starts not with tools, but with light. Luxurious finishes are unforgiving under side lighting, pendant glare, or daylight rakes across a large format floor.
Conduct a “light audit” before committing to a solution. At different times of day, observe:
- Where natural light grazes walls and floors
- How artificial lighting (especially wall washers and directional spots) intensifies minor unevenness
- Which angles reveal lippage, hairline cracks, or subtle shading differences
In high-end spaces, a filler or touch-up that looks flawless under overhead light may be conspicuous under grazing light from a floor-to-ceiling window. For walls with strong side lighting, replacing a single tile may be the only acceptable approach, while in a softly lit powder room, a carefully tinted epoxy micro-fill can perform beautifully.
Understanding how your home’s unique lighting exposes or conceals imperfections allows you to choose a repair method that appears calm and intentional at all hours—not merely “acceptable” under the contractor’s work lamp.
Insight 2: Archive Your Tile, Grout, and Finish as a Future Asset
A sophisticated tile installation anticipates time. The most elegant repair is only possible if the original materials and specifications can be meaningfully recreated.
If your home features bespoke or high-end tile, consider assembling a “finish archive”:
- Spare Tile Inventory: Retain at least 3–5% extra tile from the original installation, stored flat, in a dry and temperate space. Keep boxes labeled with batch or shade numbers.
- Grout Record: Note manufacturer, line, exact color name and code, and whether it is sanded, unsanded, epoxy, or hybrid. Photograph the packaging and keep a digital file.
- Layout and Pattern Notes: Keep a simple diagram or installation plan indicating running bond, herringbone, bookmatched slabs, or custom patterns, plus joint widths.
- Sealants and Finishes: Document sealers and enhancers used, including brand and reapplication schedule.
This disciplined record-keeping transforms future repairs from guesswork into precise, discreet interventions. When a single shower wall tile must be replaced ten years later, your archive effectively “unlocks” the original specification, allowing the repaired area to melt back into the composition instead of announcing itself as a later intrusion.
Insight 3: Refine Subtle Structural Issues Before Cosmetic Repairs
In premium environments, repeated cracking or hollow sounds underfoot are rarely a cosmetic issue; they are symptoms of movement or structural inconsistency beneath the tile. Addressing only the surface is akin to polishing a table with a broken leg.
Before any high-visibility repair, ask a qualified professional to evaluate:
- Deflection and Movement: Floors that flex even slightly under load, especially with large-format tile or stone, invite stress fractures. Underlayment, joist spacing, and subfloor material matter profoundly.
- Moisture Conditions: Persistent dampness behind shower walls or under a bathroom floor can weaken bond strength and cause “tenting” or debonding. Waterproofing membranes and drainage planes must be assessed, not assumed.
- Sounding and Hollow Spots: Tapping tiles to detect variations in sound can reveal voids or poor adhesion beneath, which may not yet be visible but could lead to future failures.
By resolving underlying movement or moisture before replacing or filling tiles, you prevent new, pristine surfaces from inheriting the same vulnerabilities. In a refined home, durability is part of the aesthetic: an untroubled floor that feels solid and timeless underfoot is as much a luxury as the tile itself.
Insight 4: Elevate Grout from Filler to Design Element in Repairs
Homeowners often focus exclusively on matching tile when planning a repair, yet the grout is where most eyes register a mismatch. In sophisticated installations, the grout line is a deliberate design element, not a byproduct.
When repairing grout—or replacing tiles that require regrouting—consider:
- Color Aging: Existing grout may have subtly lightened, darkened, or taken on a patina from cleaning products and daily use. Matching the current grout tone, not the original, is critical. A test board with small grout samples, tinted up or down, can be invaluable.
- Joint Profile: Whether grout is flush, slightly concave, or very slightly proud of the tile edge affects the shadow line. A mismatched profile can be as visible as a color miss.
- Grout Technology Upgrade: In high-traffic or high-moisture areas, consider moving to a premium epoxy or high-performance grout during repairs for stain resistance and longevity—provided it harmonizes with the existing aesthetic.
For partial grout repairs, a carefully executed color sealing of all joints after localized fixes can create visual unity across old and new work. When done with nuance and restraint, this transforms grout from a distraction into a quiet, cohesive frame for the tile field.
Insight 5: Embrace Precision Tools and Micro-Techniques for Discreet Repairs
The most refined repairs rely on restraint and micro-precision rather than brute force. Instead of defaulting to full removal, consider carefully chosen techniques that respect the existing surface.
Some advanced approaches that homeowners can request or discuss with professionals:
- Micro-Fill for Fine Cracks: For stable, non-structural hairline cracks in dense porcelain or stone, ultra-low-viscosity epoxy or specialized fillers, tinted to match the veining or base color, can bridge the defect while keeping the surrounding tile intact. When feathered and polished thoughtfully, they recede from casual view.
- Surgical Tile Removal: If replacement is necessary, the use of oscillating multi-tools with specialty blades allows for precise removal of grout and individual tiles with minimal collateral damage to adjacent pieces. A methodical approach is essential to maintain the crispness of neighboring joints.
- Finish Reconciliation: After any intervention, polishing pads, fine abrasives, or sealers may be used to reconcile sheen differences between existing and new surfaces—particularly on honed or polished stone. The goal is not uniform gloss everywhere, but visual consistency within the natural variation of the material.
Sophisticated repair is often defined by what is left undisturbed. When tools and techniques are chosen with surgical intent, the end result feels not “repaired” but simply correct, as though the tile has always been quietly flawless.
Conclusion
Tile repair in an elevated home is less about covering damage and more about restoring coherence. By treating light as an ally, archiving original materials, resolving structural causes, honoring grout as part of the design language, and embracing precise, restrained techniques, homeowners can safeguard the calm authority of their surfaces for years to come.
When executed with this level of consideration, a repair ceases to be a compromise. It becomes an act of stewardship—protecting not just the tile itself, but the architectural serenity it was chosen to express.
Sources
- [U.S. Department of Housing and Urban Development – Residential Rehabilitation Inspection Guide](https://www.hud.gov/program_offices/administration/hudclips/guidebooks/rehab) – Technical guidance on diagnosing structural and moisture issues before cosmetic repairs
- [Tile Council of North America (TCNA) Handbook](https://www.tcnatile.com) – Industry standards and best practices for tile installation, substrates, and repair considerations
- [Custom Building Products – Grout and Sealant Technology](https://www.custombuildingproducts.com/how-to-guide/grout) – Detailed information on grout types, color matching, and sealing strategies
- [Mapei Technical Articles](https://www.mapei.com/us/en-us/home-page/solutions-and-products/lines/grouts-and-sealants) – Insights into advanced grouts, crack repair products, and performance characteristics
- [National Institute of Standards and Technology (NIST) – Flooring Materials and Performance](https://www.nist.gov/topics/buildings-and-construction) – Research-backed information on flooring systems, movement, and durability factors