Below, we explore an elegant, design-led approach to tile repair—complete with five exclusive insights that discerning homeowners can use to protect both the beauty and integrity of their spaces.
Reading the Surface: Diagnose Before You Touch Anything
Before any adhesive is mixed or grout is scraped, the most sophisticated step is analysis. A tile failure is almost never random; it’s the visible symptom of a deeper condition—movement, moisture, structural weakness, or installation shortcuts.
Begin by observing patterns: Are cracks radiating from a single corner, or repeating every few tiles? Are grout joints crumbling only along one wall? Is there a hollow sound when you tap specific tiles with a knuckle or wooden dowel? These small clues will tell you whether you’re contending with isolated damage or a systemic issue.
Look beyond the tile. Check adjacent materials: baseboards, door casings, and thresholds for signs of swelling or separation. Observe whether underfloor heating zones align with the most affected areas. Document everything with photographs and notes; treating a repair like a mini “case study” sets the tone for decisions that respect both aesthetics and structure.
This diagnostic phase reframes repair from a rushed reaction to a deliberate, almost architectural evaluation—one that honors the investment already made in the space.
Material Intelligence: Matching More Than Just Color
True refinement in tile repair lies in how seamlessly the new material integrates with the existing field—not just visually, but in performance and feel.
Color is only the first layer. Carefully study:
- Surface finish: Is it high gloss, satin, honed, or structured? Even a subtle mismatch in sheen will catch the light differently and draw the eye immediately.
- Tile body: Porcelain, ceramic, natural stone, and terrazzo all have distinct densities and absorption properties; substituting inaccurately can create uneven wear or staining over time.
- Edge profile: Rectified edges versus pressed edges will influence joint alignment and the perceived precision of the layout.
- Micro-variation: Many tiles are designed with intentional shade variation; selecting a replacement from a different production batch may require curation of individual pieces to find the closest match.
If the original tile is discontinued, work with a specialty tile showroom or manufacturer’s representative to identify the nearest technical and visual equivalent. Bring a physical sample or a loose tile rather than relying on photographs alone—texture and undertone often fail to translate on camera.
Think of this stage as material matchmaking: you’re not simply finding a replacement tile, you’re curating a compatible character for the existing ensemble.
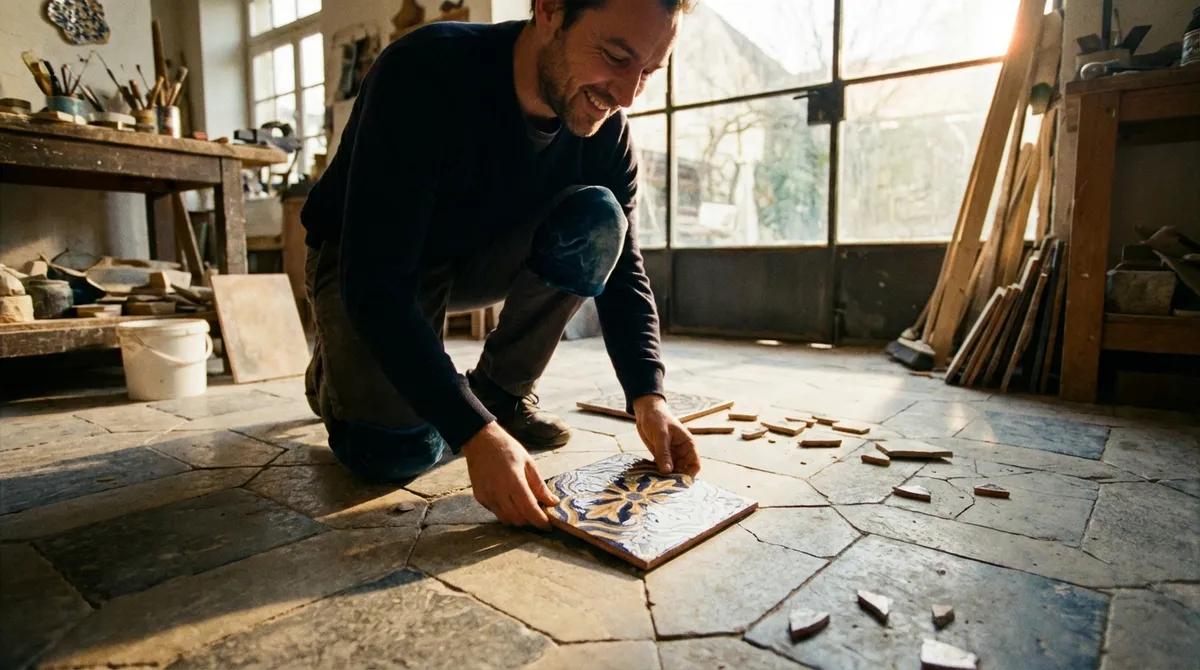
Precision at the Edges: The Art of Controlled Demolition
In premium spaces, the most decisive moment in repair is not setting the new tile—it’s removing the damaged one without disturbing the surrounding field. Controlled demolition is where craftsmanship becomes visible.
Protect adjacent tiles with low-tack tape and a firm, thin protective layer (such as a metal edge or rigid plastic card) when using oscillating tools or chisels. Start by cutting through grout joints completely; this isolates the damaged tile structurally before you touch the body of the tile itself. Working from the center outwards, break the tile inwards rather than prying upwards from the edges. This reduces leverage against intact neighbors, preserving the razor-straight lines that define a high-end installation.
For natural stone or large-format tiles, vibration control is critical. Use slow, deliberate pressure rather than aggressive blows, and pause frequently to reassess. Any inadvertent chip in an adjacent tile or lippage introduced during removal will be far more visible than the original problem you set out to solve.
This is one of the defining differences between basic repair and elevated restoration: the surrounding field should emerge entirely undisturbed, as if the damage had never occurred.
Five Exclusive Insights for the Detail-Driven Homeowner
These less obvious strategies are what separate a merely acceptable repair from one that feels thoroughly intentional and almost invisible.
1. Upgrade the Substrate Quietly While You Repair
A localized repair offers rare access to what lies beneath. Instead of simply resetting a new tile onto an unknown or compromised base, use the opening to subtly improve the structure.
If you discover weak or inconsistent thin-set, hollow pockets, or inadequate back-buttering, take the opportunity to reset the local substrate with a premium, appropriate mortar or patching compound. In wet areas, consider adding a localized waterproofing membrane if the system allows, essentially “future-proofing” the area without a full remodel. This micro-upgrade significantly enhances longevity, even if it’s only beneath a single tile or small group.
2. Treat Grout as a Design Element, Not Filler
During repair, many homeowners focus exclusively on the tile and treat grout as a secondary concern. In refined spaces, grout is part of the design language—it defines rhythm, shadow lines, and perceived precision.
When re-grouting a repaired area, color and texture matching are critical, but so is the joint profile. Study the original joints: are they slightly concave, flush with the tile edge, or subtly proud? Matching that profile will determine whether the repair recedes into the overall field or registers as a “patch.”
If the existing grout is significantly aged or discolored, a repair may be the ideal moment to upgrade all grout in the room to a high-performance, stain-resistant formula—executed as a phased project. Begin with the repaired area, then plan a systematic re-grout as time and budget allow. The goal is a unified grout language that supports the tile rather than detracting from it.
3. Use Lighting to Verify, Not Just to Admire
Post-repair evaluation under the right lighting is one of the most underused techniques in residential work—yet professionals rely on it constantly.
After the new tile and grout have cured, review the area under multiple lighting conditions:
- Raking light from a portable work lamp placed low to the surface will reveal lippage, uneven grout joints, or subtle warping.
- Ambient room lighting will show whether sheen, color, and reflectivity align with the existing field.
- Daylight—especially indirect light—will expose variations in undertone and texture that artificial light may hide.
Use these observations to decide if micro-adjustments are needed, such as lightly refining grout lines, adjusting sealer, or even reselecting a replacement tile before the work is considered truly complete.
4. Calibrate Sealers to the Existing Patina
For natural stone, encaustic cement, and some porcelains, sealing isn’t just protection; it’s a finish choice that influences depth of color, sheen, and tactile feel.
If the original installation has aged gracefully, the repaired area may initially appear “too fresh” once sealed. To avoid this stark contrast:
- Identify whether the existing surface has a natural, enhanced, or gloss finish from its sealer.
- Test the chosen sealer on an offcut or hidden tile, comparing both wet and dry states under the same light as the main room.
- Consider that older sealers may have mellowed; sometimes a more subtle, modern sealer on the entire area (applied in phases) will bring the room into a more cohesive, refined state.
The objective is not just to protect the repaired section, but to ensure its visual language and tactile response align perfectly with what already exists.
5. Document a “Surface Dossier” for Future Protection
The most sophisticated homeowners treat their tiled spaces as custodian projects, not one-time installations. After a repair, create a concise dossier for that room, including:
- Tile manufacturer, series name, color, size, and production batch (if known)
- Grout brand, color code, and type (cementitious, epoxy, hybrid)
- Mortars, membranes, sealers, and underlayment products used
- Date and scope of the repair, with photos before and after
This document transforms any future issue—from minor crack to full renovation—into a controlled, informed process rather than a guessing game. It allows you or a future owner to maintain continuity in both performance and aesthetics, preserving the deliberate choices that were made from the beginning.
When Repair Becomes an Opportunity for Refinement
Thoughtful tile repair is not a compromise; it can be a quiet elevation of what already exists. By treating the process as an interplay of structure, material intelligence, and visual continuity, you move beyond “fixing” into curating the ongoing life of your surfaces.
Each intervention—no matter how small—is a chance to reinforce the design story of your home: confirming that lines remain true, materials remain coherent, and performance continues to match the level of detail you expect from a truly refined space.
In the end, the most successful repair is not the one no one can see; it’s the one that feels inevitable, as though the surface has always been precisely as it is now.
Sources
- [The Tile Council of North America (TCNA) – Handbook & Technical Resources](https://www.tcnatile.com/technical-information/handbook-faq.html) - Authoritative standards and guidelines for tile installation and repair best practices
- [Schluter Systems – Substrates, Movement Joints, and Waterproofing](https://www.schluter.com/schluter-us/en_US/faq/substrates) - Technical insights on substrates, movement, and waterproofing that inform proper diagnosis and repair
- [Custom Building Products – Grout & Sealer Technical Data](https://www.custombuildingproducts.com/products/grout/) - Detailed information on grout types, performance characteristics, and color considerations
- [MAPEI – Tile & Stone Installation Systems Technical Library](https://www.mapei.com/us/en-us/products-and-solutions/solutions/tile-stone-installation-systems) - Product guidance and technical literature for mortars, grouts, and membranes used in advanced repairs
- [U.S. General Services Administration – Historic Tile & Terra Cotta Preservation Brief](https://www.gsa.gov/technical-procedures/tiling-and-terra-cotta) - Federal guidelines on tile and terra cotta repair that highlight careful removal, matching, and substrate considerations