Seeing Beyond the Flaw: Reading the Tile’s Original Language
Before a single tool is lifted, a sophisticated repair begins with observation. The goal is to understand how the tile was originally intended to perform—visually, structurally, and functionally.
Look at how light travels across the surface at different times of day. A tile that appears flawless at noon may reveal lippage or micro-cracks under evening side-lighting. Examine the grout pattern: is it deliberately tight and minimal, or is the grout part of the design, framing each tile? Study transitions—where tile meets wood, carpet, or stone—and note whether a metal profile, schluter edge, or flush transition was used. These decisions reveal the original installer’s priorities and inform what type of repair will feel native to the space.
A repair that respects this “original language” will not introduce a new visual accent where none existed before. It will instead blend into the rhythm already established: matching joint widths, grout color temperature (cool vs. warm neutrals), sheen levels, and even the subtle variations in a handmade or premium tile line.
Stabilizing Before Perfecting: The Hidden Structure of Elegant Repairs
Sophisticated tile repair begins where it is least visible—beneath the surface. A premium finish is only as enduring as the substrate that supports it. When tiles crack, chip, or debond, the flaw is often a symptom rather than the root problem.
Before committing to surface-level repairs, evaluate movement and structure. Is there deflection in the subfloor when weight shifts across the area? Do hollow sounds appear when tapping tiles with the plastic end of a tool? Are cracks aligned in straight, repeating paths that suggest movement in the substrate or framing below?
Resolving underlying issues may require localized reinforcement: strategic use of patching compounds compatible with tile, underlayment repairs, or—in more severe cases—partial removal and rebuilding of a small area of the substrate. This stage is rarely glamorous, but it is what separates a repair that merely looks precise from one that remains intact through seasons of expansion, contraction, and normal household use.
True elegance in repair is not only invisible today; it is still invisible five years from now.
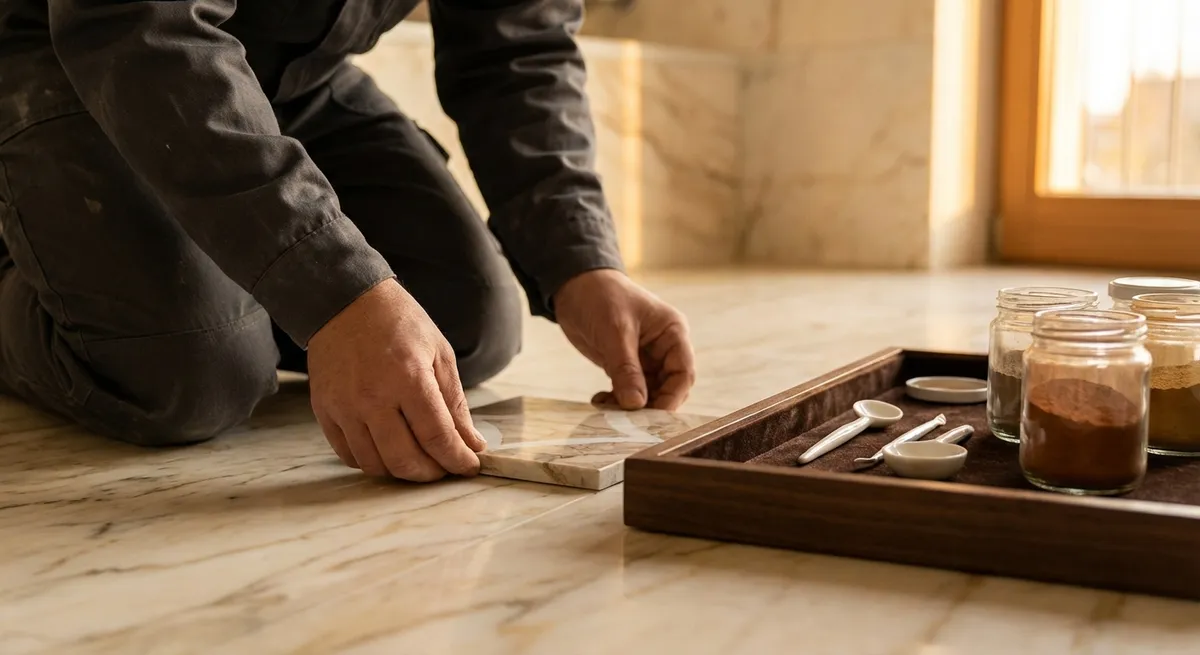
Micro-Matching: The Art of Tone, Texture, and Sheen
The difference between a competent repair and an elevated one often comes down to micro-matching—the precise alignment of color, texture, and sheen so that the eye cannot distinguish old from new.
For grout, this goes well beyond grabbing the closest pre-mixed shade. Grout color is affected by sand content, water ratio, and even the porosity of adjacent tile. A discerning approach may involve:
- Custom-tinting grout or using colorants to subtly correct tone.
- Testing small samples that are allowed to cure fully before committing.
- Considering the way sealed vs. unsealed grout alters the final appearance.
For tiles themselves, especially in premium or natural materials, subtle variation is part of the charm. Repaired areas must honor this variability, not erase it. A perfectly uniform replacement in a field of slightly variegated tiles can be more conspicuous than a very well-blended repair.
Surface sheen is equally critical. A polished, high-gloss tile with a satin repair patch will call attention to itself under raking light. Conversely, a high-sheen gloss spot on a matte porcelain will look perpetually wet. Refining the sheen—sometimes with careful polishing pads or ultra-fine abrasives—is a quiet but essential step in achieving a seamless visual field.
Precision in the Margins: Edges, Joints, and Transitions
High-end tile work is often judged at the margins—where two surfaces meet or where one material gives way to another. In repair scenarios, these zones are where the most disciplined craftsmanship is required.
Re-cutting a single edge to adjust a chipped tile, for example, is not just about filling a gap. It involves respecting the original joint spacing, keeping miters crisp, and ensuring that any profiles or trims remain perfectly aligned. In showers and wet areas, movement joints and flexible sealants must be replaced with the same discipline: neat, refined bead lines that echo the original geometry and maintain proper expansion capability.
Transitions between tile and adjacent materials also demand nuance. A slightly raised edge or asymmetric transition strip will weaken the sense of continuity in a carefully designed space. Where possible, a conscientious repair will adjust the plane so that underfoot transitions feel deliberate and comfortable, with neither snag points for textiles nor tripping hazards for occupants.
These small decisions at the edges are where a repair becomes indistinguishable from original craftsmanship.
Five Exclusive Insights for Homeowners Who Expect More
For homeowners who view their interiors as curated environments rather than simple backdrops, the following insights can help guide elevated repair decisions:
- Insist on samples of the repair strategy, not just the materials.
Ask your professional to demonstrate on a discreet test area or sacrificial tile—not only the grout color or patch compound, but the final sheen and texture after curing and sealing. This preview is far more telling than a color chip.
- Prioritize controlled removal over aggressive demolition.
Gentle extraction of damaged tiles, preserving as much surrounding structure as possible, protects adjacent grout lines and finishes. It also avoids shock and vibration that can loosen nearby tiles. Precision removal sets the stage for a discreet repair.
- Match the maintenance profile, not only the appearance.
A grout or sealant that looks correct on day one but requires drastically different maintenance than the original installation will age unevenly. Specify products whose cleaning and sealing cycles align with the rest of the space, so the repair matures gracefully.
- Consider how the repair will read under your actual lighting.
View the repaired area not only in overhead ambient light, but also under task lighting, wall washers, and natural daylight. Raking light can reveal lippage, surface filling, and sheen mismatches. Have adjustments made before final sign-off.
- Treat documentation as part of the luxury experience.
Request a brief record of what was repaired: product names, color codes, sealers used, and any structural adjustments. This quiet archive supports future work, ensures consistency if additional tiles ever need attention, and protects the design’s integrity over time.
Conclusion
Refined tile repair is less about erasing a problem and more about restoring a design conversation without interrupting it. When underlying structure is stabilized, materials are micro-matched, edges are disciplined, and the repair respects the original installation’s language, the result is not simply “fixed”—it is re-harmonized.
For homeowners who value subtlety and continuity, the most satisfying repairs are the ones that never announce themselves. They allow the room to continue speaking in a single, cohesive voice, with every tile, joint, and transition contributing quietly to a sense of enduring, cultivated order.
Sources
- [Tile Council of North America (TCNA) – Handbook for Ceramic, Glass, and Stone Tile Installation](https://www.tcnatile.com) - Industry reference for best practices in tile installation and repair standards
- [Schluter Systems – Movement Joints and Transitions](https://www.schluter.com/schluter-us/en_US/Movement-Joints/c/MJ) - Technical guidance on detailing edges, transitions, and movement joints in tile assemblies
- [Mapei – Grout Color Selection and Maintenance](https://www.mapei.com/us/en-us/products-and-solutions/solutions/grouts) - Information on grout types, color consistency, and long-term performance
- [Custom Building Products – Tile & Stone Installation Products](https://www.custombuildingproducts.com) - Product data and technical bulletins relevant to tile setting, repair mortars, and grout solutions
- [U.S. Department of Housing and Urban Development – Residential Rehabilitation Inspection Guide](https://www.hud.gov/program_offices/comm_planning/affordablehousing/training/web/rehabguid) - Broader structural and substrate considerations when evaluating and correcting building movement and damage