This is where the true luxury lies: in the planning, the tolerances, and the invisible decisions that separate a merely “nice” floor from one that feels custom-made for your home.
Designing the Substrate: Where Luxury Installation Actually Begins
Every exquisite tile installation begins where no guest will ever look—the substrate. A premium finish cannot mask a compromised foundation, and serious installers treat the underlayment as part of the design, not an afterthought.
A properly prepared substrate is flat within extremely tight tolerances, especially for large-format tile. Minor waves in the slab or subfloor translate into lippage, where one tile edge sits higher than its neighbor—a distraction the eye will catch instantly in raking light. High-end installers often use self-leveling compounds, uncoupling membranes, or floating systems to create a plane that feels almost architectural in its precision.
Beyond flatness, moisture management matters. In areas like bathrooms, entries, and lower levels, vapor barriers, waterproofing membranes, and carefully detailed transitions protect both the tile and the structure beneath. The feeling of solidity underfoot—the sense that each step is supported, not hollow or brittle—is a direct result of thoughtful substrate design. When done correctly, you do not notice it at all. You simply experience a floor that feels calm, grounded, and enduring.
Exclusive Insight #1: Grout as a Design Material, Not a Necessary Evil
Most homeowners treat grout as a necessary compromise: something to be minimized, color-matched, or ignored. In refined installations, grout is handled as a design material in its own right.
First, color selection is more nuanced than “matching the tile.” A soft tonal contrast can emphasize format and pattern without feeling busy, especially with stone-look or concrete-look porcelain. Warm grout temperatures (think putty, linen, taupe) can soften rectilinear layouts, while cooler grays and charcoals sharpen the geometry and read more architectural.
Grout joint width is equally critical. Large-format rectified tiles can handle extremely tight joints, but going as narrow as possible is not always the most sophisticated choice. The right spacing respects both the tile’s manufacturing tolerances and the room’s scale. Slightly more generous joints can make a space read more relaxed and handcrafted, particularly with textured, zellige-inspired, or stone-effect tiles.
Finally, premium installations plan grout as part of the maintenance story. High-quality cementitious grouts with added polymers, or epoxy and hybrid grouts in demanding areas, resist staining and discoloration. The result is a floor that ages gracefully—where the grout lines never announce themselves as the “oldest” part of the room.
Exclusive Insight #2: Light Mapping Your Layout Before a Single Tile Is Set
One of the least discussed yet most luxurious steps in tile installation is “light mapping” a space before committing to a layout. This involves studying how natural and artificial light move across the floor and walls over the course of a day—and then aligning the tile strategy with those observations.
Highly polished porcelain, marble, or glazed tiles will showcase every imperfection in strong side lighting. In a room with floor-to-ceiling windows, for example, long rectangular tiles placed parallel to the primary light source can amplify even minor surface irregularities. A thoughtful installer may adjust tile orientation, change to a slightly more forgiving finish (such as honed or matte), or refine substrate prep in those “high scrutiny” zones.
Light mapping also informs where to place full tiles and where to conceal cuts. Full pieces are best positioned along the most visible lines of sight: main circulation paths, openings to adjacent rooms, and areas that catch early morning or late afternoon sun. Cuts and terminations can then be discreetly tucked into less noticeable edges, under vanities, or behind built-ins. When done well, the installation feels almost photographic—composed for the way light and vision naturally move through the space.
Exclusive Insight #3: Joint Alignment as a Language Between Rooms
In elevated homes, tile is rarely isolated to one room. It moves through entries, hallways, kitchens, and baths, often meeting wood, carpet, or stone. The seams between these finishes can either feel incidental or orchestrated; the difference lies in how the joints are aligned across thresholds.
Premium installers treat grout joints as a continuous visual language. Where possible, they carry primary joint lines straight through doorways and transitions, so that the rhythm of the pattern remains consistent. Even when different tile sizes or formats meet—say, a large-format porcelain in the hallway and a smaller mosaic in the bath—there is often a hidden geometric relationship. The smaller module may be sized or placed to “nest” with the larger joints, subtly preserving alignment.
This level of coordination requires early collaboration. Tile choice, tile size, and even door locations can be influenced by a commitment to joint coherence. The reward is a home that feels exquisitely intentional: the eye catches a sense of harmony, even if the viewer cannot articulate why every room feels so quietly connected.
Exclusive Insight #4: Specifying Movement Joints with Discretion and Elegance
Movement joints—those subtle breaks that allow tile assemblies to expand and contract—are essential to long-term performance, especially over large expanses or in areas subject to thermal swings. In lesser installations, they appear as awkward, mismatched caulk lines or intrusive metal profiles. In elevated work, they are planned, integrated, and nearly invisible.
Refined installers reference professional standards for maximum field size and perimeter joints, then translate those technical requirements into a discreet design language. Movement joints may align with natural breaks in the architecture: a shift between spaces, a change in ceiling plane, a column, or a built-in element. In some instances, a change in tile pattern or direction at those same lines makes the joint feel like a deliberate design moment rather than a technical necessity.
Material selection also matters. Color-matched, high-performance sealants, thoughtfully chosen transition strips, and well-positioned control joints can maintain a seamless visual field while honoring the realities of building movement. The result is a floor that feels monolithic and serene—but is, in fact, cleverly segmented for durability.
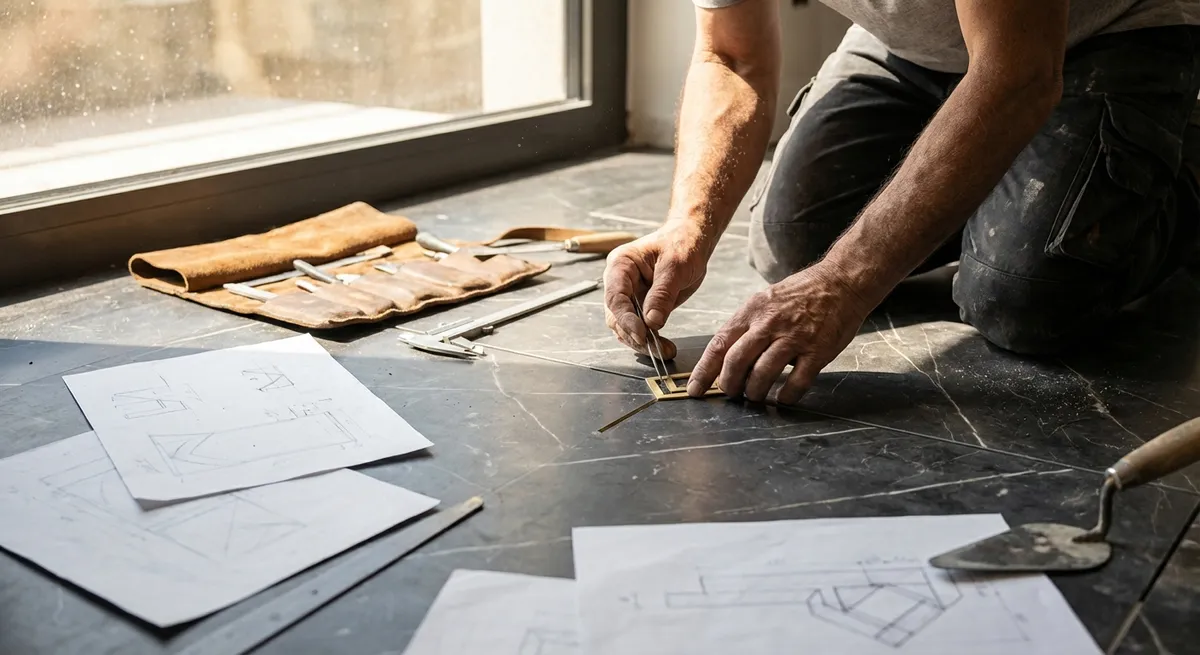
Exclusive Insight #5: The Mockup as a Luxury, Not an Indulgence
For sophisticated homeowners, insisting on a full-scale mockup is not overkill; it is part of commissioning bespoke work. A physical mockup—whether a small wall panel or a section of floor—reveals truths that drawings and samples on a showroom table cannot.
In a mockup, you see the real-world interaction of tile finish, grout color, joint width, and lighting. You can test the edge profiles on stairs or niches, confirm how a pattern reads at the scale of the room, and verify that the tile format feels balanced against cabinetry, fixtures, and architectural lines. Subtle issues—such as a shade variation that feels too pronounced or a grout color that reads warmer than expected next to your paint—can be identified and corrected long before they become permanent.
This step also allows your installer to establish and demonstrate their standard of precision: how tightly they manage lippage, how consistent their joints are, and how carefully they handle cuts around outlets, trims, and hardware. In luxury projects, the mockup becomes both a design instrument and a quality benchmark—an agreed-upon target that ensures the final installation lives up to the vision.
Conclusion
Exceptional tile work is as much about discipline as it is about design. Materials may catch the eye, but it is the underlying rigor—the unseen substrate, the deliberate grout strategy, the choreographed response to light, movement, and room-to-room alignment—that creates a sense of quiet luxury underfoot.
For homeowners who care about refinement, the opportunity is clear: treat tile installation not as a commodity service, but as a crafted collaboration. Ask how the substrate will be prepared, how grout will be specified, how joints will align, where movement joints will be concealed, and whether a mockup will precede the final work. Those conversations do not simply protect your investment; they are the foundation of a home where every surface feels considered, composed, and unmistakably bespoke.
Sources
- [ANSI A108 / A118 / A136.1 Tile Installation Standards (TCNA)](https://www.tcnatile.com/faqs/79-ansi-standards.html) - Industry standards referenced by professionals for substrate prep, setting materials, and installation tolerances
- [TCNA Handbook for Ceramic, Glass, and Stone Tile Installation](https://www.tcnatile.com/products-and-services/publications/tcna-handbook.html) - Authoritative installation methods and details for floors, walls, and wet areas
- [Schluter Systems – Movement Joints and Uncoupling Membranes](https://www.schluter.com/schluter-us/en_US/Movement-Joints/c/MOV) - Technical guidance on managing building movement and protecting tile assemblies
- [Custom Building Products – Surface Preparation Guidelines](https://www.custombuildingproducts.com/how-to-guide/surface-preparation) - Practical recommendations on substrate flatness, moisture control, and underlayments
- [National Tile Contractors Association (NTCA) – Technical Resources](https://www.tile-assn.com/page/technical) - Professional resources on best practices, standards, and detailing for high-quality tile installations