This guide explores how to think about tile installation as a refined design practice, not a commodity service. Along the way, you’ll find five exclusive, often-overlooked insights that discerning homeowners appreciate when working with tile in high-end spaces.
Designing from the Threshold: Planning the First Impression Line
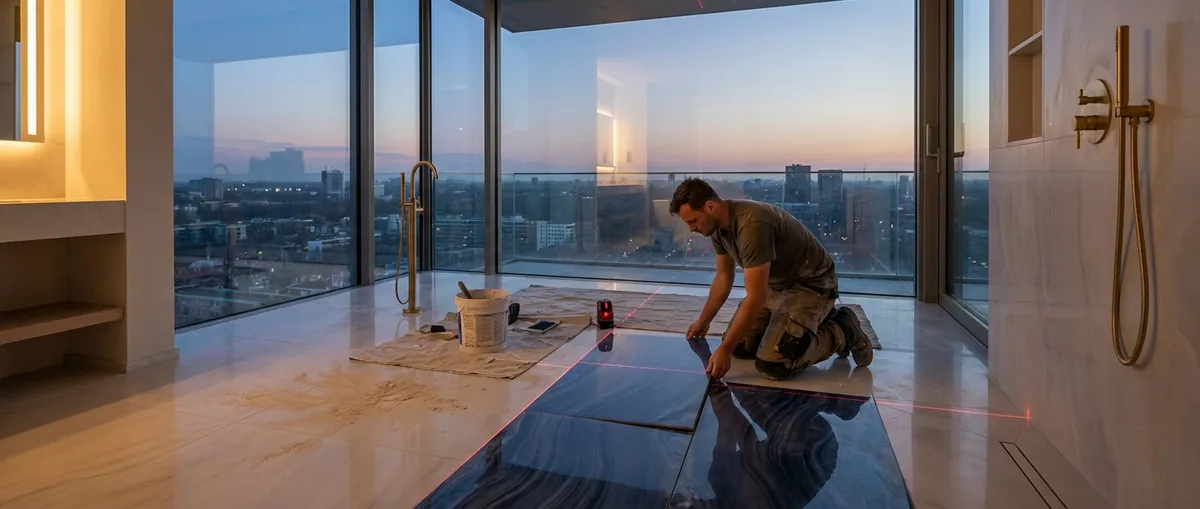
Exceptional tile work begins long before a single piece is set. The most sophisticated floors and walls are planned from the primary viewpoint—often the entry or main circulation line—rather than from a random corner of the room.
A seasoned installer will “design the grid” around how you actually move through the space. This means aligning grout joints with key architectural features: doorways, window mullions, the centerline of an island, the edge of a fireplace, or a freestanding tub. Instead of cutting tiles at your primary sightline, full tiles are showcased where the eye naturally lands, with cuts discreetly shifted to less visible perimeters.
This visual orchestration is particularly impactful in open-plan spaces where tile runs continuously between rooms. A well-planned layout allows joints in one area to resolve elegantly into another, creating a sense of effortless continuity. It’s not just about symmetry; it’s about understanding how perspective, light, and movement reveal the installation throughout the day.
Exclusive Insight #1: Ask your installer where the “hero line” begins.
Before work starts, stand in the main entry to the room and ask how the tile pattern will present itself from that vantage point. A premium installation always has an intentional starting line designed for the eye—not merely for convenience.
Quiet Geometry: Pattern, Scale, and the Discipline of Alignment
In refined interiors, pattern is less about loud statements and more about disciplined geometry. The relationship between tile size, space dimensions, and grout joint placement dictates whether a room feels composed or restless.
Large-format tiles, for example, can create a serene, gallery-like effect, but only if the substrate is meticulously prepared and the layout is thoughtfully proportioned. Running large tiles randomly or “where they fit” undermines their intended calm. Similarly, classic patterns—herringbone, chevron, stack bond, or Versailles—acquire sophistication when they are carefully aligned with walls, thresholds, and key design axes.
The scale of the tile should also engage proportion: oversized tiles in a modest bath can look theatrical or cramped unless the pattern resolves cleanly around fixtures, niches, and openings. Conversely, smaller formats in large rooms can feel busy unless joints and transitions are planned to create visual “pauses.”
Exclusive Insight #2: Request a dry layout in a key area before permanent installation.
A short, on-site dry run—especially for a feature wall, shower, or central floor area—allows you to confirm joint alignments, pattern direction, and focal points. This step, often skipped in rushed projects, is standard practice in elevated work.
The Subtle Luxury of Flatness, Transitions, and Movement
In luxury tile installation, the surface is not just level—it is composed. Flatness, transitions, and movement joints are where high-caliber work quietly announces itself.
A flawlessly prepared substrate ensures large-format porcelain, natural stone, and thin-panel materials sit in a single visual plane, without “lippage” (tiny height differences between neighboring tiles). This is particularly critical under raking light from windows or linear fixtures, where every deviation is amplified. Beneath that visual serenity lie self-leveling underlayments, carefully selected mortars, and an uncompromising approach to prep.
Equally important are transitions between materials: stone to hardwood, porcelain to carpet, mosaic to slab. Poor transitions introduce tripping points, visible height differences, and awkward trims. Refined work treats each transition as a design detail—flush or subtly stepped, with profiles chosen to complement the architecture, not distract from it.
Then there are movement joints: invisible to most eyes, but essential. Tile expands and contracts with temperature and moisture. Strategic, almost hidden joints prevent cracking in expansive floors and sunlit rooms. In premium projects, these joints are integrated into the pattern so they look intentional, not like afterthoughts.
Exclusive Insight #3: Insist on a transition and movement-joint plan.
Before installation, review where transitions, expansion joints, and soft joints (flexible joints in place of grout) will be located. In a truly considered project, these are coordinated with sightlines, pattern breaks, and thresholds—not left to chance.
Grout as Couture: Color, Joint Size, and the Texture of Light
To the untrained eye, grout is a technical necessity. In refined interiors, it’s a design instrument—one that can either unify the composition or fragment it.
Color is the most obvious variable, but the nuance lies in what the grout is asked to do. A tone-on-tone grout creates a monolithic, continuous surface with minimal visual interruption, ideal for serene, contemporary rooms. A slightly contrasting shade can emphasize pattern in a herringbone or mosaic, lending definition without visual noise. High contrast, used judiciously, can make a deliberate graphic statement.
Joint width and profile matter as much as color. Narrow, precise joints feel tailored and modern but require extremely accurate tile manufacturing and substrate preparation. Wider joints can suit rustic stone or handmade tiles, allowing subtle variation to read as intentional character, not defect. Even the final tooling of the joint—whether gently concave, flush, or slightly proud—affects how light rakes across the surface.
Material performance is equally critical. For example, epoxy grout offers superior stain resistance and color stability—ideal for chef-level kitchens and spa-style baths—while specialized grouts may be chosen to protect natural stone or withstand heavy outdoor conditions.
Exclusive Insight #4: View grout samples in place, not just on a chart.
Request that your installer or designer prepare a small sample board or test area with your actual tile and two or three grout options. Evaluate them under the actual lighting conditions (day and night) to understand how grout will alter the perception of the entire surface.
Coordination with Fixtures, Stone, and Millwork: Where Rooms Feel “Custom”
The finest tile installations do not exist in isolation—they converse with millwork, stone, metalwork, and fixtures. When these elements are coordinated rather than merely accommodated, a room takes on a bespoke, fully resolved character.
In bathrooms, tile joints can be aligned with the edges of vanities, mirrors, and shower glass panels, creating a sense of purposeful tailoring. Niche locations can be designed to land cleanly within tile modules, avoiding awkward slivers or off-center cuts. In kitchens, backsplash tiles can be composed so that outlets, range hoods, and open shelves integrate seamlessly, rather than interrupt the pattern.
Similarly, when stone thresholds, window stools, or slab benches meet tiled surfaces, their dimensions can be thoughtfully coordinated so joints align and cuts are minimized. Even small decisions—like aligning a floor joint with a cabinet toe-kick or designing a tile plinth to receive custom millwork—signal that every decision was made in concert.
This level of coordination demands involvement during planning, not merely at installation. Your tile installer, designer, cabinetmaker, and stone fabricator should be exchanging dimensions, shop drawings, and mockups well before a trowel touches thinset.
Exclusive Insight #5: Treat tile as part of the millwork and stone package, not an isolated trade.
Invite your tile professional into early design meetings. Ask them to review cabinet layouts, stone details, and plumbing locations. When tile is designed alongside these elements, the end result feels custom-built rather than retrofitted.
Conclusion
Tile, at its highest expression, is not a surface treatment—it is a quiet architecture of lines, planes, and joints. The difference between “nicely tiled” and truly refined work is found in how thoughtfully the layout responds to the room, how rigorously the substrate is prepared, how intelligently transitions and joints are integrated, and how precisely grout and patterns are composed.
For homeowners who value subtle luxury, the most meaningful investments are invisible to casual observers: the planned hero line from the doorway, the disciplined geometry, the rigor behind flatness and expansion, the couture-level grout decisions, and the early coordination with millwork and stone. Attend to these, and your tile installation will feel less like a finish—and more like the foundation of a beautifully resolved home.
Sources
- [Tile Council of North America (TCNA) Handbook](https://www.tcnatile.com/products-and-services/publications/tcna-handbook.html) - Industry reference for tile installation standards, methods, and best practices
- [American National Standards Institute (ANSI) – A108/A118/A136.1](https://webstore.ansi.org/standards/tca/ansia108a118a1361) - Technical standards governing ceramic tile installation and materials in the U.S.
- [Schluter Systems Technical Resources](https://www.schluter.com/schluter-us/en_US/technical-center) - Detailed guidance on substrate preparation, movement joints, and transitions for advanced tile assemblies
- [LATICRETE Technical Data Sheets](https://laticrete.com/en/support-and-downloads/technical-data-sheets) - In-depth information on mortars, grouts, waterproofing, and performance characteristics for tile installations
- [National Tile Contractors Association (NTCA) Reference Manual](https://www.tile-assn.com/page/ntca-reference-manual) - Professional resource covering troubleshooting, best practices, and detailing for high-quality tile work