Below, we explore refined repair solutions shaped for homeowners who value precision, discretion, and longevity. Woven through the guidance are five exclusive insights—subtle advantages that design-conscious owners rarely hear from a standard contractor’s visit.
Reading the Damage Like a Design Professional
Before anyone reaches for grout or adhesive, the most important step is interpretation. Not all cracks, chips, or loose tiles tell the same story.
Hairline cracks across multiple tiles may indicate substrate movement or structural shifts, not merely brittle tile. Corners that lift or hollow sounds when tapped can signal inadequate thinset coverage or moisture intrusion. Staining that refuses to lift could be a symptom of improper sealing or the use of harsh cleaners earlier in the tile’s life.
Instead of treating every imperfection as identical, aim to understand the pattern. Photograph the area in daylight and evening light, note where in the room the damage appears (transitions, high-traffic paths, near plumbing lines), and observe whether the issue is spreading over time. This brief period of disciplined observation transforms repair from reactionary to strategic.
Exclusive Insight #1: Treat recurring or patterned damage as a design problem, not a cosmetic flaw.
When the same type of damage appears in more than one area, it is usually pointing to an underlying failure—of substrate, movement joints, waterproofing, or installation methods. Addressing that root cause first will safeguard any new work and maintain the visual integrity of the space over years, not months.
Curating Replacement Materials with Museum-Level Discipline
For discerning interiors, “close enough” tile rarely is. Achieving a seamless repair often depends less on technique and more on the rigor of sourcing.
Begin with your existing documentation: original invoices, project spreadsheets, or emails from your designer or builder. Note manufacturer, series, color code, finish, size, and production date or batch if available. Many premium tile brands maintain archives and can advise on whether your exact line is still in production or if there is a recommended successor that harmonizes.
When the original tile is discontinued, resist the temptation to substitute impulsively. Request samples from multiple potential matches and view them in the exact space and lighting conditions—daylight, evening, and artificial light. Evaluate not only color but also edge profile, surface reflectivity, and texture.
Exclusive Insight #2: Never finalize a replacement tile match under showroom lighting alone.
Lighting temperature and intensity can shift a “perfect” match into a distracting mismatch once installed at home. Assess samples in situ at different times of day; this is the kind of small, quiet control that separates an acceptable repair from an invisible one.
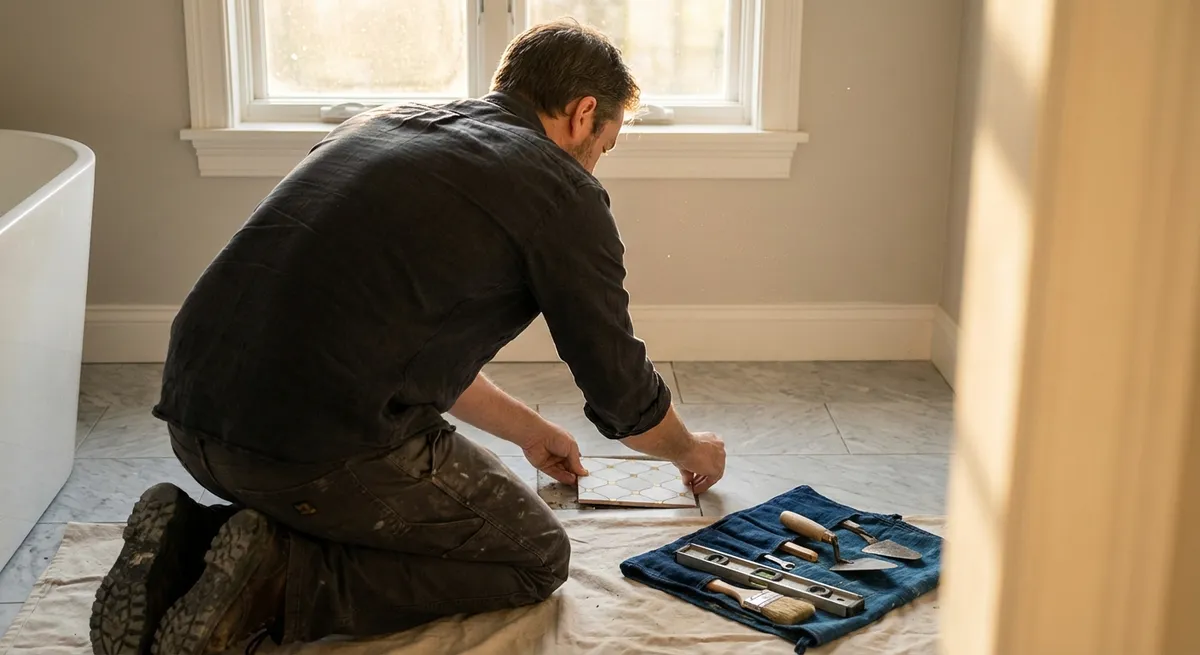
Precision Demolition: Preserving the Surrounding Field
Thoughtful tile repair is as much about what you do not disturb as what you touch. Removing a single damaged tile in a composed layout—especially in large-format, natural stone, or intricate patterns—requires almost surgical restraint.
Use painter’s tape to map a protective boundary beyond the damaged area. For delicate stones or polished surfaces, a protective film or cardboard shield over neighboring tiles can absorb accidental tool slips. Specialized oscillating tools with grout-removal blades, combined with careful scoring, allow you to isolate the tile without compromising the surrounding grout joints.
Work from the center of the damaged tile outward, rather than attacking edges first. This reduces lateral pressure on adjacent tiles and helps preserve the geometry of the original layout. Any fragments that resist removal may be adhered to a substrate issue worth examining before you reset the new piece.
Exclusive Insight #3: The real mark of a premium repair is undisturbed geometry.
Even if the surface color and finish match perfectly, a slightly skewed replacement tile, altered joint width, or distorted pattern rhythm will be visible to a trained eye. Prioritize keeping grout lines, alignment, and pattern continuity intact over speed of demolition.
Grout and Finish: Where Most Repairs Reveal Themselves
In many homes, the giveaway that a tile has been replaced is not the tile itself, but the grout and finishing details. Mass-market grouts can age, discolor, or cure differently from the original, leaving a subtle but persistent “box” around the repaired area.
Whenever possible, identify the exact grout brand, line (e.g., cementitious vs. epoxy), color code, and any additives used in the original installation. If this is unavailable, create sample boards with small offcuts or spare tiles and test several grout options in thin, narrow joints. Observe them once dried and again after light cleaning to see how they settle in tone and texture.
Sealing is equally important. For natural stone or unglazed tile, selecting a penetrating sealer with the correct sheen level—matte, satin, or gloss—can determine whether the repair quietly merges or reflects light differently from the field. Apply sealer consistently across the entire visual field, not just the repaired zone, to avoid “halo” effects.
Exclusive Insight #4: Micro-variations in grout texture can be more visible than color differences.
Even when the hue appears identical, a grout that cures too smooth, too sandy, or with an inconsistent surface will draw the eye in raking light. Study the original joints up close and match not just color, but also granularity and sheen to maintain cohesion.
Future-Proofing the Next Repair: Creating a Tile Archive
The most sophisticated repair strategy begins long before anything is damaged. High-end projects often skip a simple step that would turn future repairs from stressful to effortless: intentional over-ordering and archiving.
When planning or revisiting a tiled space, assemble a dedicated “tile archive” box including spare tiles (ideally 5–10% of the installed quantity), offcuts, original grout containers or labels, adhesive and sealer information, and notes on the installation sequence. Store this in a climate-stable area, clearly labeled by room and date, and keep a digital record (photos and PDFs) of invoices and product data sheets.
This archive not only supports seamless repairs but also enables more ambitious future modifications—such as reconfiguring thresholds, expanding a tiled area, or integrating underfloor heating—without jarring material transitions.
Exclusive Insight #5: Treat spare tile and documentation as part of the room’s long-term finish, not leftover construction waste.
A carefully curated archive transforms repair from an improvisation into a continuation of the original design intent. For homes positioned as long-term assets or generational properties, this quiet foresight protects both aesthetic coherence and resale value.
Conclusion
Refined tile repair is less about erasing damage and more about restoring composure. When you read the underlying cause, curate replacement materials with rigor, protect adjacent work during demolition, perfect the grout and finish, and maintain a thoughtful archive, each intervention becomes nearly invisible—an act of stewardship rather than triage.
For homeowners who view their interiors as considered compositions rather than disposable backdrops, this approach to repair is not an indulgence; it is alignment with the very standard that guided the original design. The result is a home whose surfaces age gracefully, where every correction is as disciplined and deliberate as the day the first tile was set.
Sources
- [Tile Council of North America (TCNA) Handbook](https://www.tcnatile.com/publication-main/handbook.html) - Industry reference for tile installation standards, substrates, movement joints, and best practices that underpin durable repairs
- [American National Standards Institute (ANSI) A108/A118/A136.1](https://webstore.ansi.org/standards/tcmna/ansia108a118a1361) - Technical standards for installation materials and methods, relevant when diagnosing underlying causes of tile failure
- [Schluter Systems – Technical Articles on Substrates and Movement Joints](https://www.schluter.com/schluter-us/en_US/technical) - Manufacturer guidance on substrates, uncoupling, and expansion strategies that help prevent recurrent tile damage
- [Laticrete – Grout and Sealer Product Data Sheets](https://laticrete.com/en/tile-and-stone-installation/grouts) - Detailed information on grout types, performance, and sealing that informs premium grout-matching and finishing decisions
- [University of Florida IFAS – Home Moisture & Mold Resources](https://edis.ifas.ufl.edu/entity/topic/moisture_and_mold) - Educational material on moisture behavior in homes, useful for understanding tile damage related to water intrusion and substrate conditions