This guide explores repair solutions through a more discerning lens, revealing five exclusive insights that transform tile repairs from crude patchwork into nearly invisible, architecturally literate corrections.
Repair as Continuity, Not Patchwork
When tile fails—a hairline crack, a hollow-sounding tile, or a loosened corner—the instinct is often to “replace what’s broken.” In sophisticated interiors, that thinking is too narrow. The more elevated approach is to ask: How does this repair sustain the original design intent?
Instead of swapping a single visibly damaged tile, a continuity-focused strategy might extend the repair into a discreet visual boundary—replacing a controlled cluster of tiles within a grout grid so the eye reads it as part of the original layout, not as a solitary scar. On patterned or large-format installations, preserving alignment and joint rhythm becomes more important than preserving every original tile. Sometimes this means removing seemingly “intact” neighbors to maintain pattern integrity and plane flatness, ensuring light still travels elegantly across the surface with no hint of disruption.
Continuity also extends to transitions and thresholds. A repair at a doorway, stair nosing, or along a built-in should be evaluated in context of how it interacts with adjacent materials—wood, metal, or carpet—so that the relationship between surfaces remains poised and intentional.
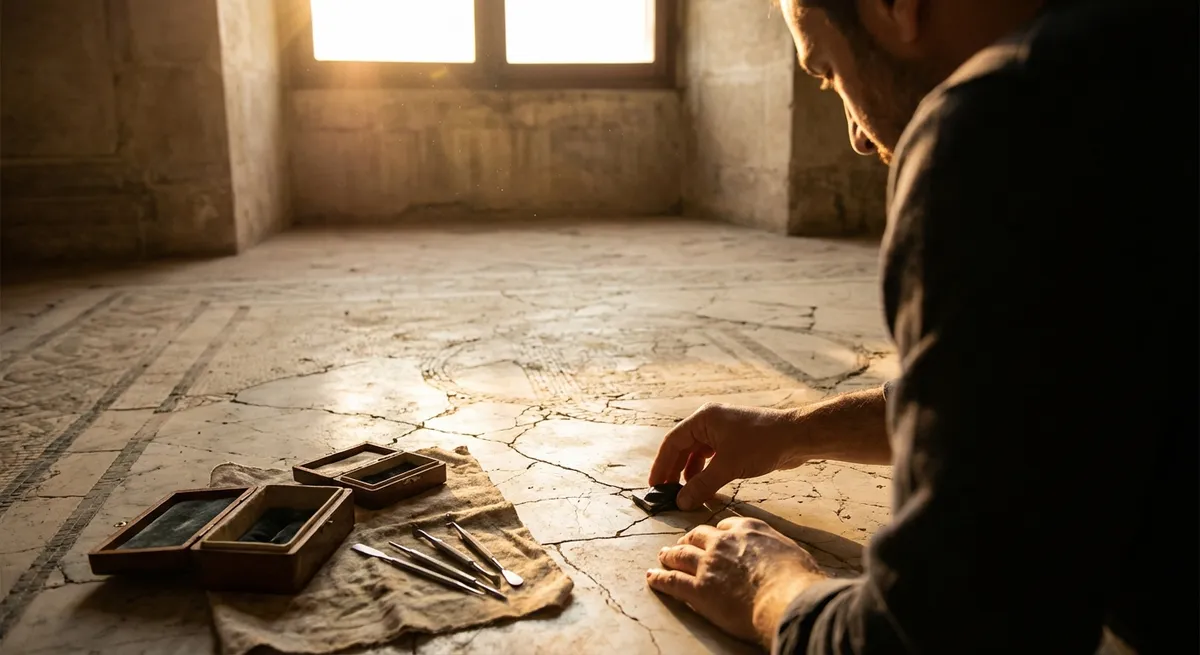
The Substrate First: Invisible Causes, Visible Consequences
Tile rarely fails in isolation. Cracks, debonding, and hollow spots often tell a deeper structural story that must be addressed to achieve a lasting, premium repair. Attention gravitates to the tile surface, but the true sophistication lies in interrogating what lies beneath.
An expert repair begins with a forensic assessment: checking for deflection in wood subfloors, moisture intrusion in concrete slabs, or improperly installed underlayment. A refined practitioner will measure flatness with straightedges, test for moisture where appropriate, and evaluate movement joints (or the lack thereof) around the perimeter and at large spans.
Only after the substrate’s condition is fully understood should removal and rebuilding proceed. High-end repairs may include re-leveling a localized area with a self-leveling underlayment, adding an uncoupling membrane to control future movement, or adjusting underlayment fastening patterns to reduce flex. Though invisible when complete, these measures are what distinguish a superficial fix from a repair that ages gracefully, in harmony with the home’s structure.
Tone, Texture, and Time: Achieving Seamless Visual Integration
The most conspicuous tile repairs rarely fail due to technique alone—they fail because the replacement tile and grout read as “new” in a field that has matured and mellowed over years. Light, wear, and subtle patina give existing tile an aura that is challenging to re-create. Masterful repair work respects this reality and compensates for it.
Rather than simply grabbing a “matching” box of tile, a discerning homeowner or professional will:
- Draw from attic stock or surplus from the original installation when available.
- If original material is unavailable, source tile with near-identical size, edge profile, and finish, then test-fit in daylight beside existing tiles.
- Recognize that grout is rarely just “white” or “gray”; existing grout may have absorbed micro discolorations over time. Custom-tinting grout or choosing a slightly softened hue can deliver a more harmonious result than a theoretically perfect color-match from a chart.
- Consider micro-texture: matte vs. polished, rectified vs. cushioned edges, and even micro-chips along original grout lines. Subtle edge softening on new tiles or slight honing of glossy surfaces can help new materials blend with lived-in counterparts.
Lighting should be part of this evaluation. Walk the space at different times of day and under various lighting scenes to confirm the repair does not “flash” differently under grazing light or highlight a shift in reflection or sheen. Patience in this phase is often what allows a repair to disappear from daily awareness.
Precision Demolition and Reinstallation: Protecting the Surrounding Field
A refined repair is as much about what it preserves as what it replaces. Aggressive chiseling and careless demolition can chip edges of adjacent tiles, fracture underlayments, or telegraph cracks into neighboring joints. In premium spaces, a surgical approach is non-negotiable.
Professionals working at a high standard will often:
- Score grout joints cleanly with oscillating tools or diamond blades sized precisely to the joint width.
- Use controlled, incremental removal techniques (such as drilling the center of a damaged tile to relieve tension, then lifting pieces toward the center rather than prying against neighboring tiles).
- Protect surrounding tile with painter’s tape, foam, or thin protection boards during removal and reinstallation.
- Check and re-establish plane alignment before setting the replacement tile, ensuring no “toe-catch” lips or subtle depressions that could disturb the smooth, continuous plane.
Equally refined is the attention to adhesive coverage and cure time. High-performance thinsets, carefully keyed and troweled, should yield nearly full coverage beneath the replacement tile, particularly in wet environments or on large-format pieces. After installation, resisting the temptation to rush traffic back onto the area preserves bond integrity and protects delicate edges during curing.
Five Exclusive Insights for Discerning Homeowners
Beyond these broader principles, there are a handful of nuanced insights that those with a cultivated eye for detail will particularly appreciate:
Strategic Recomposition Over One-to-One Replacement
In some cases, a single damaged tile offers an opportunity to subtly rebalance the entire composition. For example, on a patterned floor, replacing a small motif segment across a larger visual “block” can re-establish symmetry or alignment that may have been compromised by an earlier installation, all under the guise of repair.
Grout as a Design Instrument, Not a Filler
During repairs, consider whether the grout joint is functioning as intended. Tightening or marginally widening joints (within tolerance) across a localized repair area can refine the rhythm of the grid, relax visual tension, or better align to cabinetry, fixtures, or thresholds. While the overall system must remain structurally sound, selective grout recalibration can subtly elevate the entire field.
Embracing Discreet Inlays as a Luxurious Solution
When a perfectly seamless repair is impossible—perhaps the tile is discontinued and no true match exists—an elegant alternative is to convert necessity into intentional design. A carefully proportioned inlay, border, or medallion in stone, metal, or a complementary tile can transform a forced substitution into an apparent design decision, aligned with the room’s geometry and focal points.
Moisture Mapping in Wet Areas Before Any Surface Work
In showers, steam rooms, and spa-like baths, visible damage often trails behind invisible moisture issues. Before considering surface repair, a more sophisticated path includes moisture mapping, checking ventilation, and evaluating waterproofing continuity. Addressing potential leaks or vapor migration beneath the tile ensures that repairs are not merely cosmetic, but genuinely protective of the home’s structure and finishes.
Future-Proofing with Hidden Access and Thoughtful Joints
When repairing floors near plumbing, heating manifolds, or junction boxes, it can be advantageous to integrate discreet access points within the tile layout—concealed panels or carefully aligned joints that can be removed in the future without compromising the surrounding field. Likewise, adding or improving movement joints at logical architectural breaks (doorways, long corridors, between heated and unheated zones) can insulate the installation from future cracks and minimize the need for subsequent interventions.
These insights move tile repair beyond crisis response and toward strategic refinement—each decision contributing to the enduring calm and coherence of the space.
Conclusion
Exquisite tilework is one of the most enduring expressions of a sophisticated home, and repairs need not diminish that legacy. When treated as an art of salvage—rooted in substrate integrity, visual continuity, and reverence for light, texture, and time—repair becomes an extension of the original craftsmanship, not a compromise to it.
For homeowners who value quiet precision over conspicuous intervention, investing in elevated repair solutions ensures that every surface, even after adversity, continues to feel composed, intentional, and beautifully resolved underfoot.
Sources
- [The Tile Council of North America (TCNA) Handbook](https://www.tcnatile.com) - Industry standards and best practices for tile installation and repair
- [Schluter Systems – Substrate & Movement Joint Guidelines](https://www.schluter.com/schluter-us/en_US/techcenter/faq/movement-joints) - Technical guidance on movement joints, uncoupling, and substrate considerations
- [U.S. Department of Housing and Urban Development – Residential Rehabilitation Guide](https://www.huduser.gov/portal/publications/resrehab.html) - Broader context on durable rehabilitation practices and substrate issues in residential construction
- [International Association of Certified Home Inspectors – Tile and Stone Inspection Guide](https://www.nachi.org/ceramic-tile-inspection.htm) - Common causes of tile failure and inspection methods that inform high-quality repairs
- [National Institute of Standards and Technology (NIST) – Moisture in Buildings](https://www.nist.gov/programs-projects/moisture-management) - Research-based insight into moisture behavior, crucial for understanding and repairing tile assemblies in wet areas