Below are five exclusive, often-overlooked insights that elevate tile installation from acceptable to exceptional—exactly the level of work Tile Pro Tips readers expect and demand.
The Substrate Dictates the Story
Every flawless tile surface begins long before the first tile is set. The substrate—the surface beneath your tile—quietly controls everything: alignment, lippage, grout performance, and long-term durability.
For floors, that means insisting on flatness, not just “level.” Industry standards typically call for no more than 1/8" deviation in 10 feet for large-format tile, and even minor waves telegraph as visual noise once the tile is down. For walls, particularly in bathrooms and showers, properly installed backer board or approved substrates prevent movement, moisture intrusion, and those subtle cracks that never seem to stop spreading.
A refined installation often includes self-leveling underlayment for floors, careful shimming or planing of wall studs, and the use of decoupling membranes where appropriate. Homeowners should not hesitate to ask their installer how they will achieve substrate flatness and movement control. The most sophisticated tile work is rarely about rescuing a bad surface; it is about refusing to tile over one in the first place.
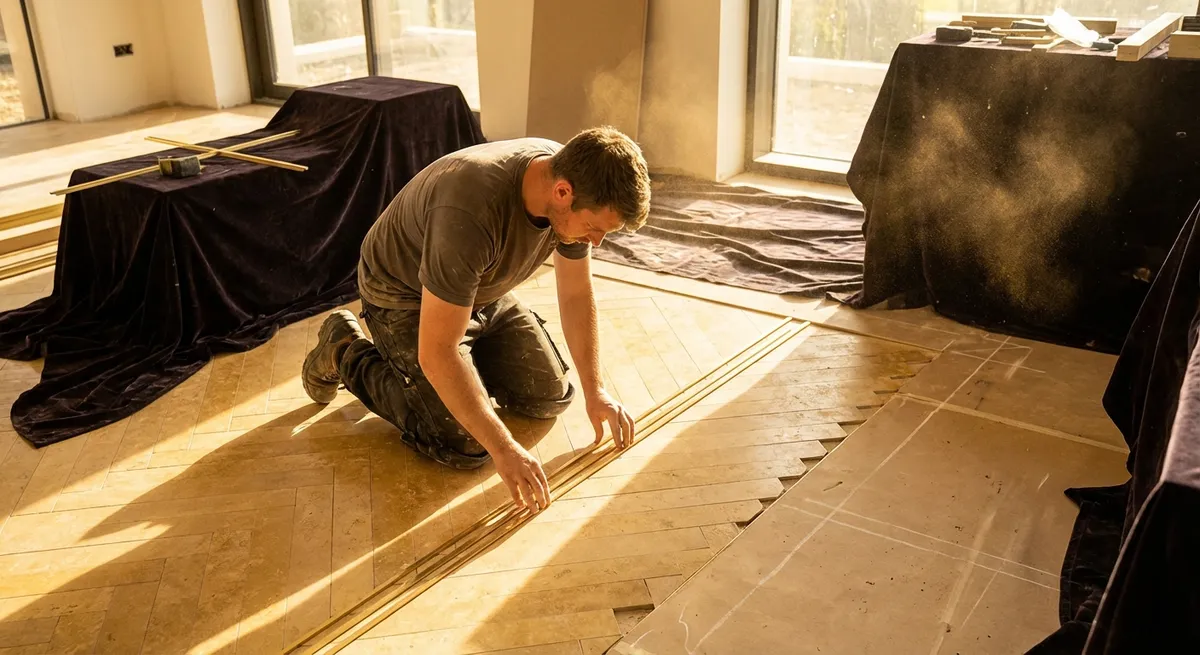
Light, Sightlines, and the Art of the First Tile
The most exclusive tile installations are composed around light and sightlines, not just room dimensions. Where your eye naturally lands when you enter a space should almost never be a cut tile or a glaringly narrow sliver. Instead, that first impression point should receive full tiles, beautifully aligned.
A thoughtful installer will “walk the room” before laying a single piece, studying natural and artificial light, doorways, and primary viewing angles. In a shower, that might mean centering tile on the back wall, so the niche sits elegantly within a full tile grid rather than interrupting it awkwardly. In a foyer, it could mean adjusting the layout so the line you see from the front door runs parallel and true to the primary corridor, even if that requires subtle compromise along a hidden edge.
Sophisticated homeowners know to ask: “Where will you start the layout, and why?” The answer should include more than measurements—it should reference how the space is actually experienced. This is design intelligence married to technical competency, and it is what gives a tiled room its quiet authority.
Grout as a Design Material, Not an Afterthought
Many homeowners spend weeks selecting tile, then treat grout as an item to “pick quickly at the end.” In elevated projects, grout is never incidental. It is a design material with its own aesthetic and performance profile.
The width of the joint changes the entire character of the surface. Ultra-tight joints may feel sleek and contemporary but demand extremely flat tile and a flawless substrate. Slightly wider joints can introduce a sense of rhythm and craftsmanship while helping to visually correct small irregularities. The grout color, meanwhile, either blends—creating a seamless field—or contrasts, emphasizing the geometry of each tile.
Beyond appearance, grout type matters. For heavily used kitchens and baths, high-performance or epoxy grouts resist stains, discoloration, and moisture far more consistently than traditional cementitious options. Their upfront cost is higher, but they deliver a surface that continues to look curated rather than slowly compromised.
Homeowners who treat grout as part of the design brief—aligning its texture, sheen, color, and maintenance profile with the tile and the room’s use—end up with installations that feel complete rather than almost finished.
Movement Joints: The Invisible Insurance of Fine Tile Work
Truly elevated tile installations accept a simple truth: buildings move. Temperature changes, humidity shifts, structural deflection—these forces are subtle but relentless. Refined tile work does not pretend they do not exist; it accommodates them thoughtfully.
Movement joints—discreet, flexible breaks within large expanses of tile—allow the assembly to absorb these shifts without cracking tile or stressing grout. Perimeters, transitions to other materials, and long runs in sun-drenched spaces are all candidates for properly detailed expansion or soft joints. The most sophisticated projects weave these joints into the design: a narrow, precisely aligned silicone joint matching the grout color at the room perimeter, for example, or a carefully located transition that visually reads as a deliberate design line, not a technical concession.
Homeowners should be wary of any installer who dismisses movement joints as “unnecessary.” Industry standards and manufacturers’ instructions are clear on their importance. Invisible when done well, they are the quiet insurance policy that preserves the integrity—and the investment—of fine tile over decades, not just years.
Thinset as a Precision Instrument, Not Just Glue
In premium tile work, thinset is treated less like adhesive and more like a structural component that must be perfectly matched to its task. Different tiles and conditions demand different mortars—standard, medium-bed (large-and-heavy-tile mortar), rapid-setting, or highly deformable formulations—each with specified uses.
Back-buttering large-format or dense porcelain tiles is one of those fine details that separates routine work from exemplary practice. It improves coverage, bonds more securely, and reduces voids that can lead to cracks or hollow sounds. The trowel notch size, the direction of the ridges, and the way tiles are pressed and moved into place all contribute to achieving the coverage recommended by industry standards and manufacturers.
Sophisticated homeowners can—and should—ask specifics: “Which mortar are you using for this tile and why?” and “How will you verify coverage?” A premium installer will have precise answers, not vague assurances. The result is a surface that not only looks exacting on day one but resists debonding, tenting, and other failures that betray rushed or generic technique.
Conclusion
Exquisite tile work seldom announces itself loudly. Instead, it quietly reassures: every line is intentional, every joint controlled, every surface calm. For homeowners, the path to that level of refinement is not learning to install tile—it is learning to recognize and insist upon the disciplined decisions that define masterful installation.
By respecting the substrate, choreographing layout around light and sightlines, elevating grout to its proper importance, honoring movement with subtle joints, and treating thinset as a precision material, you transform tile from a mere finish into a crafted architectural element. The difference is not just visible; it is deeply felt every time you cross the room.
Sources
- [Tile Council of North America (TCNA) Handbook](https://www.tcnatile.com/products-and-services/publications/tcna-handbook.html) - Industry-recognized standards and guidelines for tile installation, including substrate prep, movement joints, and coverage.
- [American National Standards Institute (ANSI A108/A118/A136.1)](https://webstore.ansi.org/standards/tca/ansia108a118a1361-2022) - Technical standards governing ceramic tile installation methods, materials, and performance.
- [Schluter Systems – Movement Joint Profiles](https://www.schluter.com/schluter-us/en_US/Profiles/Movement-Joint-Profiles) - Manufacturer guidance on the function and placement of movement joints in tile assemblies.
- [LATICRETE – Selecting the Right Mortar and Grout](https://laticrete.com/en/tile-and-stone-installation-system/choosing-the-right-product) - Detailed information on mortar and grout types, performance characteristics, and appropriate applications.
- [Custom Building Products – Surface Preparation Guidelines](https://www.custombuildingproducts.com/how-to-advice/technical-documents/) - Technical documentation on substrate requirements, self-leveling underlayments, and preparation best practices.