This guide explores the refined decisions and unseen rigor that separate a merely acceptable installation from one that ages with grace. Along the way, you’ll find five exclusive insights that discerning homeowners can use to collaborate more intelligently with their installer and elevate the outcome far beyond the standard trade playbook.
Designing from the Substrate Up
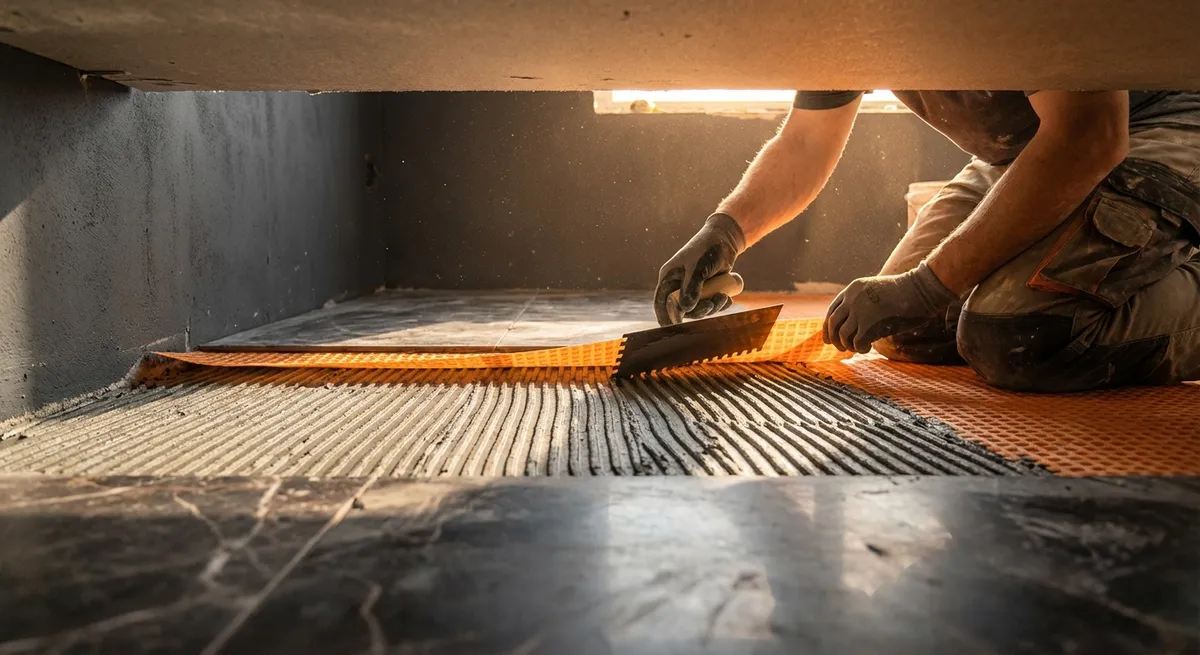
Elegant tile work begins long before the first piece meets thinset. The substrate—what lies beneath—governs the flatness, stability, and longevity of the finished surface. In premium installations, the substrate is treated not as a formality but as a design tool.
A truly flat plane is non‑negotiable, particularly with large-format porcelain or natural stone. Minor dips or crowns that might go unnoticed under paint become glaring under raking light across polished tile. Beyond flatness, deflection (how much a floor flexes under load) dictates whether grout lines remain crisp or slowly fracture. This is where proper underlayment systems—cement backer boards, decoupling membranes, or properly primed self-leveling underlayments—quietly protect your investment.
For homeowners, one practical question changes the conversation: “How are you preparing the substrate to meet tile manufacturer tolerances for flatness and deflection?” That single query signals that you view tile as a high-performance finish, not a cosmetic bandage.
Exclusive Insight #1:
Treat substrate preparation as part of the design brief, not a back-of-house detail. Insist on documented flatness standards (for example, no more than 1/8" variation over 10 feet for large-format tile) and how they will be achieved. This preempts nearly every “mysterious” aesthetic flaw that appears after installation.
Orchestrating Layout as a Design Narrative
Layouts that feel effortlessly balanced are meticulously orchestrated. The goal is not simply to “center the room,” but to choreograph how grout lines and tile proportions interact with doorways, thresholds, cabinetry, and architectural features.
Refined installations anticipate sightlines: the moment you step into a room, the view from a freestanding tub, the line you see while seated at a dining table. A premium installer evaluates multiple layout options—shifting the grid by fractions of a tile, aligning joints with window mullions, or deliberately “hiding” small cuts under toe-kicks and behind appliances.
Transitions matter just as much. The way a tiled bathroom floor meets a hardwood corridor, or how a shower niche aligns with wall joints, quietly communicates intention—or its absence. Sophisticated projects often use dry-lay mockups or 3D layout drawings to preview these relationships before any tile is set.
Exclusive Insight #2:
Request a layout consultation that includes at least two options drawn to scale, with special attention to where narrow cuts will occur and how pattern lines relate to key architectural elements. Approving a layout on paper, not just “in the room,” is one of the most cost-effective ways to upgrade the final result.
Elevating Materials with Intelligent Mortar and Grout Choices
In refined tile work, adhesive and grout are as considered as the tile itself. They are not commodities; they are performance components. The pairing of mortar, grout, and tile dictates everything from color fidelity to stain resistance and long-term stability.
Premium installations rely on mortars engineered for the specific tile: highly deformable thinsets for large-format panels, white mortars to preserve the luminosity of light marbles, and specialized products for exterior or wet environments. Skimping here diminishes even the finest material.
Grout selection is another quiet luxury decision. Modern high-performance grouts resist staining, efflorescence, and color inconsistency, while pre-mixed or epoxy systems can be transformational in kitchens and spa-like baths. Joint width is equally critical: overly wide joints can visually “break” a sophisticated surface, while joints that are too tight for the tile’s inherent size variation invite lippage and cracking.
Exclusive Insight #3:
Ask your installer to specify the exact mortar and grout products by brand and model, and confirm that they meet or exceed ANSI standards for your tile type and environment. Then, review grout joint width and color using a physical sample board under your actual lighting to avoid subtle yet permanent disappointments.
Controlling Light, Reflection, and Perception
High-end tile installations are always composed with light in mind. The interaction between tile surface, lighting direction, and sheen can dramatically alter the perceived quality of the work—especially with glossy finishes and rectified edges.
Raking light from floor-to-ceiling windows or low-profile wall sconces will accentuate even gentle undulations in the substrate and any lippage between tiles. In a sophisticated design, this is anticipated rather than discovered at the punch list stage. Sometimes the correct response is elevating the preparation standard; sometimes it is wisely selecting a matte finish or subtly textured tile that is more forgiving under dramatic light.
Lighting temperature also matters. Cool LEDs can render warm stone as flat or cold; overly warm light can muddy the true color of intricate porcelain designs. Coordinating tile selection and lighting strategy allows the space to read as cohesive and intentional, morning to evening.
Exclusive Insight #4:
Before committing, view tile samples installed temporarily on a test board under your actual room lighting at different times of day. Have your installer place two or three pieces together to reveal how joints, reflections, and micro-shadows will appear in reality, not just in a showroom.
Managing Moisture, Movement, and Time
The most refined installations are those that remain untroubled by time, quietly withstanding moisture, movement, and daily use without visible distress. Achieving this requires a disciplined approach to waterproofing, expansion accommodation, and cure times.
In wet areas, waterproofing is a system, not a single product. Proper slope to drain, integrated waterproof membranes, sealed penetrations, and correctly executed corners work together to protect the structure. Skipping or improvising on any of these becomes visible years later as stained grout, loose tiles, or musty odors.
Movement joints, both at perimeters and within large expanses, are another hallmark of professional restraint. They rarely feature prominently in design conversations, yet they prevent tenting, cracking, and debonding as structures inevitably expand and contract. Finally, a premium project respects cure times: rushing to grout, seal, or occupy a space shortcuts the chemical processes that give mortars and grouts their long-term strength.
Exclusive Insight #5:
Request a written outline of the waterproofing and movement joint strategy for your project, including brands, locations, and curing intervals. This transforms these “invisible” protections into conscious design decisions and gives you a benchmark to hold the work against in the years ahead.
Conclusion
Truly distinguished tile installations are an interplay of precision, foresight, and restraint. They honor the material while quietly respecting the physics of buildings and the realities of daily life. For homeowners, the path to that level of refinement lies in asking the right questions: about substrates, layouts, setting materials, lighting, and long-term performance.
When these factors are elevated from backstage technicalities to deliberate, upfront decisions, tile ceases to be a decorative layer and becomes an integral part of the home’s architecture—enduring, composed, and unmistakably considered.
Sources
- [Tile Council of North America (TCNA) – Handbook for Ceramic, Glass, and Stone Tile Installation](https://www.tcnatile.com) – Industry standards and best practices for substrates, layouts, and installation systems
- [American National Standards Institute (ANSI) – A108/A118/A136.1 Specifications](https://webstore.ansi.org/standards/tca/tcaa108a118a1362017) – Technical requirements for mortars, grouts, and installation methods
- [Schluter Systems – Waterproofing and Uncoupling Membrane Resources](https://www.schluter.com/schluter-us/en_US/learning-center) – Detailed guidance on waterproofing, movement accommodation, and substrate preparation
- [Mapei Technical Library](https://www.mapei.com/us/en-us/technical-library) – Product-specific data sheets and primers on mortar, grout choice, and performance characteristics
- [U.S. Department of Energy – Residential Lighting Basics](https://www.energy.gov/energysaver/lighting-choices-save-you-money) – Foundational information on light quality and color temperature, relevant to how tile appears in finished spaces