Calibrating Clean: Matching Care to Material, Not Marketing
One-size-fits-all cleaners are the fastest way to erode a premium tile installation. Every material—porcelain, ceramic, natural stone, encaustic cement, glass—responds differently to pH, abrasion, and moisture.
Begin by identifying your tile and grout composition, ideally from installation documentation or supplier specifications. Porcelain and ceramic tolerate a wider range of neutral cleaners, but natural stones like marble, limestone, and travertine are sensitive to acids and harsh alkalis that can etch or dull the surface. Cement tiles, while robust, can be discolored by aggressive detergents and require sealers that allow the surface to breathe.
A neutral-pH cleaner (pH 7) is generally safe for most surfaces, but “neutral” on a label does not guarantee compatibility. Look for products explicitly listed as suitable for your tile type and, if applicable, for sealed stone or cement. Test in an inconspicuous area and assess not just cleanliness but any change in sheen, color, or texture once dry.
For everyday care, prioritize frequency over force: light, regular cleaning with the correct agent is far less invasive than occasional, intensive scrubbing. Think of it as preventive care for a tailored garment—small, precise interventions that preserve the original structure instead of periodic overcorrection.
Exclusive Insight #1: The Reflection Test
Evaluate your maintenance routine by how light behaves on the surface, not just how clean it appears. After cleaning and drying, stand at an angle to the floor or wall and examine the reflection line from windows or fixtures. If that line appears hazy, wavering, or patchy compared with adjacent areas, your cleaning chemistry or tools may be microscopically scuffing or etching the finish—even if the surface “looks” clean straight on.
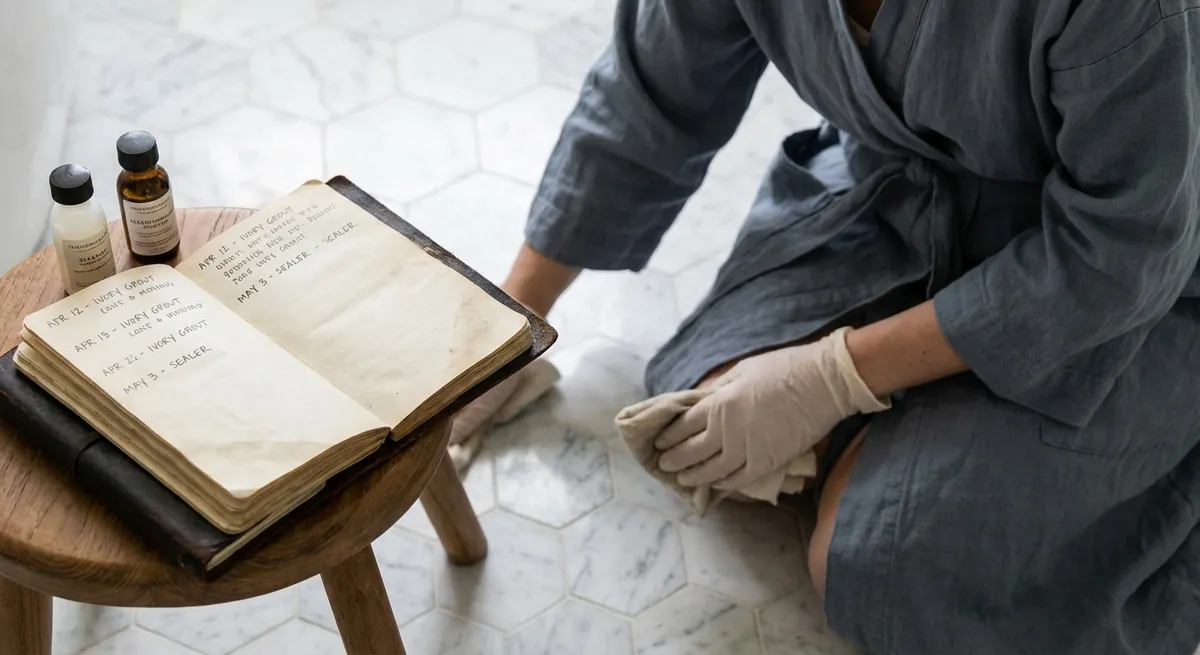
Grout as Architecture: Protecting the Lines That Hold the Room
Grout is more than filler; it is the visual grid that frames your tilework and the structural buffer that absorbs small movements. Poorly maintained grout is often what makes an otherwise beautiful tile installation feel tired.
Begin by inspecting grout lines in good natural light, focusing on high-traffic passages, wet zones (around showers, tub perimeters, niches), and transitions between materials. You are looking for three things: color drift (darkening, yellowing), surface erosion (pitting or flaking), and hairline cracking along tile edges. Each reveals a different underlying issue—residue, abrasive wear, or movement.
Clean grout with a soft brush, not a stiff one. The goal is to clean the surface of the grout, not to “re-sculpt” it with every scrub. Use a neutral or manufacturer-approved cleaner and avoid chlorine bleach as routine maintenance; despite the temptation, it can weaken some grout over time and may alter consistent pigmentation.
For cementitious grout, periodic re-sealing in wet or high-traffic zones can dramatically extend its life and keep stains from becoming permanent. Epoxy grout has different requirements—it often needs less sealing but may demand specific cleaning agents to avoid dulling. Always align your maintenance with the grout technology used.
Exclusive Insight #2: The Strategic Re-Grout, Not the Total Overhaul
Instead of waiting until all grout looks tired and commissioning a full re-grout, institute a “strategic re-grout” approach. Have a professional refresh only the earliest-failing zones—typically shower floors, entry thresholds, or kitchen work triangles—while the rest remains intact. This keeps the overall installation visually consistent and structurally sound without the dust, disruption, and expense of a full tear-out, and prevents small failures from telegraphing as “the entire floor is old.”
Water Management: Elegance Lies in the Details You Never See
The most refined tiled spaces share one habit in common: they manage water with almost obsessive discipline. The visible tile is only the outermost expression of a well-planned system designed to shed and control moisture.
In showers and wet rooms, the daily ritual matters. Encourage the use of a squeegee on walls and glass immediately after use—not as a chore, but as a final, almost ceremonial step. This simple act drastically reduces mineral spotting, soap film, and prolonged water exposure to grout and caulk joints.
Inspect all change-of-plane joints (corners, wall-to-floor, tub-to-wall, countertop-to-backsplash) at least twice a year. These should be caulked with an appropriate flexible sealant, not packed with rigid grout. Any separation, cracking, or fungal staining at these joints is not cosmetic; it is a notification that water may be exploring places you cannot see.
Pay attention to ventilation. Even the most immaculate cleaning routine cannot compete with trapped humidity. Run exhaust fans longer than you think you need—around 20–30 minutes after showering—and ensure they vent properly to the exterior, not just into a ceiling void. Where possible, supplement with natural ventilation by opening a window after heavy use.
Exclusive Insight #3: The “Dry Zone Audit”
Once a month, conduct a dry-zone audit: on a day when the shower has not been used for at least 24 hours, inspect every grout and caulk joint by touch, not just sight. Slowly run your fingers along lower corners, niches, and linear drains. Any cool, slightly damp, or darker-feeling area compared with its surroundings suggests moisture retention behind the surface—an early hint that sealing, caulking, or drainage may need attention long before you see overt damage.
Traffic, Texture, and the Art of Controlled Wear
No floor remains untouched; what distinguishes a refined installation is how gracefully it absorbs use. High-traffic tiles should age with patina, not premature fatigue.
Begin with zoning. Identify the true traffic patterns in your home: the path from entry to kitchen, the hall used most often between rooms, the segment in front of the primary vanity. Once you see these as “lanes,” you can protect them intelligently with strategically placed runners and mats that suit the space’s aesthetic rather than blanketing everything in generic coverings.
Choose mats with non-staining, non-rubberized backing to avoid chemical interactions that can mark or ghost the tile over time. In entries, prioritize both aesthetics and function: an outside mat to capture grit and an indoor mat to absorb residual moisture dramatically reduces fine scratching and grout soiling.
Vacuum or dust-mop dry debris before any wet cleaning; tiny particulates become abrasive when combined with water. Use plush microfiber mops or soft pads, avoiding string mops that can leave behind excess solution and work dirt deeper into grout.
Exclusive Insight #4: The “Wear Map” Photography Ritual
Twice a year, take a series of photographs of your main tiled areas from the same angles and at the same time of day, ideally using natural light. Save them in a dedicated “Tile Wear Map” album. Over time, these images reveal subtle changes—sheen loss, dull zones, concentrated grout darkening—that the eye normalizes from day to day. Use this visual history to adjust where you place runners, how often you seal, and which cleaning methods are working (or not) in specific zones.
Finishes, Sealers, and the Discipline of Subtle Intervention
The most luxurious tile installations seem as if they require little effort; in reality, they benefit from carefully chosen, low-visibility interventions. Over-sealing, over-polishing, or constantly “improving” a finish can prematurely age it just as badly as neglect.
If your tile is factory-glazed porcelain or ceramic, it generally does not require surface sealing, though the grout often does. Natural stone, unglazed porcelain, and cement tiles may benefit from either penetrating sealers (which protect from within without altering appearance) or enhancing sealers (which deepen color and sheen). The correct choice depends on the original design intent—sometimes the most elevated look is the one that appears completely untreated.
Follow the manufacturer’s recommended intervals rather than arbitrary annual schedules. When in doubt, perform the water-drop test on a clean, dry area: if water beads and sits on the surface, your sealer is likely still active; if it immediately darkens the tile or grout, it may be time to re-seal.
Avoid layering incompatible products. Mixing residues from “shine-enhancing” cleaners, waxes, or topical polishes can create uneven gloss, trap dirt, and be extremely difficult to reverse. A premium tile installation should never look as though it has a coating sitting on top; the finish should feel intrinsic to the material itself.
Exclusive Insight #5: The “Finish Neutrality” Standard
Adopt “finish neutrality” as your default standard: your maintenance routine should preserve the original matte, satin, or gloss level—not gradually transform it. When you introduce any new product (sealer, cleaner, polish), view it through this lens: does it subtly maintain or visibly modify the finish? If the effect is immediately noticeable, it is likely too aggressive for long-term routine use and should be treated as a corrective, not a habitual, solution.
Conclusion
Flawless tilework is rarely the result of dramatic interventions; it is the outcome of disciplined, almost invisible choices made over time. When you calibrate cleaning to your material, treat grout as architecture, manage water with intention, guide traffic instead of resisting it, and protect the original finish with restraint, your tile does more than survive—it continues to anchor the space with quiet authority.
In a home where every detail has been considered, maintenance is not an afterthought. It is the final, essential layer of design—an ongoing collaboration between you, your materials, and the spaces you inhabit every day.
Sources
- [American National Standards Institute (ANSI) – Tile Installation Standards](https://www.tileusa.com/ansi-standards) – Overview of industry standards for tile installations and materials, including grout and sealers
- [Mayo Clinic – Mold and Mildew in Homes](https://www.mayoclinic.org/diseases-conditions/mold-allergy/in-depth/mold-and-dampness/art-20050945) – Discusses moisture, ventilation, and mold risks relevant to tiled wet areas
- [U.S. Environmental Protection Agency – Bathroom Ventilation Guidance](https://www.epa.gov/indoor-air-quality-iaq/improving-indoor-air-quality) – Covers best practices for humidity and ventilation management in interiors
- [Harvard T.H. Chan School of Public Health – Healthy Buildings](https://www.hsph.harvard.edu/healthybuildings/) – Research-based insights on moisture, indoor air quality, and material durability
- [The Tile Council of North America (TCNA)](https://www.tcnatile.com/faqs/35-cleaning-tile-and-grout.html) – Practical, authoritative guidance on cleaning and maintaining tile and grout systems