Below are five exclusive, often-overlooked insights that quietly separate a competent installation from an exceptional one.
Designing the Grid, Not Just the Pattern
Most homeowners choose tile based on color, finish, and format. The true luxury, however, lies in the grid—the underlying geometry that governs where every grout line begins, ends, and intersects.
A well-conceived grid starts at the architectural level, not at the nearest wall. Instead of measuring from one corner and hoping for the best, a refined installer lays out the grid according to the room’s main view lines: entries, windows, fireplaces, islands, and focal walls. The goal is to land full or near-full tiles at these key locations and absorb cuts in visually discreet zones.
This approach frequently means abandoning the temptation to “center everything” in favor of strategic asymmetry. For example, allowing a slightly smaller cut under a vanity to achieve a crisp, full-tile reveal at a shower threshold is a deliberate, high-level decision. The grid becomes a design language: doorways align with grout joints, kitchen islands sit purposefully within a tile field, and transitions between rooms feel authored rather than accidental.
Ask your installer to review a scaled layout drawing with you before a single tile is set. The conversation should include where full tiles will land, where cuts will be concealed, and how grout lines will connect between adjacent spaces. If there is no plan for the grid, there is no plan for elegance.
Treating Transitions as Architectural Moments
Most tile installations fail not at the center of a room, but at the edges—the thresholds, meets, and transitions where one surface hands off to another. In a refined home, these are not afterthoughts. They are carefully composed architectural moments.
Between tile and hardwood, for example, a premium solution often avoids bulky transition strips in favor of a near-flush meeting with a micro-bevel or perfectly aligned metal profile. The exact height difference is calculated in advance, often by adjusting the tile underlayment thickness or subfloor preparation so that the finish surfaces meet gracefully.
At showers, niche edges, and window returns, the choice of trim becomes a design statement. Mitred tile corners that appear to “fold” around an edge, finely specified metal profiles in a matching finish, or integral stone jambs elevate these areas from utilitarian to bespoke. Even the direction of the tile cut on a curb or bench—whether the factory edge faces the eye or the cut edge is hidden—reveals the level of care taken.
Before installation begins, walk the house and identify every place a material will meet tile: doors, stairs, cabinetry, and built-ins. Each of these deserves a deliberate detailing strategy, rather than a quick fix in the moment. The result is a sequence of transitions that feels continuous, calm, and unmistakably intentional.
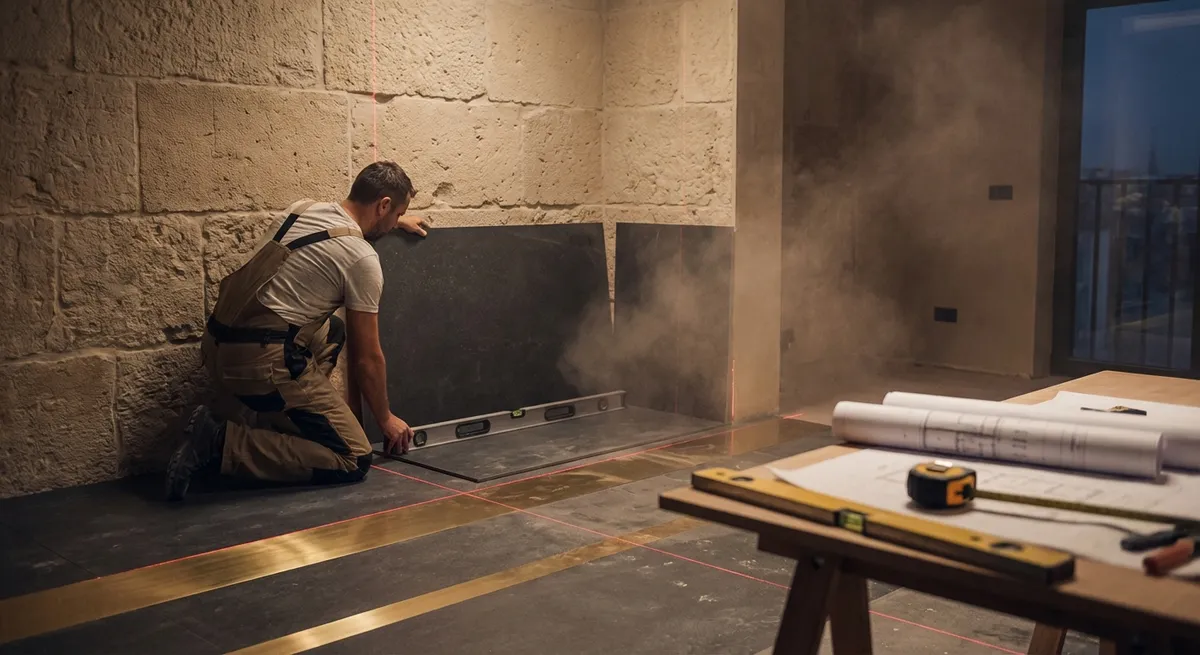
Calibrating Substrate Flatness for Large-Format Luxury
Large-format and slab-look tiles deliver a sophisticated, gallery-like calm—but only if the underlying surface is painstakingly prepared. Their elegance is unforgiving; even small deviations in flatness translate into lippage (uneven tile edges), shadow lines, and a subtle sense that something is “off,” even if the average guest cannot articulate why.
Professional standards typically require a stricter flatness tolerance for larger tiles, and truly high-end work often goes beyond these minimums. This might mean self-leveling compounds across the entire room, precision grinding high spots, or even reframing and reinforcing certain areas to remove deflection and movement.
Homeowners who appreciate refined finishes should be prepared to invest time and budget into substrate preparation. Ask your installer how they will achieve the necessary flatness, and request that they reference industry standards (for example, standards published by recognized tile councils or manufacturers). The conversation should involve actual measurements, not guesswork.
A well-prepared substrate does more than prevent lippage. It allows for thinner, more controlled mortar beds; cleaner grout joints; and a visual plane that reads as uninterrupted. In high-end spaces, that seamless plane is where the luxury truly resides.
Curating the Grout as a Design Material
Grout is often treated as an afterthought: a quick color selection made at the end of the process. In a sophisticated installation, grout is a design material with equal standing to the tile itself.
There are three primary levers to consider: color, joint width, and material technology.
Color dictates how assertive the grid feels. A closely matched grout color creates a monolithic, serene surface, perfect for spa-like baths or minimalist kitchens. A higher-contrast grout celebrates the pattern and rhythm of the tile joints—ideal for intentional, graphic layouts. In premium spaces, the goal is usually visual coherence rather than trend-driven contrast; the most successful grout choices often appear almost inevitable.
Joint width influences not only aesthetics but also performance. Narrow joints feel more tailored, but they demand exceptional tile calibration and precise installation. Wider joints can graciously absorb small variations, especially with handmade or intentionally irregular tiles, lending them an artisanal, collected feel.
Lastly, grout technology matters. Epoxy or high-performance cementitious grouts offer enhanced stain resistance and color retention, which quietly preserve the refined look of the installation over time. For heavily used kitchens, showers, and entryways, this is not a luxury—it is prudent foresight.
Discuss grout early, and treat it with the same seriousness as the tile selection. Ask to see installed samples (not just color chips) and review lighting conditions, as grout reads differently in natural versus artificial light. Under refined scrutiny, grout is never merely “the stuff between the tiles.”
Orchestrating Light, Reflection, and Orientation
The way tile interacts with light can either flatter or expose a space. A premium installation anticipates this interaction long before the first tile is laid.
Directional lighting—wall washers, under-cabinet lights, recessed downlights—casts raking light across surfaces, dramatically emphasizing even small irregularities. In bathrooms and kitchens, where these conditions are common, the tile orientation and finish should be chosen with light in mind. For instance, a high-gloss wall tile directly under a strong downlight will reveal every wave in the substrate; a satin or matte finish, paired with meticulous wall preparation, often yields a more cultivated result.
Tile orientation can also guide the eye along or across a room. Long rectangular tiles laid in the direction of the main sightline elongate a corridor or accentuate a focal view. In showers, vertical orientation can subtly heighten the room, particularly when tiles run uninterrupted to the ceiling with no awkward horizontal “cut band” at the top.
For spaces with a strong natural light source, consider how the tile’s texture and reflectivity will perform throughout the day. A softly textured, matte porcelain on a sunlit floor can bring a quiet depth that polished stone might render overly reflective or slippery. Conversely, a honed or lightly polished surface in a dim entryway can gently amplify ambient light and add a sense of arrival.
Request that your installer or designer mock up a few tiles on-site near the actual light sources, at the correct orientation. Study them at different times of day. When light, surface, and direction are orchestrated together, the tile ceases to be a backdrop and becomes a subtle instrument of atmosphere.
Conclusion
Exceptional tile work is not defined by flashy patterns or overt statements. It is defined by an almost invisible discipline: a grid that respects architecture, transitions that feel inevitable, substrates prepared with rigor, grout curated as a design element, and surfaces tuned to the light that touches them.
For homeowners who value quiet sophistication, these are not technical footnotes; they are the true markers of quality. When you approach tile installation as a form of quiet architecture, every decision—from layout to grout—becomes an opportunity to elevate your home from well-finished to genuinely considered.
Sources
- [Tile Council of North America (TCNA) Handbook](https://www.tcnatile.com/handbook.html) - Industry reference for tile installation standards, methods, and tolerances
- [ANSI A108/A118/A136.1 Specifications for the Installation of Ceramic Tile](https://webstore.ansi.org/standards/tca/ansia108a118a1362019) - Defines technical requirements for tile installation and setting materials
- [Schluter Systems – Movement Joints and Transitions](https://www.schluter.com/schluter-us/en_US/Movement-Joints/c/MJ) - Detailed guidance on refined transitions and profiles between tile and adjacent finishes
- [Custom Building Products – Surface Preparation Guidelines](https://www.custombuildingproducts.com/en/support/faqs/surface-prep) - Practical overview of substrate flatness, leveling, and preparation for tile
- [Mapei – Grout Guide and Technical Data](https://www.mapei.com/us/en-us/products-and-solutions/products/grouts) - Technical information on grout types, performance characteristics, and color selection