The Substrate: Where True Quality Actually Begins
The beauty of a tile surface is determined long before the first tile meets mortar. The substrate—the layer beneath your tile—governs how flat, stable, and long‑lasting your installation will be.
A refined tile project begins with a conversation about what lies underfoot or behind the walls. Concrete slabs should be checked for moisture, cracks, and flatness, not just “level.” Wood subfloors must be evaluated for deflection: how much they flex under load. Excessive movement is a silent saboteur that eventually telegraphs as cracked grout, loosened tiles, or hollow sounds.
Professionals committed to excellence will discuss underlayments such as cement backer board, fiber‑cement panels, or uncoupling membranes. These products help isolate the tile from minor structural movement and reduce the risk of cracks. On walls, especially in wet areas, cement board or foam backer systems—not standard drywall—are the hallmarks of properly engineered longevity. When your installer is as focused on structure as on style, you’re on the right path.
Exclusive Insight 1: Treat Layout as Architectural Composition, Not a Puzzle
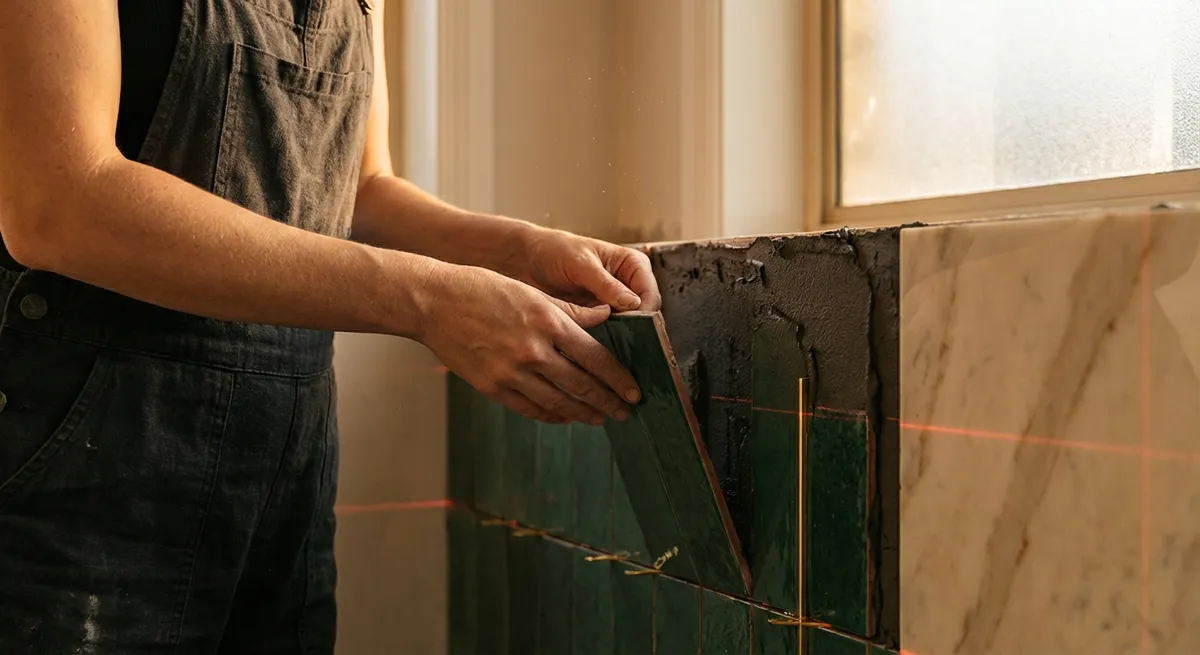
Many installations fail visually not because of poor craftsmanship, but because of indifferent layout. The tiles are straight and the grout is neat, yet something feels slightly “off.” This is almost always a layout issue—an aesthetic decision made (or avoided) before any tile was set.
Sophisticated installations begin with a dry layout and a detailed discussion of sight lines: what you see first when you enter the room, where your eye naturally pauses, and how lines carry across thresholds and into adjoining spaces. Centering a shower niche on the plumbing fixtures, aligning grout lines with window mullions, or continuing a floor joint line through multiple rooms turns your tile into a quiet architectural rhythm rather than a grid.
A premium installer will avoid narrow “sliver” cuts in prominent areas, even if it requires subtle shifts in layout. They will also consider how tile and grout joints align with baseboards, cabinetry, and built‑ins. This is where your input is invaluable—asking to review layout options before installation ensures that the final result feels intentional, not accidental.
Exclusive Insight 2: The Grout Story—Color, Joint, and Performance
Grout is often treated as an afterthought, yet it occupies a substantial portion of the visual field, especially in smaller-format tile. In an elevated installation, grout is curated with the same care as the tile itself.
Choosing grout color is both an aesthetic and practical decision. A tone that nearly matches the tile creates a monolithic, serene surface—ideal for minimalist spaces and large-format stone looks. A slightly contrasting grout can emphasize pattern and geometry, especially in herringbone, chevron, or parquet layouts. Highly contrasting grout, while striking in photographs, can quickly feel busy in real life and highlight even minor irregularities.
Joint width is equally critical. Rectified porcelain with factory‑squared edges can support refined, narrow joints that evoke stone slabwork. Handmade or zellige-type tiles benefit from slightly wider joints that celebrate their irregularity and allow the eye to read the surface as intentionally organic rather than “crooked.” Beyond aesthetics, high-performance grouts—such as pre‑mixed or epoxy formulations—offer enhanced stain resistance and color consistency, which can be invaluable in kitchens, entries, and showers. A sophisticated specification balances visual nuance with daily practicality.
Exclusive Insight 3: Large-Format and Slab Tile Demand a Different Standard
Oversized tiles and porcelain slabs promise an exceptionally elevated look: fewer grout lines, expansive planes, and a near‑seamless continuity that feels architectural rather than decorative. However, these formats magnify imperfections. When you opt for large-format tile, you’re effectively choosing a higher tier of installation discipline.
Substrate flatness becomes non‑negotiable. Industry guidelines specify tight tolerances for surface variation, and a conscientious installer will skim-coat or self-level where necessary rather than “forcing” tiles into plane with extra mortar. Lippage—where one tile edge sits higher than its neighbor—is more noticeable with larger tiles and in spaces with directional lighting, such as wall‑washing fixtures or sunlight grazing across the floor.
Additionally, patterning and veining in large-format porcelain and stone require thoughtful sequencing—often called “vein matching” or “bookmatching.” Instead of opening boxes randomly, a premium installer will lay out pieces on the floor first, orchestrating how veining moves across the surface or up the wall. This transforms the tile from a backdrop into a composed, quiet focal point that speaks of bespoke craftsmanship.
Exclusive Insight 4: Movement Joints—The Invisible Guardians of Elegance
One of the most overlooked nuances in tile installation is the inclusion of movement joints—purposeful, flexible breaks in the tile field that accommodate minor expansion, contraction, and structural drift. Finely executed, they are almost invisible; neglected, their absence often leads to cracking, tenting, or debonding over time.
Temperature changes, moisture, and structural shifts all cause buildings to move subtly. Rigid tile assemblies need controlled places where this movement is absorbed. This is especially important in sun‑drenched rooms, heated floors, long corridors, and open‑plan spaces with wide expanses of tile. Properly placed perimeter and interior movement joints prevent stresses from accumulating in the tile layer itself.
For the refined homeowner, the conversation here is about discretion and foresight. High-end metal or color‑matched profiles can integrate these joints seamlessly into the overall aesthetic. When your installer discusses movement joints as integral design details rather than unfortunate necessities, you’re dealing with a professional intent on ensuring your space looks as immaculate in ten years as it does on the day of completion.
Exclusive Insight 5: Wet Areas as Engineered Systems, Not Just Pretty Surfaces
In showers, wet rooms, and spa-like bathrooms, tile is merely the visible finish of a more complex, engineered system. The true measure of sophistication lies in how effectively that system manages water—both the water you see and the water you never should.
A premium installation in wet areas is always built around waterproofing, not just water resistance. This can be achieved with sheet membranes, liquid-applied systems, or foam-based integrated panels, each with its own detailing requirements. Corners, transitions, niches, and benches are frequent failure points when shortcuts are taken. A meticulous installer will flood-test shower pans before tiling, verifying that drains, slopes, and waterproofing are performing exactly as intended.
From an aesthetic standpoint, this engineering enables design freedom: linear drains that disappear into the floor tile, barrier‑free entries with continuous floor planes, or fully tiled niches that align perfectly with grout joints. When the technical underpinnings are robust, you can pursue these refined details with confidence, knowing beauty is backed by sound building science.
Partnering With Your Installer: Turning Vision Into Precision
The finest tile installations are collaborations. As a homeowner, your role is not to master trade techniques, but to enter the process with informed questions and a clear sense of priorities. Ask to review substrate preparation plans, layout sketches, and grout selections. Request mockups for complex patterns or unconventional grout colors. Discuss how edges, transitions, and terminations will be detailed—especially at stairs, thresholds, and shower entries.
An installer dedicated to exceptional work will welcome this engagement. Precision tilework is slow, deliberate, and deeply considered. It thrives on clear dialogue and shared standards. When you pair elevated materials with equally elevated execution, tile ceases to be a mere finish and becomes an enduring architectural language—quietly articulate, impeccably proportioned, and deeply satisfying to live with.
Conclusion
Truly exquisite tile installations are not the result of one grand gesture, but of dozens of carefully made decisions—most of them invisible to the casual eye. From the rigor of substrate preparation to the nuance of grout, from the discipline of large-format handling to the foresight of movement joints and waterproofing, each layer contributes to a surface that feels resolved rather than simply completed.
Armed with these insights, you can approach your next tile project with the discernment it deserves. When craftsmanship, engineering, and aesthetic intent align, tile becomes more than a backdrop—it becomes the quiet, enduring foundation of a beautifully considered home.
Sources
- [Tile Council of North America (TCNA) Handbook](https://www.tcnatile.com/) - Industry standards and best practices for tile installation, including substrate prep, movement joints, and wet-area assemblies.
- [American National Standards Institute (ANSI A108/A118/A136 Series)](https://webstore.ansi.org/) - Authoritative installation and material standards that govern professional tile work in North America.
- [Schluter Systems – Waterproofing and Uncoupling Technologies](https://www.schluter.com/schluter-us/en_US/solutions) - Technical resources on uncoupling membranes, movement joints, and integrated waterproofing systems for tile.
- [Custom Building Products – Technical Articles](https://www.custombuildingproducts.com/resources/technical-support/technical-bulletins.aspx) - Detailed bulletins on large-format tile, substrate requirements, grout technologies, and movement accommodation.
- [U.S. Department of Housing and Urban Development (HUD) – Residential Rehabilitation Guide: Floor & Wall Finishes](https://www.hud.gov/program_offices/healthy_homes/rehab_sm) - Guidance on floor and wall finish systems, including tile, with a focus on durability and building performance.