Below, five exclusive insights reveal how design‑savvy homeowners and seasoned professionals preserve tile surfaces at a level that feels almost invisible, but unmistakably elevated.
1. Treat Grout as a Design Element, Not a Cleaning Afterthought
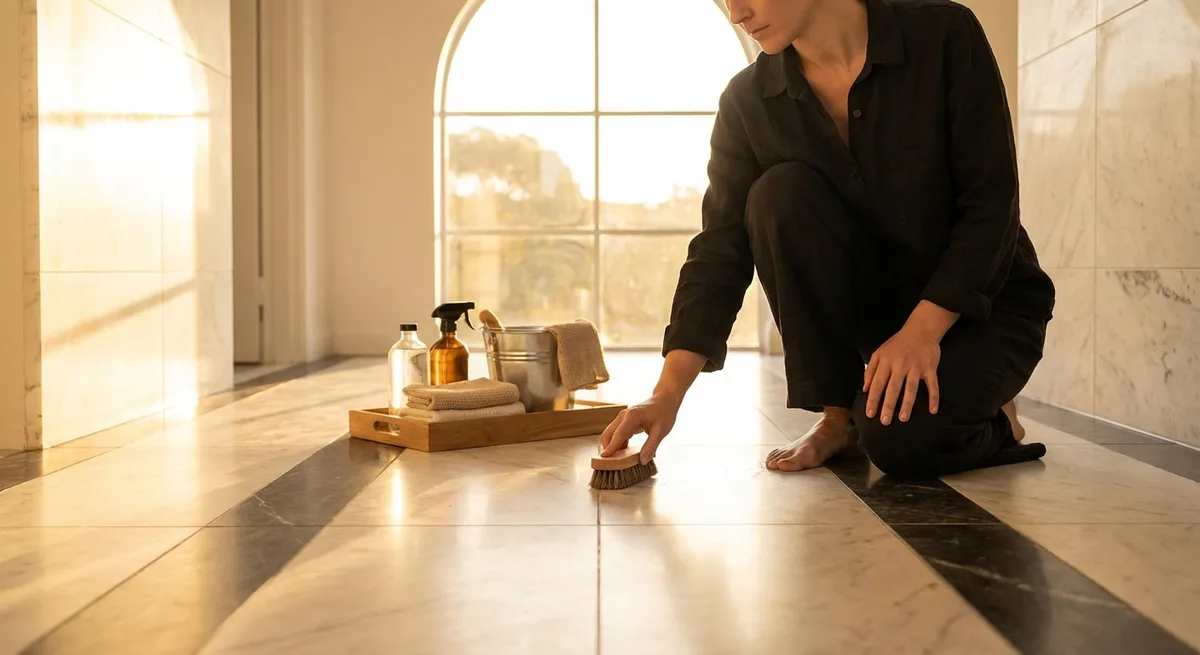
In many homes, grout is maintained reactively: scrubbed only when visibly dingy. Discerning homeowners invert this logic and maintain grout as they would a fine textile—preemptively and with nuance.
Begin by identifying your grout type. Cementitious grout is porous and will absorb pigments and oils; epoxy grout is denser, more stain‑resistant and often used in performance‑driven spaces. Each demands a tailored routine. Cementitious grout, when left unsealed or improperly sealed, will telegraph neglect faster than the tile itself. A penetrating sealer, carefully applied and allowed to cure fully, creates an invisible barrier that preserves the original tone of the grout while allowing it to breathe.
Maintenance then becomes meditative rather than frantic. Use a pH‑neutral cleaner and a soft, narrow‑bristled brush to focus on joints, moving in linear passes that follow the tile layout rather than scrubbing chaotically. This protects the grout’s edges and preserves the crisp geometry of your tilework. For pale, high‑contrast grout lines (white grout with dark tile, for example), avoid pigmented cleaners and colored scrubbing pads that can leave subtle residues. The aim is not a “brightened” joint, but a joint that looks as if it has simply never been compromised.
2. Calibrate pH: The Invisible Line Between Clean and Damaged
Most tile maintenance mistakes come from good intentions paired with the wrong chemistry. Elegant tile surfaces—especially natural stone, cement tile, and high-end porcelains with special finishes—respond more to what you clean with than how often you clean.
pH‑neutral cleaners (around pH 7) should be your default for routine maintenance across almost all tile materials. They lift everyday soils—dust, light oils, city grime—without disrupting sealers or etching sensitive surfaces. Acidic products (like vinegar or “soap scum removers”) and aggressive alkalines may seem effective in the short term but can create subtle dull patches, particularly on limestone, marble, travertine, and certain matte glazes. These changes often appear first under grazing light near windows, where micro-etching becomes visible as uneven sheen rather than obvious damage.
Elevated maintenance means segmenting your cleaning toolkit:
- Daily/weekly: pH‑neutral concentrates diluted per manufacturer instructions, applied with a soft mop or cloth.
- Periodic deep cleaning: Slightly more alkaline tile‑specific products, used sparingly and rinsed thoroughly.
- Spot treatment only: Any product marketed as “heavy duty,” “lime remover,” or “soap scum eliminator”—these should be targeted, not part of a routine.
This level of selectivity allows a floor to age gracefully, building a subtle patina instead of scars from chemical overreach. The result is not the glassy shine of an over-scrubbed showroom, but a measured, consistent finish that aligns with the original design intent.
3. Master Dry Maintenance: The Understated Power of Preventive Care
What separates a well-kept tiled home from a perpetually “managed” one is the emphasis on preventing soiling rather than endlessly correcting it. Dry maintenance—curated and consistent—is where this sophistication lives.
Start with entry strategy. High-quality, dense-fiber mats at all exterior doors capture grit before it can act as sandpaper on polished porcelain or stone. The best mats are sized generously, allowing at least several steps inside before tile is contacted. In refined interiors, this is not a visual intrusion but a design opportunity: choose textures and hues that echo your grout or secondary tile tones, blending utility with composition.
Next is dust control. Micro-abrasives (fine grit, dried garden soil, urban dust) not only dull finishes but embed themselves into grout lines and textured tiles. A soft-bristled broom or, ideally, a vacuum with a hard-floor setting and non-marking wheels should be used more often than a wet mop. Think of this as “tuning” the floor’s surface—removing what could become tomorrow’s embedded stain.
By the time you mop, the floor should already be 80–90% clean. This means less chemical exposure, less scrubbing, and a far lower chance of pushing debris into grout joints. Over years, this rhythm—capture at the threshold, lift with vacuuming, then clarify with minimal moisture—will keep even heavily trafficked tiles looking composed rather than exhausted.
4. Respect Cures, Coatings, and Climates: The Timing Few Talk About
Some of the most permanent “maintenance problems” begin in the first days and weeks after installation, long before the homeowner ever reaches for a cleaning product. Understanding timing is one of the most valuable, and most overlooked, insights in professional tile care.
Fresh cementitious grout and certain cement-based tile bodies continue to cure for days after installation. Cleaning too aggressively, or sealing too early, can trap moisture, create blotchy appearance, or compromise bond strength. A premium approach involves a clear sequence:
- Initial cure window (typically 72 hours, but follow manufacturer guidance): Only light, dry maintenance—no wet mopping, no harsh spot cleaning.
- Post-cure evaluation: Inspect under both natural and artificial light to identify efflorescence (whitish mineral deposits) or uneven coloration before sealing.
- Sealer curing: After applying a penetrating sealer or impregnator (for stone, cement, and many grouts), allow full cure time before exposing surfaces to routine moisture or cleaning. This ensures the sealer anchors properly into the substrate, maximizing stain resistance.
Climate matters as well. In humid regions or cooler interiors, drying and curing slow significantly. Rushing to “put the room back into use” can create dull patches, watermarking, or hazy residues that are far harder to correct later. Seasoned professionals often treat the first 30 days as a commissioning period, during which cleaning is minimal, gentle, and strategic. This patience lays the foundation for a surface that responds predictably and elegantly to maintenance for years.
5. Curate a Bespoke Care Profile for Each Tile Zone
Truly refined tile maintenance does not rely on a single routine for the entire home. Instead, each tiled zone receives a discreet “care profile” based on its function, exposure, and material.
For example:
- Kitchen floors: Prioritize degreasing without stripping. Choose a pH-neutral cleaner formulated for food oils, and pair it with more frequent dry maintenance to remove crumbs and grit before they combine with grease into stubborn films.
- Spa-like bathrooms: Focus on managing moisture and minerals. Use a squeegee or soft microfiber cloth on wall tiles and glass after showers to limit water spotting and soap film before it develops. Ventilation and gentle, regular drying do more for long-term clarity than episodic “deep cleans.”
- Outdoor and transitional spaces: Respect freeze–thaw cycles and UV exposure. Choose cleaners rated for exterior tile and avoid leaving soapy residues that can become slippery when wet. Regular rinsing and periodic light scrubbing with outdoor-appropriate tools keep these surfaces looking intentional rather than weathered.
- Feature walls and decorative insets: These often benefit from almost entirely dry maintenance—a soft brush and occasional wipe with a barely damp microfiber cloth—to protect delicate glazes, metallic accents, or specialty finishes.
Documenting these profiles—even briefly—creates continuity, especially when professional cleaners or household staff are involved. A simple, well-communicated protocol prevents “one-size-fits-all” shortcuts that can undermine premium tilework. The result is a home where every tiled surface, from the most functional to the most ceremonial, ages in character rather than in distress.
Conclusion
Exceptional tilework deserves more than generic care; it deserves a maintenance approach that mirrors the thoughtfulness of its selection and installation. By elevating grout to a design element, calibrating cleaning chemistry, privileging preventive dry maintenance, honoring curing and climate, and crafting room-specific care profiles, homeowners move beyond “clean floors” into something more enduring: tiled spaces that remain visually composed, structurally sound, and quietly luxurious year after year.
In the end, the most beautiful tile surfaces rarely look freshly scrubbed. They look calm, consistent, and confidently maintained—a testament not just to craftsmanship at installation, but to the quiet discipline of how they are cared for every day.
Sources
- [Ceramic Tile Maintenance Tips – Tile Council of North America (TCNA)](https://www.tcnatile.com/faqs/maintenance.html) – Technical guidance on appropriate cleaners, grout care, and general tile maintenance best practices
- [Natural Stone Institute – Stone Care, Maintenance, and Cleaning](https://www.naturalstoneinstitute.org/consumers/care/) – Detailed recommendations on pH, sealers, and proper maintenance routines for marble, limestone, travertine, and other natural stones
- [Mapei – Guide to Grout and Sealant Maintenance](https://www.mapei.com/us/en-us/home-page/support-and-training/technical-library/tech-documents) – Professional documentation on grout types, curing considerations, and sealer use (search within library for grout/sealer bulletins)
- [Schluter Systems – Considerations for Tile and Grout Protection](https://www.schluter.com/schluter-us/en_US/education/faq) – FAQs on substrate protection, moisture management, and long-term performance of tiled assemblies
- [U.S. General Services Administration – Custodial Cleaning Guidelines for Hard Floors](https://www.gsa.gov/cdnstatic/Custodial_Requirements_Hard_Floors.pdf) – Institutional standards on neutral cleaners, floor finishes, and preventive care practices applicable to high-performance tile installations