The following insights move beyond generic how‑to guidance and into the refined considerations that distinguish a truly premium tile installation. Whether you are working with a contractor or managing a detail‑driven renovation yourself, these principles ensure your tiled spaces feel tailored, not merely covered.
The Substrate as the Silent Foundation of Luxury
Exquisite tile work does not begin with the tile; it begins with what you never see. The substrate—the surface beneath your tile—dictates how flat, durable, and visually calm the finished installation will be.
A premium installation starts with a ruthless evaluation of the existing surface: checking for deflection in floors, hairline cracks in concrete, and irregularities that will telegraph through large‑format tiles. On floors, a refined approach often includes self‑leveling underlayment to achieve near‑perfect flatness, especially with oversized porcelain slabs or rectified tiles where any deviation becomes immediately visible in the grout lines.
Walls, too, benefit from elevated preparation. Cement backer board or foam tile backer systems are chosen not just for moisture resistance but for dimensional stability and compatibility with the chosen waterproofing system. Corners are squared, planes are trued, and transitions between materials are carefully managed to avoid lippage (uneven tile edges) and awkward cuts.
For homeowners, the key insight is simple: insist that your installer talks not only about tile and grout, but about structure, underlayment, and flatness tolerances aligned with current standards. Luxury tile is wasted on a careless foundation.
The Geometry of the First Line: Layout as Design Intelligence
A sophisticated tile installation is not merely “centered.” It is composed.
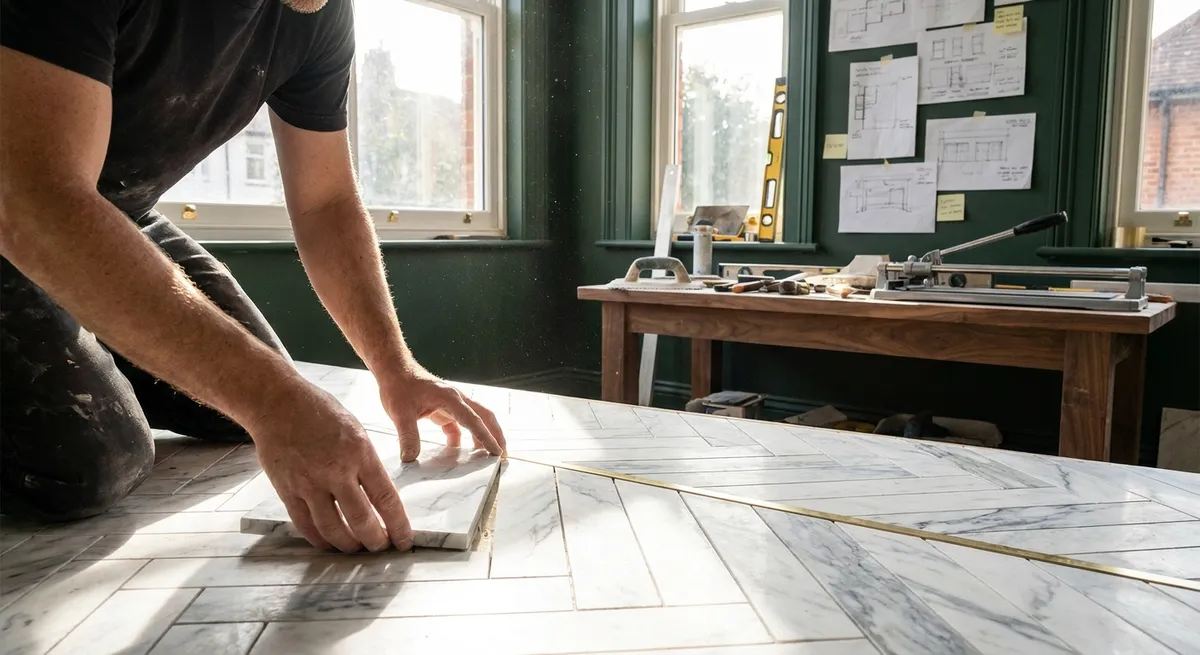
Before a single tile is set, a meticulous dry layout should be mapped, measured, and often snapped with chalk lines. This includes determining where full tiles will land at focal points—behind a freestanding tub, under a shower niche, at the threshold of a room—so that cuts are balanced and intentional, not an afterthought.
Upscale installations frequently consider sight lines from adjacent spaces: what you see as you approach a bathroom door, or the pattern that greets you when you enter a kitchen. In a refined layout, grout joints carry cleanly through doorways, align with cabinetry, and relate to architectural elements like windows, beams, and built‑ins.
One of the most impactful yet underused tactics is “stealing” a few millimeters across the field—subtly widening or narrowing grout joints within spec—to avoid awkward slivers of tile at the edges. A premium installer knows how to adjust layout invisibly so the room reads as measured, not compromised.
For homeowners, the request is this: ask to see the layout strategy before installation. In a well‑planned project, the tape measure and laser level are used more in the first day than the tile cutter.
Five Exclusive Insights for Homeowners Who Expect More
These nuanced considerations are often overlooked yet make a decisive difference in how refined your tile work feels.
1. Grout Color as a Visual Filter, Not Just a Filler
Grout is not merely functional; it’s the lens through which you experience the tile. A slightly warmer or cooler grout tone can either quiet a busy pattern or emphasize the geometry of the layout.
- Matching grout to tile creates a seamless, monolithic effect—ideal for large‑format porcelain or natural stone where you want the surface to read as one plane.
- A subtly contrasting grout (one to two shades off) can articulate pattern in a herringbone or chevron without feeling busy.
- Avoid defaulting to bright white grout in high‑use areas; modern stain‑resistant and epoxy grouts in soft neutrals provide elegance and practicality.
A sophisticated choice considers lighting conditions: grout often appears lighter in strong natural light and darker under warm artificial light. Asking for a small mockup board grouted with two or three contenders can prevent costly disappointment.
2. Edge Profiles as the Jewelry of the Installation
The way tile edges terminate is often where installations betray their quality. Basic exposed cut edges may chip or feel visually abrupt. Elevated projects treat edges as a design opportunity.
- Bullnose, mitered, or factory‑finished trim tiles deliver a fully “framed” look on niches, steps, and outside corners.
- Metal or color‑matched edge profiles (from brands like Schluter) can create a razor‑sharp, tailored reveal around niches, transitions, and countertop terminations.
- On stone, expertly mitered corners with aligned veining are a hallmark of couture‑level work, but they demand a highly skilled installer and precise cutting.
Before work begins, determine exactly how every edge—shower jamb, window return, stair nose—will be finished. The absence of a plan at the edges is the fastest way for an otherwise beautiful tile to feel unfinished.
3. Movement Joints as Invisible Insurance
Truly premium tile work plans for expansion and movement rather than fighting it. Tile, substrate, temperature, and humidity all interact; without accommodation, even the most elegant installation can crack or tent over time.
Industry standards call for movement joints around perimeters, over changes in substrate, and in larger fields—particularly in sun‑drenched spaces or heated floors. Skilled installers integrate these joints discreetly: at transitions to other materials, along baseboards, or aligned with grout joints filled with flexible sealant rather than rigid grout.
To the eye, nothing seems different. To the structure, those subtle details are what keep your installation crack‑free for years. Ask where movement joints will be placed and how they will be visually minimized.
4. The Quiet Power of Setting Materials
Adhesives and mortars are rarely discussed in design meetings, yet they are crucial to performance, especially with premium tiles and complex conditions.
- Large‑format porcelain and dense stone typically require a high‑performance, polymer‑modified thinset for proper bond and minimal sag.
- Glass tile often needs bright white mortars specifically rated for glass to avoid shadowing and ensure color fidelity.
- Exterior or wet‑area applications demand mortars and waterproofing systems tested to work together as a system, not a mix‑and‑match of convenience.
In a high‑standard project, your installer or contractor should be comfortable referencing manufacturer data sheets and industry standards for each setting material—not simply choosing whatever is on sale. As a homeowner, you can request that the full installation “stack” (underlayment, waterproofing, mortar, grout, sealant) be compatible and warrantied.
5. Lighting and Reflection as Part of the Installation Strategy
Light can be ruthlessly honest with tile work. Downlights placed too close to a wall, long runs of sunlight across a floor, or reflective glazed tiles can reveal even minor irregularities.
A refined installation anticipates how light will wash surfaces. For highly reflective subway tiles or high‑gloss stone, additional care is taken to ensure the substrate is impeccably flat and grout joints are consistent. For floors with grazing light from large windows, the installer may choose smaller format tiles or a staggered layout that is more forgiving to subtle variations.
Consider viewing tile samples under the exact lighting you will use—both day and night—before final selections and layout are approved. When tile, layout, and lighting are coordinated, the room feels composed at any hour.
Installation as Collaboration: Working With the Right Professional
A premium tile installation is the result of collaboration between homeowner, designer, and installer—a conversation where details are not seen as obstacles but as opportunities to refine.
The right professional will welcome questions about standards, substrates, waterproofing, and layout strategy. They will be comfortable discussing flatness tolerances, recommending appropriate grout types (cementitious vs. epoxy), and offering sample boards or mockups for complex patterns. They will not rush the preparation phases, and they will resist shortcuts that compromise performance in wet areas or on heated floors.
As a homeowner, your role is to insist that invisible decisions are given visible attention: What’s under the tile? How will edges terminate? Where are the movement joints? Which system warranty applies? These questions signal that you value enduring quality over expedient completion.
When each of these elements is thoughtfully addressed, tile stops being a mere surface. It becomes a crafted skin for your home—quietly precise, deeply considered, and built to remain elegant long after trends have moved on.
Conclusion
Tile is one of the rare materials that can feel both architectural and decorative, practical and indulgent. The difference between a standard installation and a truly elevated one lies in a hundred small decisions: the discipline of the substrate, the intelligence of the layout, the subtlety of grout and edge details, and the foresight to accommodate movement and light.
By engaging with these refined considerations and working with a professional who respects them, you move beyond simply “having tile installed.” Instead, you curate tiled spaces that feel bespoke to your home—calm, resolute, and quietly exacting in their craftsmanship.
Sources
- [Tile Council of North America (TCNA) Handbook](https://www.tcnatile.com/handbook.html) - Industry‑recognized standards and best practices for tile installation, including substrate preparation and movement joint guidelines.
- [Schluter Systems – Installation Handbooks](https://www.schluter.com/schluter-us/en_US/Handbooks) - Detailed technical guidance on edge profiles, waterproofing, and integrated tile installation systems.
- [LATICRETE Technical Data Sheets](https://laticrete.com/en/support-and-downloads/product-data-sheets) - Information on mortars, grouts, and setting materials, including recommendations for large‑format and glass tile.
- [Mapei – Expert Tips on Large Format Tile Installation](https://www.mapei.com/us/en-us/home-page/tools-and-downloads/tech-talk-blog/detail/large-format-tiles-installation-tips) - Practical insights into substrates, mortars, and layout for oversized tiles.
- [U.S. Department of Housing and Urban Development – Residential Rehabilitation Inspection Guide](https://www.hud.gov/program_offices/public_indian_housing/programs/ph/phguidebook) - Broad guidance on residential construction and rehabilitation, including attention to substrates and structural considerations relevant to tile work.