Below, we explore how to think about tile installation with the same discernment you’d bring to bespoke cabinetry or fine upholstery—along with five exclusive insights that sophisticated homeowners consistently leverage to achieve exceptional results.
Designing the Canvas Before the Pattern
Refined tile work begins long before the first piece is set. Instead of starting with color or pattern, start with the “canvas”: substrate quality, transitions, and room geometry. A perfectly installed tile on a flawed base will always feel compromised.
A premium installation assumes the floor or wall will be corrected before it’s beautified. That means assessing flatness with long straightedges, checking for out-of-square walls, and identifying structural movement that could telegraph cracks into the tile. Concrete slabs may require self-leveling underlayment; framed floors may need additional bracing or underlayment systems to control deflection. These quiet corrections rarely make it into social media captions, yet they dictate how your finished tile reads—especially under natural light.
Equally important is planning the “edges” of the tile field: doorways, casework, fireplaces, stair nosings, and exterior thresholds. When you decide where tile starts, stops, and aligns in relation to other architectural elements, the installation becomes integrated rather than ornamental. The result is not merely a tiled surface, but a deliberate architectural layer.
Five Exclusive Insights for Elevated Tile Installations
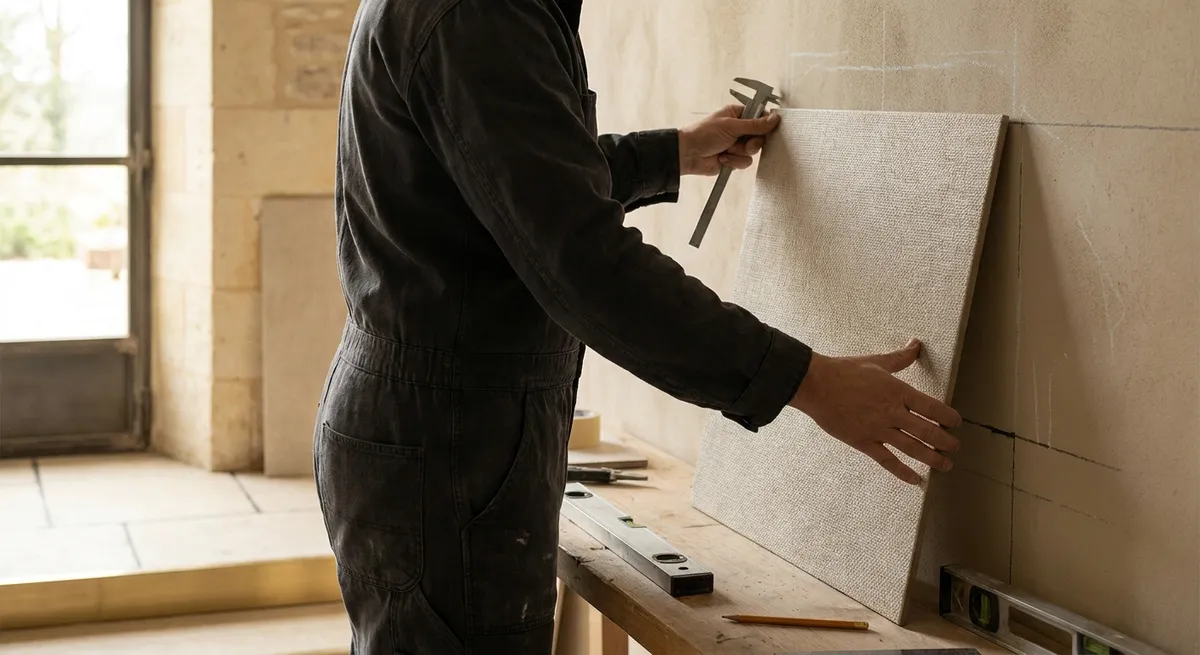
1. Treat the Focal Wall as a Composition, Not a Coverage Area
In premium spaces, feature walls—showers, fireplaces, kitchen backsplashes—are composed like artwork. The objective is not to “cover the wall,” but to stage a visual narrative.
A discerning strategy includes:
- Centering thoughtfully, not mechanically. Instead of automatically centering on the wall, consider centering on the primary viewpoint: the tub, the vanity mirror, the cooking range, or the fireplace opening.
- Protecting whole tiles in key sightlines. Around niches, valves, and fixtures, aim to land full or nearly full tiles rather than tiny slivers that cheapen the effect.
- Planning terminations elegantly. Where tile meets painted wall or plaster, ultra-straight finishing with slim profiles or meticulously caulked edges reads more architectural than casual.
By sketching the layout at full scale—or using a digital layout tool—before work begins, you ensure that grout joints and tile edges feel intentional rather than coincidental.
2. Calibrate Grout Joint Size to Tile, Light, and Distance
Grout joints do more than separate tiles; they orchestrate rhythm, scale, and shadow. Sophisticated installations treat joint size as a design decision, not just a technical one.
Consider these subtleties:
- Tile size and calibration. Large-format or rectified tiles often look best with very tight joints, but only when the manufacturing tolerances allow it. If tiles vary even slightly in size, joints must be widened to avoid misalignment.
- Ambient lighting. In spaces with strong side lighting (large windows, wall washers, linear LEDs), very narrow joints can appear sharper and more seamless, while slightly wider joints can emphasize pattern and grid.
- Viewing distance. In a long corridor, slightly wider joints can create a pleasing sense of cadence; in an intimate powder room, tight joints enhance a monolithic, tailored feel.
Discuss with your installer where you prefer the visual emphasis: on the tiles themselves, on the grid they form, or on the interplay between the two. Then select a joint size that reinforces that choice.
3. Use Grout Color as a Subtle Instrument, Not an Afterthought
Many projects are designed around the tile and then compromised by hurried grout selection. Yet grout color can either elevate an installation or fracture it visually.
A refined approach to grout color:
- Tone-on-tone for serenity. Choosing a grout that closely matches the tile creates a quiet, continuous field—ideal for primary baths, sophisticated kitchens, and any space where calm is the priority.
- Deliberate contrast for structure. A darker grout with light tile can emphasize pattern—beautiful for herringbone, stacked, or specialty formats—but should be chosen only when the layout is precise enough to withstand the emphasis.
- Soft contrast for depth. Slight tonal variance (half-shade lighter or darker) often yields the most luxurious result, adding depth without visual noise.
Ask for sample boards grouted with at least two or three candidates and view them in your actual lighting, both daytime and evening. The grout that looks “invisible” in one light and harmonious in another is usually the right choice.
4. Engineer Slope and Drainage as Invisible Comfort
In refined homes, wet areas are designed not only to work but to feel quietly impeccable. You should not notice where water goes; you should simply never encounter puddles, damp corners, or musty smells.
Essential details include:
- Pre-slope and waterproofing as separate stages. The underlying substrate should be sloped properly before any waterproofing membrane is installed, and the membrane itself should be tied carefully into drains and transitions.
- Drain placement as part of the composition. Linear drains can be aligned with grout joints or tucked near walls to allow large uninterrupted tiles. Point drains can be centered or aligned with plumbing fixtures to reduce awkward cuts.
- Micro-topography near thresholds. The subtle height changes where showers meet bathrooms or where terraces meet interiors should be engineered thoughtfully. A barely perceptible depression or rise can be the difference between a perpetually dry bath mat and one that constantly wicks moisture.
These engineered slopes rarely photograph dramatically, but they define the daily comfort and longevity of your tiled spaces.
5. Coordinate Movement Joints with the Architecture, Not Just the Codes
Movement joints—those deliberate, flexible gaps that allow tile assemblies to expand and contract—are often viewed as a necessary blemish. In refined installations, they are disguised and integrated into the architecture.
Sophisticated handling of movement includes:
- Aligning with existing joints. Where possible, place movement joints exactly over structural control joints in concrete slabs or along framing breaks so they appear as logical continuations rather than random interruptions.
- Hiding in natural breaks. Doorways, transitions between different materials, and changes in plane (floor-to-wall, wall-to-ceiling) are ideal places to absorb movement discreetly.
- Color-matched, flexible sealants. Using high-quality, color-consistent sealants ensures that joints flex structurally but read visually as part of the grout field or trim palette.
This combination of structural integrity and visual discretion distinguishes luxury tile work from purely functional installations.
Orchestrating Transitions: Where Tile Meets the Rest of the Room
Some of the most telling details in a home occur where materials change. Tile that ends abruptly or meets other finishes without intentional mediation undermines even the finest product selections. Thoughtful transitions, by contrast, express continuity and care.
Refined projects plan thresholds as design moments. A floor that moves from wood to stone might use a single, custom-cut stone or metal strip rather than a bulky off-the-shelf reducer. Where tile meets minimalist baseboards, the baseboard thickness, reveal, and paint sheen should be considered in relation to the tile’s edge and grout tone. In contemporary interiors, flush transitions—where tile sits perfectly level with adjacent floors—signal architectural rigor but demand precise coordination of substrate and finish thicknesses.
Vertical transitions matter just as much. Where a kitchen backsplash meets upper cabinets or open shelving, the final tile row should be composed to avoid thin slivers and awkward cuts behind brackets. In showers, the intersection between tiled walls and ceilings can be either a crisp, sharp line or a gentle reveal, depending on the architectural language of the home.
When these seams are considered early, the tile no longer appears as a decorative layer, but as an integral part of the building’s architecture.
Partnering with Your Installer Like a Design Collaborator
Even the most thoughtful design can be diminished if the installation is treated as purely technical. Discerning homeowners approach their tile contractor as a specialist collaborator—someone who brings practical insights that can refine the overall concept.
Before work begins, review:
- Layout drawings and reference lines. Confirm where full tiles will land, how patterns will turn corners, and which sightlines are most critical.
- Sample mockups. Ask for a small on-site mockup of the selected grout, joint size, and pattern. Minor adjustments at this stage can make a major visual difference.
- Tolerance expectations. Perfectly straight homes are rare; discuss where minor deviations might occur and how they will be disguised, such as shifting layout slightly to keep visible lines pristine.
This collaborative, detail-driven approach ensures that the craftsmanship aligns with the level of investment—and that the completed tile feels tailored specifically to your home, not merely installed within it.
Conclusion
Exceptional tile installations rarely call attention to themselves in a single dramatic gesture. Their luxury is cumulative and quiet: the way grout vanishes into the tile, how thresholds feel smooth underfoot, how a shower wall reads as a singular, coherent composition. When you approach tile as architectural tailoring—designed, engineered, and executed with meticulous discretion—the result is not just a finished room, but a space that feels considered at every scale.
The five insights above—composed focal walls, calibrated joints, strategic grout color, invisible drainage, and integrated movement joints—are the levers that turn good tile into enduring architectural refinement. Invest in these subtleties, and your tiled spaces will reward you with a level of calm, clarity, and longevity that feels quietly, unmistakably premium.
Sources
- [Tile Council of North America (TCNA) Handbook](https://www.tcnatile.com/honors-and-awards/publications.html) - Industry reference for tile installation standards, including substrate preparation, movement joints, and wet-area detailing
- [American National Standards Institute (ANSI) A108/A118/A136.1](https://webstore.ansi.org/standards/tca/ansia108a118a1362011) - Technical standards that guide professional tile installation practices and material performance
- [Schluter Systems – Waterproofing Shower Assemblies](https://www.schluter.com/schluter-us/en_US/faq/waterproof-shower-assemblies) - Detailed guidance on shower slopes, waterproofing, and drain integration for long-lasting installations
- [Custom Building Products – Surface Preparation Guidelines](https://www.custombuildingproducts.com/how-to/technical-resources/surface-preparation.aspx) - Practical recommendations for preparing substrates to achieve flat, durable tile installations
- [International Code Council – Building Codes](https://codes.iccsafe.org/) - Authoritative source for structural and moisture-related code requirements that impact tile, movement joints, and wet-area construction