In a world where every renovation can be documented, dissected, and shared in seconds, the standard for visible craftsmanship has quietly risen. Tile is front and center in that conversation. A chipped edge around a niche, a crooked patch of floor, or a clumsy caulk line doesn’t just register as “good enough” anymore—it reads as careless. Inspired by the current fascination with “Not My Job” disasters, this guide explores how to approach tile repairs with the opposite mindset: meticulous, intentional, and unapologetically premium.
Below are five exclusive insights to help your tile repairs look as if they were always part of a carefully designed whole—worthy of close-ups, not call-outs.
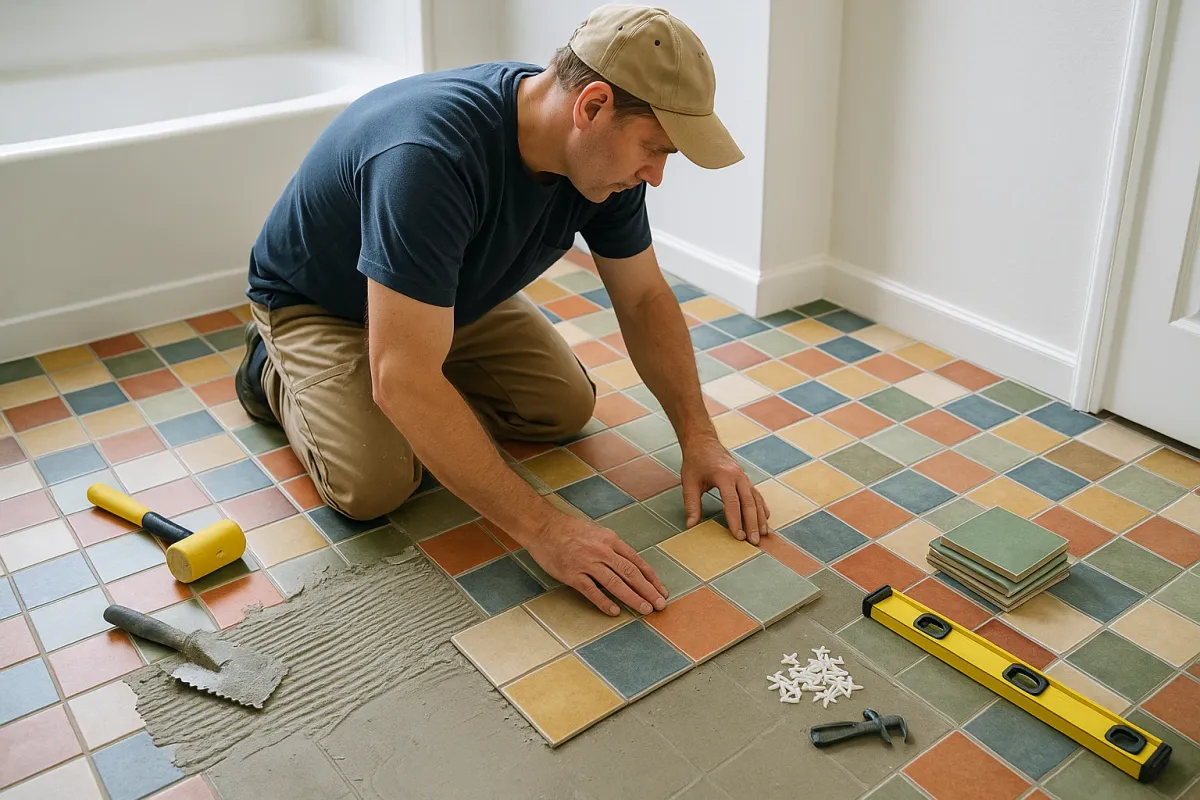
1. Treat Every Patch as a “Micro-Room,” Not a Spot Fix
What the “Not My Job” photos reveal over and over again is a mindset problem: workers interact only with the exact square inch they’re touching, ignoring how it relates to the space as a whole. Tile repairs done this way are instantly noticeable—and not in a good way.
Instead, treat any repair area as its own “micro-room.” Before lifting a trowel, step back and study:
- Pattern continuity: Where do grout joints lead the eye? Does your repair bisect a pattern or respect it? For running-bond or herringbone layouts, plan cuts so the original rhythm carries straight through the repaired section.
- Field vs. feature: Is this tile part of a main field, a border, or an accent strip? A beautifully repaired floor can still look wrong if the border line suddenly jogs or dies into nothing.
- Transition lines: Pay attention to doorway thresholds, edge trims, and transitions to wood or carpet. A patch that ignores these lines feels visually “off” even if it’s technically watertight.
A sophisticated repair begins with a macro view. Only once the larger geometry is understood should you zoom in to the square foot that needs attention. The goal is simple: after the repair, the eye continues to glide across the space, instead of stopping at an awkward interruption.
2. Color Matching Is Not Just Tile—It’s Grout, Aging, and Light
On social media, the most glaring “Not My Job” moments often come down to bad color judgment—a fresh patch that screams against an older surface. With tile, the usual culprit is grout, not the tile itself.
Premium-looking repairs demand a more nuanced approach to color:
- Account for aging: Existing grout has lived a life—steam, cleaning agents, micro-abrasion. If you simply buy the “same color” from the original brand, your new grout will likely be too bright or too cool. Bring a broken piece or take high-resolution photos in natural light and compare in person.
- Adjust for lighting: Warm LEDs can make beige grout read cream; cool daylight can pull out gray undertones. View your color samples in your space at different times of day before committing.
- Use test joints: On a scrap board or a hidden area, float a small joint with your proposed grout, then seal it and let it cure completely. Grout always dries lighter, and sealer alters the final sheen and tone.
- Mind the tile surface: Polished marble, honed limestone, high-gloss porcelain, and textured ceramics all reflect light differently onto the grout. A grout that looks perfect on a sample card may subtly clash once surrounded by a particular tile finish.
The difference between an adequate repair and an invisible one is rarely the trowel work; it’s the obsessive attention to how color behaves over time and in real light.
3. Restore Substrate Integrity First, Beauty Second
A recurring theme in “Not My Job” images is superficial problem-solving—covering issues instead of correcting them. In tile work, that translates into re-tiling over compromised substrates: loose backer board, water-damaged drywall, or spongy subfloors.
High-caliber repairs begin where the camera never sees:
- Check for movement: Before replacing any cracked or loose tiles, gently stand and shift your weight over the area. A subtle “bounce” or crunching sound means your subfloor or underlayment has failed. New tile on a moving base is an expensive bandage.
- Assess moisture realistically: In showers or around tubs, remove more tile than you think you need. Water travels. If backer board crumbles at a touch or shows darkened, swollen sections, replace it back to solid, clean material.
- Re-create the original assembly: If the original build included a decoupling membrane, waterproofing layer, or foam shower tray, your repair should honor that system. Mixing methods within the same wet area can create hidden weak points the next owner—or inspector—won’t find until there’s major damage.
- Upgrade quietly where it counts: When walls are opened, consider stealth upgrades such as modern waterproofing membranes or better fasteners, even if you replicate the exact same visible tile. This is the difference between “repaired” and “future-proofed.”
Luxury in tile repair isn’t just about what’s seen—it’s the calm confidence that comes from knowing your surface is as strong and stable as it is beautiful.
4. Refine Edges, Not Just Fields: The Art of Transitions
What makes many online repair fails so jarring is not the central area, but the edges—where old meets new. In tile work, this is where true craftsmanship either shines or unravels.
Focus on transitions with the same care you give to layout:
- Respect existing trims: If your original installation uses metal profiles, stone thresholds, or bullnose trim, your repair should either match them exactly or be intentionally re-designed—not abruptly terminated with a raw cut.
- Under-door thresholds as design moments: When repairing tile around doors, align grout joints so that, with the door closed, the line of sight feels clean from both rooms. A precision-cut threshold piece can make two different floors feel intentionally related rather than improvised.
- Silicone where the building moves: Change-of-plane joints (floor-to-wall, wall-to-wall corners, around tubs) should not be grouted. Premium repairs use color-matched silicone in these locations, resulting in lines that look crisp but flex with the building instead of cracking.
- Blend lippage, don’t highlight it: Where new tiles meet old ones, micro-adjustments in thinset can ensure a smooth fingertip transition, not a new ridge that catches bare feet and sunlight.
The casual eye may never name what’s “right” about a well-handled transition, but it will immediately feel when something is wrong. Invisible excellence at the edges is what separates repair from refinement.
5. Document the Repair Like a Boutique Studio Would
As “Not My Job” posts go viral, the story is being told by frustrated observers, not by the people who did the work. Reputable firms counter this by elevating documentation as part of the service: progress photos, notes, and clear before-and-afters.
Homeowners can borrow that mindset, even on small projects:
- Photograph layers: Capture images of the substrate, waterproofing, and tile setting before they’re covered. These become your future insurance should you sell, renovate again, or troubleshoot a hidden issue.
- Note materials and batch numbers: Keep a simple record of thinset types, grout color codes, and tile batches. Future repairs become far easier—and far more accurate—when you’re not guessing.
- Request alignment shots: Ask your installer to share photos taken straight down lines of grout, along transitions, and across repaired sections. This level of scrutiny encourages precision and gives you visual proof of the quality you’ve paid for.
- Share selectively—and thoughtfully: If you’re proud of the result, these images become powerful social media content in their own right: not as spectacle, but as a quiet showcase of what careful, professional repair work can look like.
In an era where shoddy work can be publicly shamed in a single upload, a thoroughly documented, beautifully executed tile repair is more than peace of mind—it’s a statement about your standard.
Conclusion
The current fascination with “Not My Job” disasters has done something unexpected: it has educated the public’s eye. People recognize careless work faster than ever—and they broadcast it widely. Tile, with its precise lines and unforgiving geometry, is particularly vulnerable to that kind of scrutiny.
By treating every repair as a micro-room, mastering subtle color and light, rebuilding what lies beneath, perfecting transitions, and documenting the process with intention, you move your home firmly to the opposite end of that spectrum. The result is not just a fix, but a restoration of coherence and quiet luxury—tile work that withstands close inspection, candid photos, and the passing of trends with equal grace.