This guide explores sophisticated repair solutions for homeowners who demand more than a quick patch—those who expect any intervention to preserve, and often elevate, the original intent of the space. Along the way, you’ll find five exclusive insights that professionals use to keep tile work looking impeccable long after installation day.
Reading the Room: Diagnosing Before You Touch a Tile
Refined repair starts with restraint. Before chisels, blades, or adhesives ever come near the surface, a quiet diagnostic process should unfold. What looks like a cracked tile might actually be evidence of substrate movement; discolored grout might point to moisture migration rather than simple wear. An experienced eye treats the room as a system, not a collection of isolated tiles.
Begin with sound: a knuckle or rubber mallet tapped lightly across the surface reveals hollow spots—often indicating poor adhesion, voids in thinset, or failure of a decoupling membrane. Next, observe the edges: are baseboards separating from tiled floors, or are wall tiles showing stress lines near corners and transitions? These details often reveal whether the underlying issue is structural, moisture-related, or localized.
Moisture meters, thermal cameras, and even a simple straightedge become essential instruments in this diagnostic ritual. Rather than immediately replacing a cracked or loose tile, the premium approach is to ask: “Why did this fail here, and why now?” Responding to that question determines whether you are merely repairing a symptom—or resolving the cause.
Exclusive Insight #1: The most successful tile repairs begin with a full “forensic walkthrough” of the space. Skilled professionals will often spend more time diagnosing than repairing, ensuring that each intervention is both minimal and genuinely lasting.
Substrate First: The Invisible Foundation of Flawless Repairs
Any tile repair that ignores the substrate is, at best, cosmetic. The quiet luxury of a perfectly aligned tile field depends on the plane and integrity of what lies beneath—cement board, mortar bed, self-leveling compound, or uncoupling membrane. When tiles fail, it is frequently this unseen layer that has betrayed the surface.
If a tile has cracked in isolation, remove it carefully and inspect the bed beneath. Crumbling thinset, inadequate coverage, or gaps in the mortar bed often signal improper installation. In bathrooms, powder rooms, and near exterior doors, check for subfloor movement or moisture compromise. Slight deflection in wood substrates can be enough to fracture large-format tiles or cause recurring grout cracks.
Premium repair solutions favor upgrading the substrate locally rather than simply “re-gluing” a replacement tile. This may involve patching and re-leveling small sections with high-performance mortar, reinforcing plywood subfloors from beneath where accessible, or introducing a modern decoupling membrane in targeted areas during partial demolition. The objective is to blend contemporary performance expectations into an existing installation with surgical precision.
Exclusive Insight #2: In a luxury setting, it is often preferable to slightly enlarge the repair area to correct the substrate properly, rather than executing a tight but superficial fix that will fail again under the same stresses.
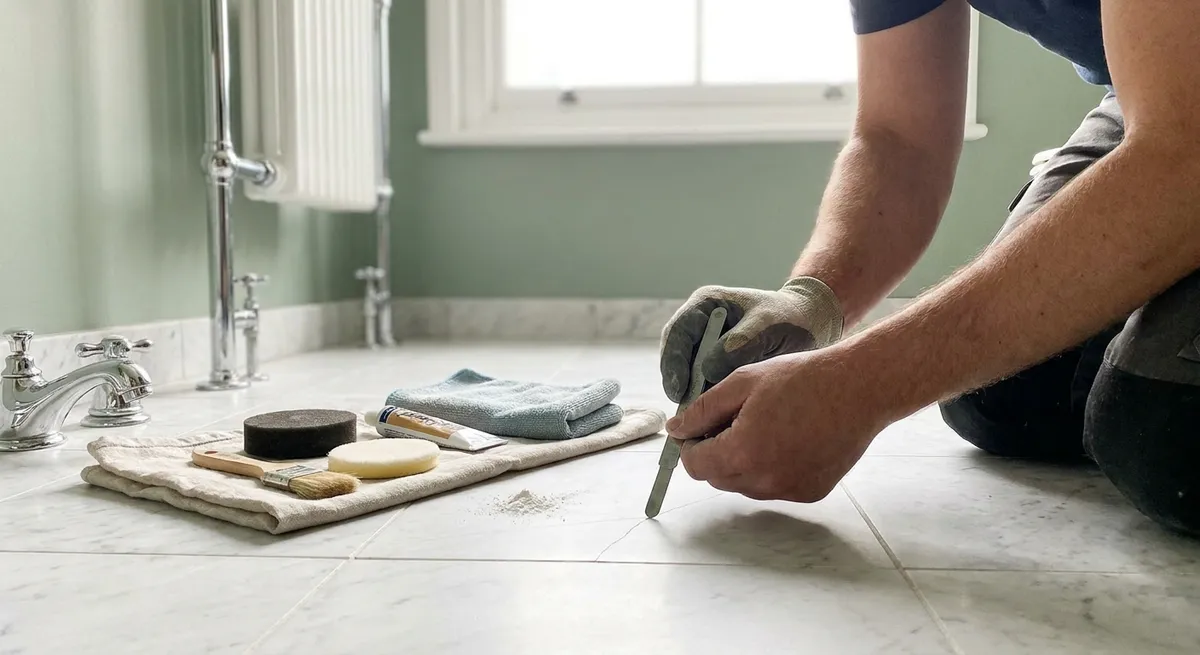
Grout as Couture: Precision Repairs for Joints and Lines
Grout is the tailoring of a tiled surface—its fit and finish determine whether the installation looks bespoke or merely assembled. Over time, joints may discolor, crack, or lose texture, particularly in high-traffic zones and wet areas. Effective grout repair demands a more nuanced approach than simply “re-grouting.”
The first decision is material: cementitious, epoxy, or high-performance hybrid. If the original grout type is unknown, a professional may test water absorption, texture, and hardness to match it. For hairline cracks or isolated weaknesses, a meticulously executed joint removal—often with oscillating multi-tools and vacuum-assisted dust extraction—allows for a controlled refresh without scarring adjacent tiles.
Color is where sophistication is most evident. A half-shade mismatch can cheapen even the most luxurious tile. Premium repair work often employs sample boards, test joints in inconspicuous locations, or manufacturer color charts in natural and artificial light before committing. In some cases, a penetrating grout colorant is used to “reset” an entire field subtly, blending repairs into a recalibrated, uniform tone.
Exclusive Insight #3: High-end grout repairs rarely address only the visibly damaged joint. Instead, they often extend into natural visual breaks—doorways, thresholds, or layout shifts—ensuring the eye reads the surface as continuous rather than patched.
Preserving Pattern and Patina: Working with Discontinued or Rare Tile
In a home where tile has been carefully curated—handmade zellige, honed limestone, large-format porcelain slabs—the challenge often isn’t how to repair, but how to do so when the original material is no longer available. This is where a repair becomes a design act rather than a purely technical one.
The first step is inventory: identifying any leftover tiles from the original installation, usually housed in forgotten boxes in storage or mechanical rooms. These become invaluable, not only for replacements but as a source of sacrificial pieces for color and finish comparison. When no spares exist, a thoughtful repair strategy might involve selectively “harvesting” tiles from discreet areas (inside closet floors, behind removable cabinetry toe-kicks, or under appliances) and relocating them to more visible locations.
For natural stone and artisanal tiles, subtle variation is part of the charm—and also the challenge. Honing, polishing, edge-beveling, and sealing can be adjusted on-site to coax a near-perfect match from similar but not identical replacements. In more contemporary settings, a deliberate design pivot—introducing a small inset, border, or threshold accent in a related material—may allow the repair to read as a considered upgrade rather than a forced compromise.
Exclusive Insight #4: In high-value interiors, the most successful repairs sometimes involve redesigning a small zone—using carefully chosen contrasting or complementary tile—to avoid the visual dissonance of an imperfect match. The revision feels intentional, not apologetic.
Movement, Moisture, and Micro-Details: Ensuring Repairs Age Gracefully
A refined tile repair is judged not on the day it is completed, but in how it behaves over seasons of use, humidity shifts, and temperature changes. Two recurring adversaries—movement and moisture—must be addressed explicitly if the repair is to age as gracefully as the surrounding home.
Movement joints, often underappreciated in original installations, become vital in repair work. Where large expanses of tile meet walls, structural transitions, or heated floors, replacing rigid grout with a color-matched flexible sealant can prevent future cracking and tenting. Similarly, reinforcing vulnerable transitions—such as between tile and hardwood—with premium metal or stone profiles protects edges while delivering a precise, tailored look.
Moisture control, especially in showers, steam rooms, and near exterior thresholds, demands a layered strategy. Any repair in these zones should confirm the presence and integrity of waterproofing systems—whether sheet membranes, liquid-applied barriers, or foam backer boards. If these are absent or compromised, a strategic partial rebuild may be the most dignified solution, even if it means opening more of the surface than initially planned.
Exclusive Insight #5: Elite tile specialists treat every repair as an opportunity to retroactively introduce missing best practices—movement accommodation, waterproofing, edge protection—quietly upgrading the system beneath the visible tile so that this repair becomes the last one needed in that area.
Conclusion
In the most carefully considered homes, tile is not merely a surface; it is a statement of longevity, intention, and craft. When damage appears—subtle or severe—the response should be as curated as the original design. By prioritizing diagnosis over speed, substrate over cosmetics, and detail over convenience, homeowners can ensure that repairs do more than conceal flaws.
The true mark of a premium repair is that it disappears into the narrative of the room, reinforcing its quiet order rather than disrupting it. When executed with precision and foresight, tile repair is not a compromise—it is maintenance as an art form.
Sources
- [The Tile Council of North America (TCNA) Handbook](https://www.tcnatile.com/products-and-services/publications/handbook.html) - Industry reference for installation and substrate standards that underpin durable tile repairs
- [Schluter Systems – Movement Joints and Uncoupling Membranes](https://www.schluter.com/schluter-us/en_US/solutions/movement-joints) - Technical guidance on managing movement and preventing tile and grout cracking
- [LATICRETE – Grout & Joint Design Resources](https://laticrete.com/en/support-and-downloads/technical-resources-and-literature) - Information on grout selection, performance characteristics, and repair considerations
- [U.S. Environmental Protection Agency – Moisture Control Guidance](https://www.epa.gov/mold/moisture-control-guidance-building-design-construction-and-maintenance) - Explains how moisture impacts building materials, including tile assemblies, and informs repair strategy in wet areas
- [University of Florida IFAS Extension – Tile Installation Over Wood Subfloors](https://edis.ifas.ufl.edu/publication/FR402) - Discusses substrate movement and deflection, critical to understanding recurring tile and grout failures